Imagine harvesting fresh, gourmet oyster mushrooms right from your kitchen counter or garden shed! Growing your own oyster mushrooms at home is a surprisingly simple and incredibly rewarding endeavor. Not only do you get to enjoy the freshest mushrooms possible, but it’s also a fun and educational project for gardeners of all levels. Say goodbye to store-bought and hello to a continuous supply of earthy, tender oyster mushrooms!
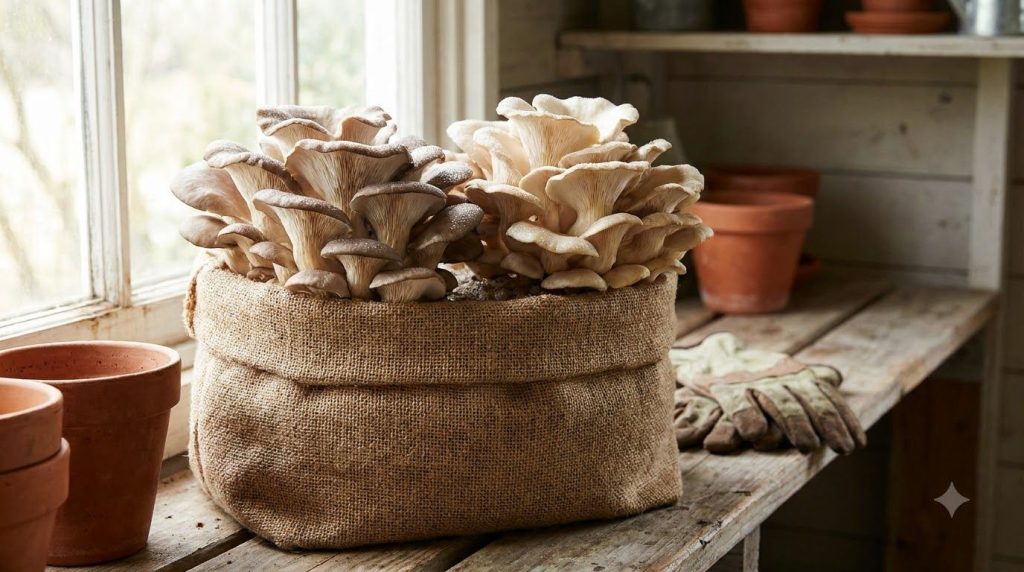 Fresh oyster mushrooms are surprisingly easy to cultivate right in your own home.
Why Grow Oyster Mushrooms?
Oyster mushrooms (Pleurotus ostreatus) are a fantastic choice for home cultivation for several reasons:
- Fast Growth: They grow quickly, often producing a harvest within a few weeks of inoculation.
- Easy to Grow: They are forgiving and adaptable, making them ideal for beginners.
- Delicious and Versatile: Their delicate flavor and tender texture make them perfect for stir-fries, soups, pastas, and more.
- Nutritious: They’re packed with vitamins, minerals, and antioxidants.
- Sustainable Hobby: You can often use recycled materials as substrate, making it an eco-friendly practice.
What You’ll Need to Get Started
Gathering your supplies is the first step. Most items are readily available online or at gardening stores.
- Oyster Mushroom Spawn: This is essentially the “seed” for your mushrooms. Grain spawn is a popular choice for beginners.
- Substrate: This is what the mushrooms will grow on. Common options include straw (pasteurized), hardwood sawdust (sterilized), spent coffee grounds (sterilized), or even cardboard. For beginners, a pre-sterilized substrate kit is a great starting point.
- Grow Bags or Containers: Specialized mushroom grow bags with filter patches are ideal. You can also use large, clear plastic bags or even five-gallon buckets with drilled holes.
- Spray Bottle: For misting to maintain humidity.
- Clean Workspace: Sterilization is key to preventing contamination.
- Optional: Pressure cooker (for sterilizing your own substrate), thermometer, hygrometer (to measure humidity).
Step-by-Step Guide to Growing Oyster Mushrooms
1. Preparing Your Substrate (If Not Using a Kit)
If you’re using loose substrate like straw or sawdust, it needs to be pasteurized or sterilized to eliminate competing molds and bacteria. Pasteurization (heating to 140-160°F or 60-70°C for an hour) is sufficient for straw. Sterilization (using a pressure cooker) is recommended for sawdust and coffee grounds.
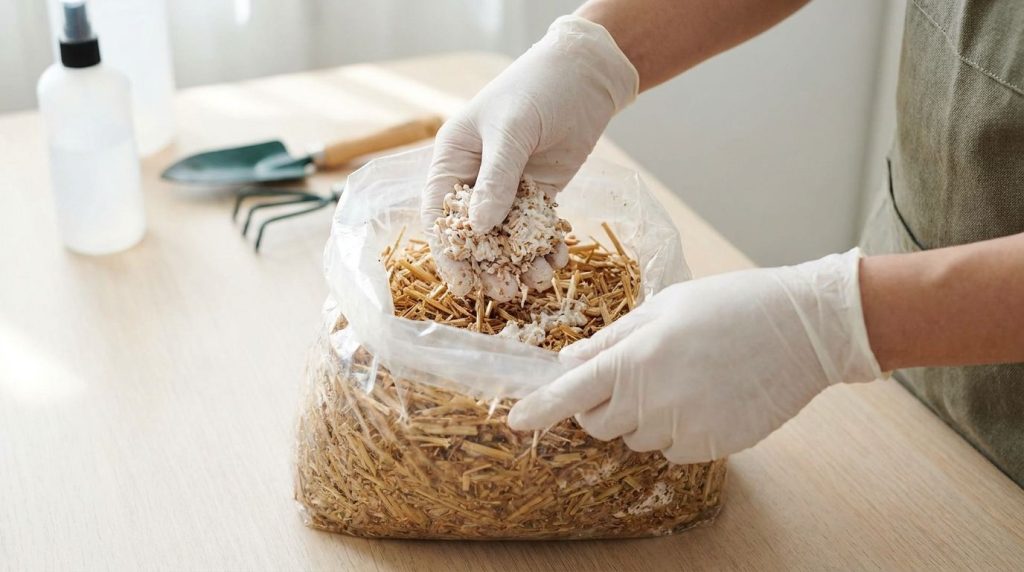 Mixing the spawn into your chosen substrate is a critical step.
2. Inoculation: Introducing the Spawn
Once your substrate is cool (if heat-treated) and ready, it’s time to introduce the mushroom spawn. This should be done in a clean environment to minimize contamination.
- Wash Your Hands: Thoroughly wash your hands and sterilize your workspace.
- Break Up Spawn: Gently break apart the grain spawn in its bag to separate the individual grains.
- Layering Method: For grow bags, alternate layers of substrate and spawn. Use about 10-20% spawn by weight of your substrate.
- Mix Thoroughly: Ensure the spawn is evenly distributed throughout the substrate.
- Seal the Bag: Seal your grow bag, leaving the filter patch open (if applicable) or making small holes for gas exchange.
3. Incubation: The Mycelium Takes Over
Now, the mycelium (the root-like fungal network) needs time to colonize the substrate.
- Dark, Warm Place: Place your inoculated bags in a dark place with a stable temperature, ideally between 65-75°F (18-24°C).
- Patience is Key: Over the next 1-3 weeks, you’ll see white, cotton-like growth spreading through the substrate. This is the mycelium.
- Check for Contamination: Look out for green (Trichoderma mold), black, or unusual colors, which indicate contamination. If this happens, it’s best to discard the contaminated bag to prevent spreading.
4. Fruiting Conditions: Time for Mushrooms!
Once the substrate is fully colonized (entirely white), it’s time to trigger fruiting.
- Provide Fresh Air: Cut small slits or X-shaped openings (about 1-2 inches) in the sides of your grow bag where you want mushrooms to emerge.
- Increase Humidity: Oyster mushrooms love high humidity (85-95%). Mist the cut areas several times a day with a spray bottle filled with clean water. You can also create a humidity tent with a larger plastic bag placed over your grow bag, ensuring there’s still airflow.
- Light Exposure: While they don’t need direct sunlight, they do require some indirect light (similar to reading light) for about 8-12 hours a day to orient their growth. A window with indirect light or a grow light works well.
- Cooler Temperature: A slightly cooler temperature, around 60-70°F (15-21°C), can encourage fruiting.
5. Harvesting Your Bounty
In about 5-10 days after introducing fruiting conditions, you should see tiny mushroom “pins” forming, which will rapidly grow into full-sized clusters.
- When to Harvest: Harvest when the edges of the caps start to flatten out or curl slightly upwards, but before they release too many spores (which can look like white dust).
- How to Harvest: Gently twist and pull entire clusters off the substrate. Avoid cutting individual mushrooms, as this can leave stubs that might rot.
6. Second Flushes and Beyond
After your first harvest, you can often get several more “flushes” or rounds of mushrooms from the same substrate. To encourage a second flush:
- Soak the Block: Submerge the mushroom block in cold water for 4-6 hours (some even suggest overnight) to rehydrate it.
- Return to Fruiting Conditions: Place it back under high humidity, fresh air, and indirect light.
- Repeat: You might get 2-4 flushes, with each subsequent flush typically yielding slightly less than the previous one.
Troubleshooting Common Issues
- No Pins Forming: This often means insufficient humidity, fresh air, or incorrect temperature. Review your fruiting conditions.
- Mushrooms are Leggy/Stunted: Too much CO2 and not enough fresh air exchange. Increase ventilation.
- Contamination: Green, black, or other colored molds. Usually, a result of insufficient sterilization of the substrate or unclean inoculation. Prevention is key!
Tips for Success
- Cleanliness is Paramount: Always work in a sterile environment and wash your hands thoroughly.
- Monitor Conditions: Consistency in humidity, temperature, and fresh air exchange is crucial.
- Don’t Over-Mist: While humidity is important, avoid constantly soaking the mushroom caps, which can lead to bacterial blotch. Mist the air around them.
- Experiment: Don’t be afraid to try different substrates or techniques as you gain experience.
Growing oyster mushrooms at home is a rewarding journey that connects you more deeply with your food. With these easy steps, you’ll be enjoying your homegrown, delicious oyster mushrooms in no time. Happy growing!