Hey beauty besties! Are you ready to dive into the wonderful world of natural skincare? Today, we’re unlocking the secret power of a spice you probably have in your pantry: cloves! These little wonders aren’t just for adding flavor to your favorite dishes; they’re packed with benefits that can transform your skin. We’re talking about making your very own homemade clove beauty oil, designed to give you that smooth, radiant glow you’ve been dreaming of.
The Magical Benefits of Cloves for Your Skin
Cloves are more than just a fragrant spice; they’re a powerhouse of natural goodness, especially for your skin. Here’s why we love them:
- Antioxidant Boost: Cloves are rich in antioxidants, which help fight off free radicals that can damage skin cells and lead to premature aging. Think of it as a protective shield for your skin!
- Anti-Inflammatory Properties: If you struggle with redness, irritation, or minor breakouts, the anti-inflammatory compounds in cloves can help calm and soothe your skin.
- Antiseptic Qualities: They possess natural antiseptic properties, which can be beneficial in keeping skin clean and clear, helping to prevent blemishes.
- Skin Smoothing: Regular use can help improve skin texture, making it feel softer and appear smoother.
DIY Clove Beauty Oil: Your Secret to Smooth Skin
Ready to create your own potent beauty elixir? Making clove beauty oil at home is surprisingly simple and incredibly rewarding. Plus, you know exactly what’s going into it!
What You’ll Need (Ingredients & Tools)
- Dried Whole Cloves: About 1/4 cup. The fresher, the better for maximum potency!
- Carrier Oil: 1 cup of a nourishing oil like sweet almond oil, jojoba oil, or extra virgin olive oil. Choose one that suits your skin type.
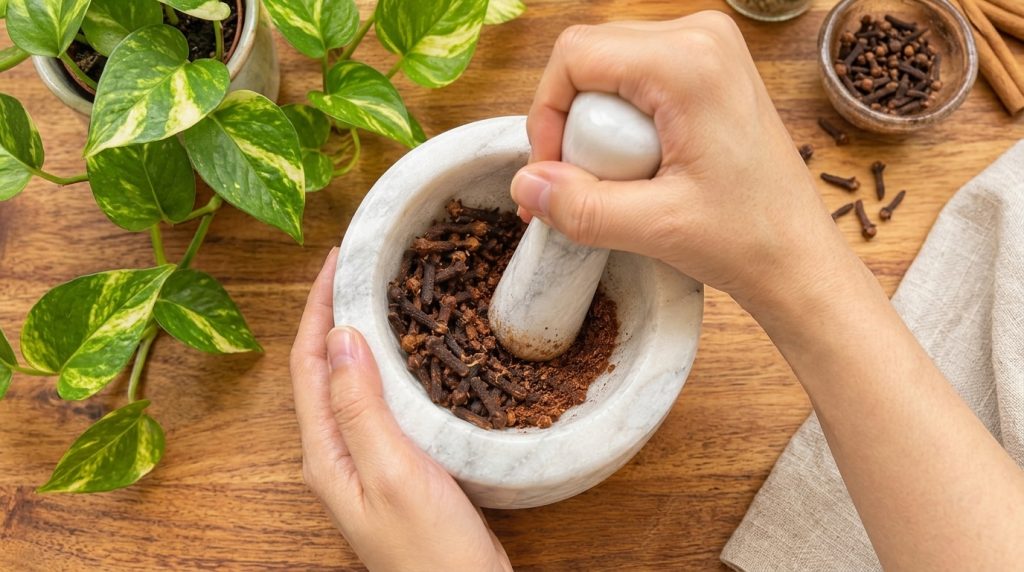
- Mortar and Pestle: For grinding your cloves and releasing their natural oils.
- Small Glass Jar with Lid: For infusing the oil.
- Fine Mesh Strainer or Cheesecloth: For straining the oil.
Step-by-Step Guide to Making Your Clove Oil
- Grind Your Cloves: Place the whole dried cloves into your mortar and pestle. Grind them into a coarse powder. You want to break them up enough to release their aroma and oils, but they don’t need to be super fine. This step is crucial for activating their benefits!
- Combine & Infuse: Transfer your ground cloves to the clean glass jar. Pour your chosen carrier oil over the cloves, ensuring they are fully submerged.
- Shake It Up: Secure the lid tightly and give the jar a good shake.
- Let It Steep: Place the jar in a cool, dark place for about 1-2 weeks. Give it a gentle shake every day or two. This allows the beneficial compounds from the cloves to infuse into the carrier oil.
- Strain the Oil: After the infusion period, strain the oil through a fine mesh strainer or cheesecloth into a clean bottle or jar. Make sure to squeeze out all the oil from the cloves.
- Store & Enjoy: Your homemade clove beauty oil is ready! Store it in a cool, dark place.
How to Use Your Homemade Clove Beauty Oil
Incorporating this potent oil into your routine is easy:
- Patch Test First: Always do a patch test on a small area of your skin (like behind your ear or on your inner arm) to ensure you don’t have any sensitivities. Cloves are powerful, so it’s always best to be safe!
- Nighttime Treatment: After cleansing and toning your face, take a few drops of the clove oil onto your fingertips. Gently massage it into your skin using upward, circular motions. Focus on areas where you want extra smoothness or a healthy glow.
- Body Oil: Don’t limit it to your face! You can also use this oil on your body, especially on dry patches or areas that could benefit from extra smoothness.
- Frequency: Start by using it 2-3 times a week and adjust as your skin tolerates it.
Why Freshly Ground Cloves Make All the Difference
While you can buy clove essential oil, making your own infused oil from freshly ground cloves has unique advantages. Grinding them yourself ensures you’re getting the freshest, most potent compounds directly from the spice. The aroma, the natural oils, and the anti-inflammatory benefits are at their peak, giving your skin the very best nature has to offer. Plus, it’s incredibly satisfying to create your own beauty remedies from scratch!
Important Tips for Your Clove Oil Journey
- Sourcing Cloves: Look for whole, dried cloves that are aromatic and appear fresh.
- Storage: Keep your homemade clove oil in a dark, airtight glass bottle to protect it from light and air, which can degrade its potency.
- Shelf Life: Your infused oil should last as long as the carrier oil you used (usually 6-12 months), but always check for changes in smell or appearance.
- Listen to Your Skin: Everyone’s skin is different. If you notice any irritation, discontinue use.
Embrace the power of nature and give your skin the gift of smooth, radiant health with this DIY clove beauty oil. It’s a simple, affordable, and effective way to elevate your skincare routine, just like a true beauty bestie would share! Happy infusing!