Craving a sweet, airy, and wonderfully crunchy treat? Look no further than this delightful homemade honeycomb candy recipe! Also known as cinder toffee or sponge candy, this classic confection is surprisingly simple to make in your own kitchen with just a few basic ingredients.
This golden, brittle candy is famous for its unique texture: light and crisp, with countless tiny air bubbles that practically melt in your mouth. The process involves creating a hot sugar syrup and then, at just the right moment, stirring in baking soda. This magical ingredient reacts with the heat and acid (from the syrup, or sometimes added vinegar) to create a spectacular foam that quickly sets into the iconic bubbly structure. It’s a fun kitchen experiment that yields incredibly delicious results.
Perfect for an afternoon treat, a charming homemade gift, or even as a unique topping for ice cream and desserts, homemade honeycomb candy offers a satisfying crunch and a rich, caramelized flavor. Get ready to impress your friends and family with this sweet, golden delight!
Why You’ll Love This Homemade Honeycomb Candy Recipe
- Surprisingly Simple: Despite its impressive appearance, this candy requires minimal ingredients and straightforward steps.
- Unique Texture: The airy, brittle crunch is unlike any other sweet treat.
- Customizable: Perfect on its own, or easily adapted with chocolate coatings or flavorings.
- Great for Gifting: Homemade honeycomb makes a thoughtful and delicious present for friends and family.
- Fun to Make: Watching the sugar mixture bubble up is a truly exciting part of the process!
- Satisfies Sweet Cravings: It’s an irresistible treat for anyone with a sweet tooth.
Ingredients
Here’s what you’ll need to create this amazing honeycomb candy:
- 1 cup (200 g) granulated sugar
- ¼ cup (60 ml) water
- ¼ cup (85 g) liquid glucose or light corn syrup
- 1 teaspoon (5 g) baking soda (bicarbonate of soda)
- ½ teaspoon vanilla extract (optional, but recommended for extra flavor)
Ingredient Notes
- Granulated Sugar: Standard white sugar works best here. Don’t use brown sugar, as it changes the flavor and texture.
- Liquid Glucose or Light Corn Syrup: This is crucial for preventing the sugar from crystallizing, ensuring a smooth, glassy candy. Do not skip this!
- Baking Soda: This is the star ingredient that creates all the fizz and aeration. Make sure it’s fresh and active for the best rise.
- Vanilla Extract: Adds a lovely depth of flavor that complements the caramelized sugar. Add it with the baking soda.
Equipment You’ll Need
- Heavy-bottomed saucepan (at least 3-quart/2.8-liter capacity, to accommodate the rise)
- Candy thermometer (highly recommended for accuracy)
- 9×13 inch (23×33 cm) baking sheet or square pan
- Parchment paper or silicone baking mat
- Heat-resistant spatula or wooden spoon
- Large bowl (for an ice bath, if using)
How to Make Homemade Honeycomb Candy
Follow these steps carefully for perfect, airy honeycomb every time:
-
Prepare Your Pan
Line a 9×13 inch (23×33 cm) baking sheet or square pan with parchment paper or a silicone baking mat. Lightly grease the parchment paper with a little oil. Set aside. Have your baking soda (and vanilla, if using) measured out and ready to go, as you’ll need to work quickly.
-
Combine Sugar Mixture
In a heavy-bottomed saucepan, combine the granulated sugar, water, and liquid glucose (or corn syrup). Stir gently over medium heat until the sugar has completely dissolved. Avoid stirring once the sugar has dissolved to prevent crystallization.
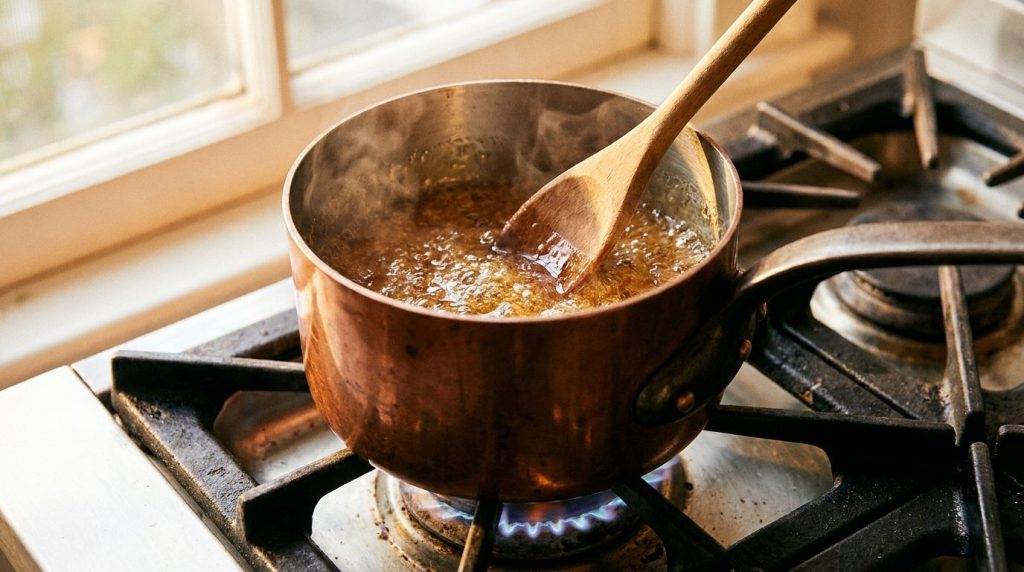
Gently stir the sugar mixture until fully dissolved. -
Boil to Hard Crack Stage
Insert a candy thermometer into the sugar mixture, making sure it doesn’t touch the bottom of the pan. Increase the heat to medium-high and bring the syrup to a boil. Boil without stirring until the mixture reaches 300°F (150°C), also known as the hard crack stage. This usually takes about 10-15 minutes. The syrup will turn a lovely golden amber color.
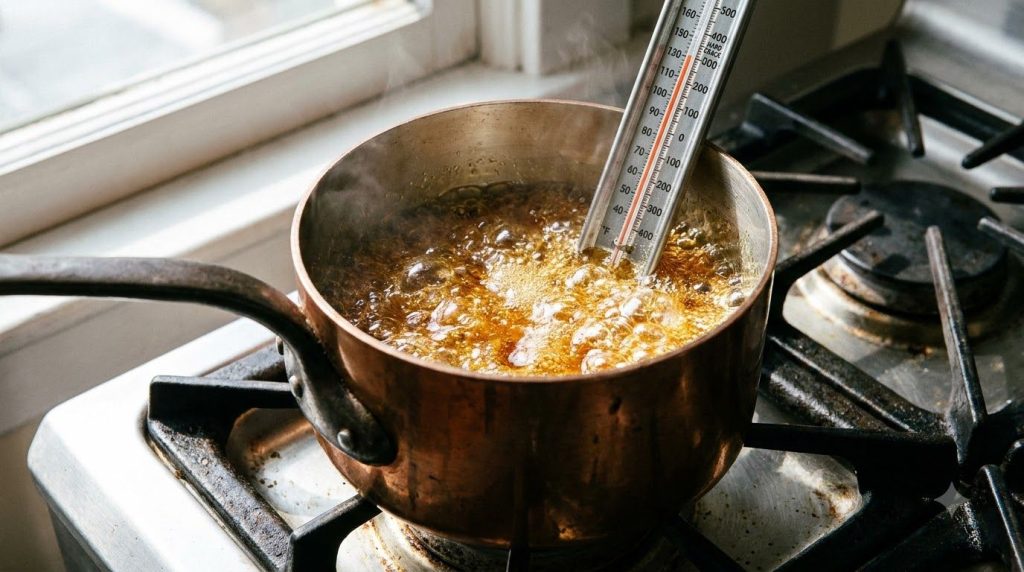
Boil the syrup to the hard crack stage, around 300°F (150°C). -
Add Baking Soda
Immediately remove the saucepan from the heat. Quickly and vigorously stir in the baking soda (and vanilla extract, if using) with a heat-resistant spatula. The mixture will instantly foam up dramatically, turning a lighter color and expanding significantly. Continue stirring for about 10-15 seconds until the baking soda is fully incorporated and the mixture is very bubbly.
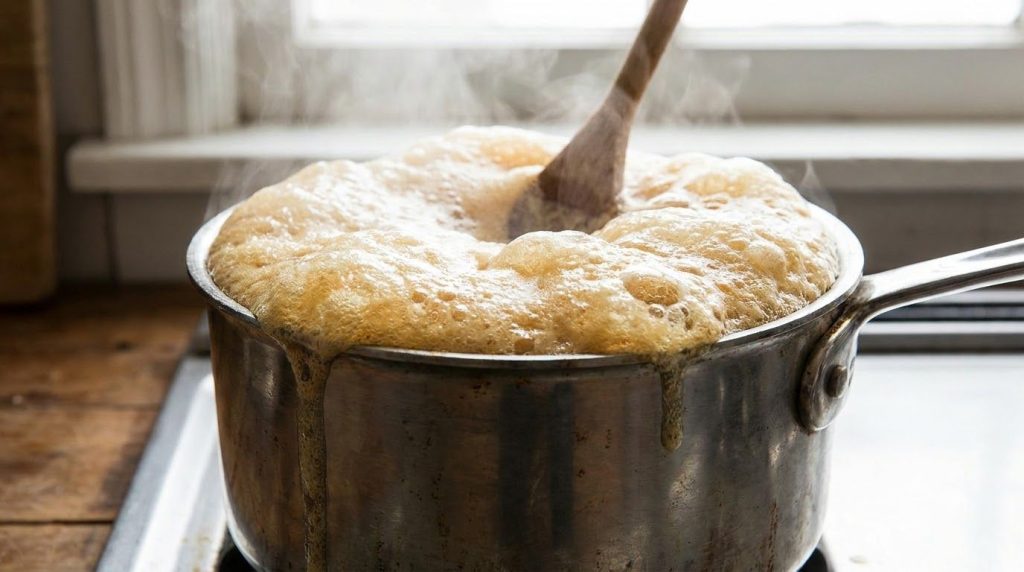
The magic happens! Stir in the baking soda and watch it foam. -
Pour and Cool
Immediately pour the foamed mixture into your prepared baking sheet. Do NOT spread or level it; just let it settle naturally. Resist the urge to touch or poke it, as this can deflate the bubbles and lead to dense honeycomb. Let the honeycomb cool completely at room temperature for at least 1-2 hours, or until it is firm and brittle. Do not refrigerate, as this can cause it to become sticky.
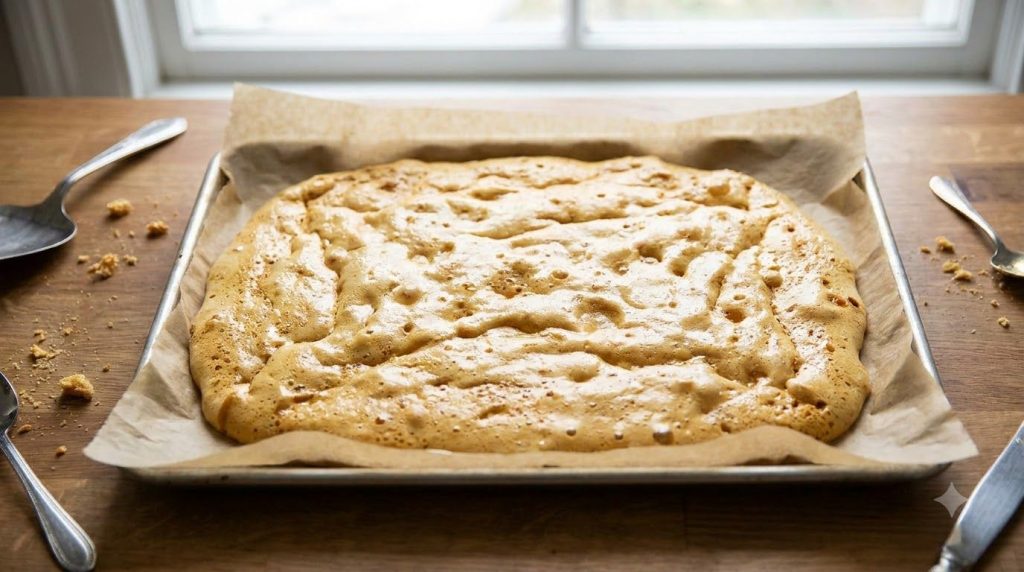
Pour into the prepared pan and allow it to cool completely. -
Break into Pieces
Once completely cool and hard, lift the parchment paper from the pan and carefully peel it away from the honeycomb. You can then gently tap or break the candy into irregular, bite-sized pieces using your hands or the back of a knife. Serve immediately or store.
Pro Tips for the Best Results
- Have Everything Ready: Candy making moves fast. Measure all ingredients and line your pan before you start heating the sugar.
- Use a Candy Thermometer: While experienced candy makers might eyeball it, a thermometer ensures accuracy and prevents under or overcooking.
- Don’t Stir While Boiling: Once the sugar has dissolved and the syrup starts boiling, avoid stirring. Stirring can introduce sugar crystals, leading to grainy candy.
- Work Quickly with Baking Soda: The reaction with baking soda is instant. Stir it in vigorously and thoroughly, but then immediately pour the mixture into the pan.
- Don’t Spread or Level: Pour the mixture into the pan and let it settle on its own. Spreading it will pop the delicate air bubbles.
- Clean Edges of Pan: If any sugar crystals form on the sides of the saucepan during boiling, you can brush them down with a wet pastry brush to prevent them from seeding the main syrup.
- Avoid Humidity: Humidity is the enemy of honeycomb. Choose a dry day to make this candy for the best, crunchiest results.
Common Mistakes to Avoid
- Not Reaching the Correct Temperature: If the syrup doesn’t reach 300°F (150°C), the honeycomb will be soft, chewy, or sticky instead of brittle. If it goes too high, it might burn.
- Stirring Too Much: Over-stirring the sugar syrup after it starts boiling can cause crystallization, resulting in grainy honeycomb.
- Delaying the Baking Soda: The baking soda needs to be added to very hot syrup to react properly. Any delay can reduce the ‘fizz’ and lead to a denser candy.
- Spreading the Mixture: After adding baking soda, resist the urge to spread the mixture in the pan. Let it expand and settle naturally.
- Cooling in the Fridge: Refrigerating honeycomb can introduce moisture, making it sticky and soggy. Always cool at room temperature.
- Old Baking Soda: If your baking soda isn’t fresh, it won’t react as strongly, leading to less airy honeycomb.
Variations & Substitutions
- Chocolate Dipped: Once cooled and broken, dip pieces of honeycomb in melted milk or dark chocolate. Allow the chocolate to set on parchment paper.
- Sprinkle Toppings: Before the chocolate sets, sprinkle with sea salt, chopped nuts, or sprinkles for extra flair.
- Flavor Extracts: A few drops of peppermint or almond extract can be added with the vanilla for different flavor profiles.
- Golden Syrup: If you don’t have liquid glucose or corn syrup, you can substitute it with golden syrup (a popular British syrup) for a similar effect, though it might impart a slightly different flavor.
Serving Suggestions
Homemade honeycomb candy is fantastic on its own as a delightful snack, but its versatility shines in other ways:
- Dessert Topping: Crumble pieces over ice cream, yogurt, puddings, or even hot chocolate.
- Cake Decoration: Use larger shards to decorate cakes or cupcakes for an impressive visual and textural contrast.
- With Coffee or Tea: Enjoy a small piece with your morning coffee or afternoon tea for a luxurious treat.
- Gift Giving: Package attractive pieces in clear bags or decorative boxes for a charming homemade gift.
Storage & Reheating
Proper storage is key to keeping your honeycomb candy crisp and delicious:
- Room Temperature: Store completely cooled honeycomb in an airtight container at room temperature.
- Avoid Humidity: Keep it away from moisture and humidity. A dry pantry is ideal.
- Duration: When stored correctly, honeycomb candy will stay fresh and crunchy for up to 1-2 weeks.
- Not Freezer Friendly: Honeycomb does not freeze well, as freezing and thawing will introduce moisture and make it sticky.
- Reheating: Honeycomb cannot be reheated or re-crisped once it becomes soft, as its structure is permanent once set. If it gets sticky, it’s best to enjoy it that way or use it in desserts where stickiness isn’t an issue.
FAQ
Can I make honeycomb candy without a candy thermometer?
While a thermometer is highly recommended for accuracy, you can test the syrup using the cold water test. Drop a small amount of boiling syrup into a bowl of very cold water. If it forms brittle threads that break easily, it’s at the hard crack stage (300°F/150°C).
Why did my honeycomb candy turn out sticky?
Stickiness usually indicates that the sugar syrup didn’t reach the full hard crack stage (300°F/150°C). It might also be due to high humidity, as honeycomb absorbs moisture easily.
What if my honeycomb doesn’t rise or isn’t airy?
This is most likely due to old or inactive baking soda, or not stirring the baking soda in quickly enough while the syrup was still very hot. Ensure your baking soda is fresh.
Can I use honey instead of corn syrup?
While the name implies honey, most honeycomb candy recipes use corn syrup or liquid glucose to prevent crystallization. Honey can be used in small amounts for flavor, but it may affect the texture and stability of the candy if used as a primary substitute for corn syrup.
How do I clean the sticky saucepan?
Immediately after pouring the honeycomb, fill the hot saucepan with water and bring it to a boil. The residual sugar will dissolve, making cleanup much easier.
What is the difference between honeycomb and sponge candy?
Honeycomb, cinder toffee, and sponge candy are all names for essentially the same confection: a light, airy, caramelized sugar candy with a brittle texture created by baking soda.
Recipe Card
Recipe Name: Homemade Honeycomb Candy
Short Description: Create wonderfully crunchy and airy honeycomb candy at home with just a few simple ingredients. A classic sweet treat that’s easier to make than you think!
Prep Time: 10 minutes
Cook Time: 15 minutes
Total Time: 25 minutes (plus cooling time)
Servings: 8-10
Course: Dessert, Snack
Cuisine: American, British
Cooking Method: Candy Making, Boiling
Ingredients:
- 1 cup (200 g) granulated sugar
- ¼ cup (60 ml) water
- ¼ cup (85 g) liquid glucose or light corn syrup
- 1 teaspoon (5 g) baking soda (bicarbonate of soda)
- ½ teaspoon vanilla extract (optional)
Instructions:
- Line a 9×13 inch (23×33 cm) baking sheet with parchment paper, lightly greasing the paper. Measure out baking soda and vanilla.
- In a heavy-bottomed saucepan, combine sugar, water, and liquid glucose/corn syrup. Stir over medium heat until sugar dissolves.
- Insert a candy thermometer. Increase heat to medium-high and boil without stirring until the mixture reaches 300°F (150°C), turning golden amber.
- Remove from heat. Quickly stir in baking soda (and vanilla) vigorously for 10-15 seconds; the mixture will foam dramatically.
- Immediately pour the foamed mixture into the prepared baking sheet. Do not spread. Let cool completely at room temperature for 1-2 hours until firm and brittle.
- Once cool, lift parchment and break the candy into irregular pieces.
Notes:
Use a candy thermometer for best results. Work quickly when adding baking soda. Do not spread the mixture in the pan. Cool at room temperature, not in the refrigerator.
Storage:
Store in an airtight container at room temperature for up to 1-2 weeks. Do not refrigerate or freeze.
Nutrition:
Nutrition information is an estimate and may vary depending on the ingredients and brands used.