Tired of stubborn floor grime that just won’t budge? Wish you could achieve sparkling, fresh floors without harsh chemicals or expensive specialty cleaners? You’re in luck! We’re about to unveil a super simple DIY cleaning solution using just a few common kitchen staples. Get ready to transform your floors and make your home shine!
The Problem with Dirty Floors
Our floors endure a lot – spills, tracked-in dirt, pet messes, and daily foot traffic. Over time, this leads to a buildup of grime, grease, and general dinginess that can be tough to clean. Many commercial floor cleaners contain strong chemicals that can be irritating to skin and lungs, and sometimes leave behind a residue. The good news is, you don’t need a cupboard full of expensive products to get your floors looking their best.
Why This DIY Cleaner Works Wonders
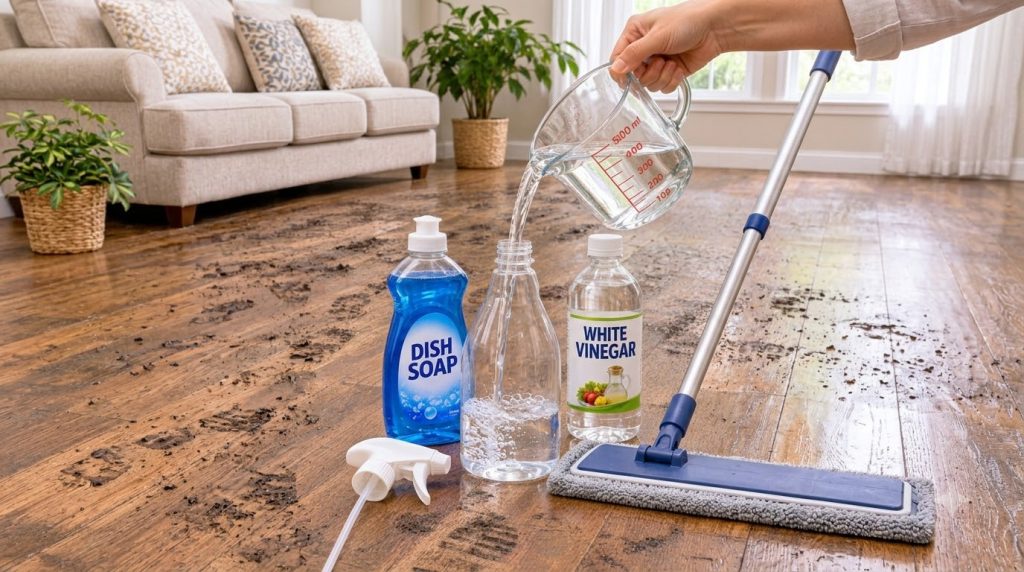
Our secret weapon combines the powerful cleaning properties of three everyday heroes: water, white vinegar, and dish soap. Each plays a crucial role in breaking down dirt and leaving your floors gleaming.
Ingredients You’ll Need:
- 1 cup warm Water
- 1/2 cup White Vinegar
- 1 tablespoon Blue Dish Soap (like Dawn or any grease-cutting brand)
Tools You’ll Need:
- Empty spray bottle
- Measuring cup and spoons
- Mop (flat mop works great for this)
- Bucket (optional, for mop rinsing)
Step-by-Step Guide to Sparkling Floors
Follow these easy steps to mix and apply your homemade floor cleaner:
- Prepare Your Bottle: Pour 1 cup of warm water into your empty spray bottle.
- Add Vinegar: Carefully add 1/2 cup of white vinegar to the bottle.
- Add Dish Soap: Measure out 1 tablespoon of blue dish soap and add it to the mixture.
- Shake Gently: Secure the spray nozzle tightly and gently shake the bottle to combine the ingredients. Avoid vigorous shaking, as dish soap can create excessive suds.
- Clear the Area: Before cleaning, sweep or vacuum your floors thoroughly to remove any loose dirt, dust, or debris.
- Spot Test: Always test the solution in an inconspicuous area of your floor first, especially if you have sensitive or new flooring, to ensure no discoloration or damage occurs.
- Spray and Mop: Lightly spray a small section of your floor with the DIY cleaner. Do not oversaturate.
- Mop Clean: Using a clean, damp mop, clean the sprayed section. Rinse your mop head in a bucket of clean water frequently to avoid spreading dirt.
- Repeat: Continue spraying and mopping in small sections until your entire floor is clean.
- Optional Rinse: For a streak-free finish, you can go over the floor one last time with a mop dampened with plain water.
The Science Behind the Shine
White Vinegar: The Grease Buster & Disinfectant
White vinegar is a cleaning powerhouse thanks to its main component, acetic acid. Acetic acid is mildly acidic, making it excellent at cutting through grease, dissolving mineral deposits (like hard water stains), and neutralizing odors. It also has natural disinfectant properties, helping to kill common bacteria and germs on surfaces.
Blue Dish Soap: The Dirt Lifter
Dish soap is designed to tackle grease and food residues on dishes, and it performs the same magic on your floors. It contains surfactants, which are compounds that reduce the surface tension of water, allowing it to better penetrate and lift dirt, grime, and oily stains from surfaces. The soap molecules then encapsulate the dirt particles, making it easy to wipe them away.
Water: The Diluter & Solvent
Warm water acts as a solvent, helping to dissolve dirt and allowing the vinegar and soap to disperse evenly. Diluting the concentrated ingredients makes the solution safe for most floor types and prevents streaks or residue.
Benefits of Your DIY Floor Cleaner
- Budget-Friendly: Uses ingredients you likely already have, saving you money on expensive commercial cleaners.
- Effective: Powerfully cleans and degreases, leaving floors sparkling.
- Natural & Safer: Reduces exposure to harsh chemicals found in many store-bought products.
- Odor Neutralizer: Vinegar helps eliminate lingering smells, leaving a truly fresh scent (which dissipates quickly once dry).
- Versatile: Can be used on many types of hard flooring.
Important Precautions & Tips
- Not for All Surfaces: While excellent for many floor types (tile, laminate, vinyl, sealed hardwood), avoid using vinegar on unsealed hardwood, marble, granite, or natural stone floors. The acid can etch or dull these surfaces over time.
- Ventilation: Ensure good ventilation when cleaning to help the floors dry faster and dissipate the mild vinegar smell.
- Patch Test: Always perform a patch test in an inconspicuous area before cleaning your entire floor, especially if you’re unsure about your flooring material.
- Storage: Store your DIY cleaner in a clearly labeled spray bottle away from direct sunlight and out of reach of children and pets.
Say goodbye to stubborn floor grime and hello to brilliantly clean floors! This DIY floor cleaner is a testament to the power of simple, everyday ingredients. Give it a try, and enjoy the satisfaction of a sparkling clean home without breaking the bank or exposing your family to harsh chemicals. Happy cleaning!