Do you dream of a vibrant herb garden, but your yard feels a little… cozy? Or perhaps you’re looking for a way to grow more in less space, adding a touch of rustic charm to your outdoor haven? Well, neighbor, you’ve come to the right place! We’re about to dive into the wonderful world of the herb spiral – a brilliant, space-saving solution that can turn even the smallest corner into a powerhouse of fresh, aromatic herbs.
Think of it as a vertical garden, but with a clever twist, literally! Herb spirals aren’t just practical; they’re a beautiful, sustainable way to cultivate a wide variety of herbs, creating diverse microclimates all within a compact footprint. Ready to get your hands a little dirty and transform your gardening dreams into reality?
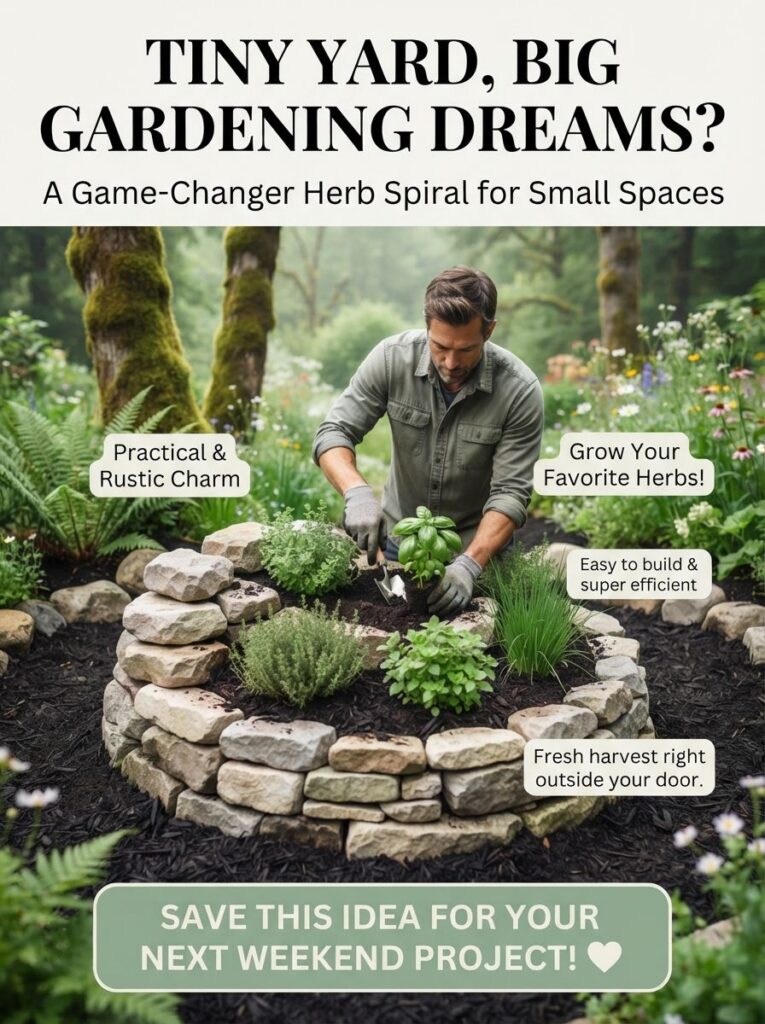
What Exactly is an Herb Spiral? A Mini-Ecosystem in Your Backyard!
At its heart, an herb spiral is a raised garden bed built in a spiral shape, typically using rocks, bricks, or even logs to create its structure. This clever design maximizes growing space and offers several unique advantages that traditional flat beds can’t:
- Space Efficiency: It’s like having a much larger garden in a tiny footprint. The vertical layers mean more planting area.
- Diverse Microclimates: The spiral’s varying height and orientation to the sun create different conditions. The top dries out faster and gets more sun, perfect for Mediterranean herbs. The bottom stays moister and shadier, ideal for water-loving plants.
- Improved Drainage: The raised structure naturally provides excellent drainage, crucial for many herbs that dislike ‘wet feet.’
- Aesthetic Appeal: Let’s be honest, they look fantastic! An herb spiral adds a beautiful, sculptural element to any garden, bringing rustic charm and visual interest.
- Easy Access: All your herbs are within easy reach, making planting, weeding, and harvesting a breeze.
It’s truly a game-changer for anyone with a small yard, a balcony, or simply a desire to grow more efficiently.
Designing Your Dream Herb Spiral: Planning for Success
Before you start stacking stones, a little planning goes a long way. Think of this as the fun part, where you get to envision your future herb haven!
Choosing the Perfect Spot
Most herbs crave sunshine, so pick a location in your yard that receives at least six hours of direct sunlight per day. If you’re in a hotter climate (like parts of USA zones 8-10), some afternoon shade might be beneficial for certain herbs, but generally, more sun is better. Consider its proximity to your kitchen – the closer it is, the more likely you are to use your fresh harvest!
Gathering Your Materials
- Stones, Bricks, or Logs: These will form the walls of your spiral. Reclaimed materials work wonderfully and add character. Flat-ish stones are easier to stack.
- Cardboard or Newspaper: For laying at the base to suppress weeds.
- Drainage Material: Gravel or broken terracotta pots for the very bottom layer.
- Good Quality Soil: A mix of compost and garden soil is ideal. Enrich it with some organic matter to give your herbs a strong start.
- Mulch: To help retain moisture and suppress weeds around the base of your spiral.
- Your Favorite Herb Plants: Start with small plants or seeds.
- Tools: Shovel, trowel, tape measure, string, and a spirit level (helpful for stacking!).
Building Your Herb Spiral: A Step-by-Step Guide
This is where the magic happens! It’s a project that’s incredibly rewarding, and you don’t need to be a master builder to achieve great results.
Step 1: Mark Your Territory
First, decide on the diameter of your spiral. A good size for a beginner’s spiral is about 6-8 feet in diameter. Use a string and a stick to draw a circle on the ground. This will be your base.
Step 2: Lay the Foundation and First Layer
Once your circle is marked, lay down a layer of cardboard or newspaper to act as a weed barrier. Then, start placing your largest stones or bricks around the outer edge of the circle, forming the first layer of your spiral’s wall. Leave an opening at the lowest point (the south-facing side in the Northern Hemisphere is often ideal for sun exposure, but consider your specific site).
Step 3: Build Upwards and Inwards
As you build, you’ll gradually spiral inwards and upwards. Each layer of stones should sit slightly on top of the one below, creating a gentle slope. Fill the lower sections with your drainage material (gravel) and then start adding your soil mix. The highest point of your spiral can be 2-3 feet tall. Always ensure your stone walls are stable and secure to prevent collapse.
Step 4: Fill with Rich Soil
Once your structure is mostly built, fill the spiral with your soil mix. Compact it gently as you go, leaving enough space at the top for planting. You’ll notice the different heights and slopes already creating distinct areas within the spiral.
Choosing and Planting Your Herbs: Perfecting the Microclimates
Now for the really fun part – bringing your spiral to life! The key here is to match your herbs to the microclimates you’ve created.
- Top of the Spiral (Driest, Full Sun): Ideal for sun-loving, drought-tolerant Mediterranean herbs. Think Rosemary, Thyme, Oregano, Sage, Lavender, Marjoram, and Savory. These herbs thrive in well-drained conditions.
- Middle Section (Moderate Sun and Moisture): Here, you can plant herbs that like a bit of sun but also consistent moisture. Parsley, Chives, Tarragon, and Dill are excellent choices.
- Bottom Section (Shadiest, Moistest): This is the spot for your water-loving and shade-tolerant herbs. Mints (plant these in pots within the spiral to prevent them from taking over!), Lemon Balm, and Watercress would be happy here.
When planting, gently loosen the roots of your plants and place them into the prepared soil. Water them in thoroughly after planting.
Caring for Your Thriving Herb Spiral
Once built and planted, your herb spiral will be relatively low maintenance, but a little regular care will ensure a bountiful harvest.
- Watering: Pay attention to the different zones. The top will dry out faster, so check it more frequently. The bottom will retain moisture longer. Water deeply when needed.
- Pruning: Regularly harvest your herbs! This encourages new growth and keeps your plants productive. Pinch back flowering stems to encourage leaf production.
- Pest Watch: Keep an eye out for any pests. Companion planting (like Nasturtiums for aphids) can help, as can natural pest control methods.
- Soil Refresh: Every spring, top-dress your spiral with a layer of compost to replenish nutrients.
Remember, gardening is an ongoing learning journey. Observe your plants, see how they’re doing, and adjust your care as needed. USA zones for plants are a general guide, but your specific microclimate within the spiral can create unique conditions, so always pay attention to what your plants are telling you.
Beyond Herbs: Other Small Space Delights
While designed for herbs, a spiral can also host other small, compact plants. Think about small strawberries trailing down, or even a few leafy greens like lettuce or spinach in the cooler, moister sections. The possibilities are endless when you embrace creative space utilization!
Ready to Get Started?
Building an herb spiral is more than just a gardening project; it’s an investment in fresh, healthy flavors and a beautiful addition to your home. It’s a wonderful way to connect with nature, even if you only have a tiny corner to spare. So, gather your materials, envision your delicious harvests, and get ready to create a thriving, sustainable practice right outside your door. You’ll be amazed at how much you can grow and how much joy it brings!