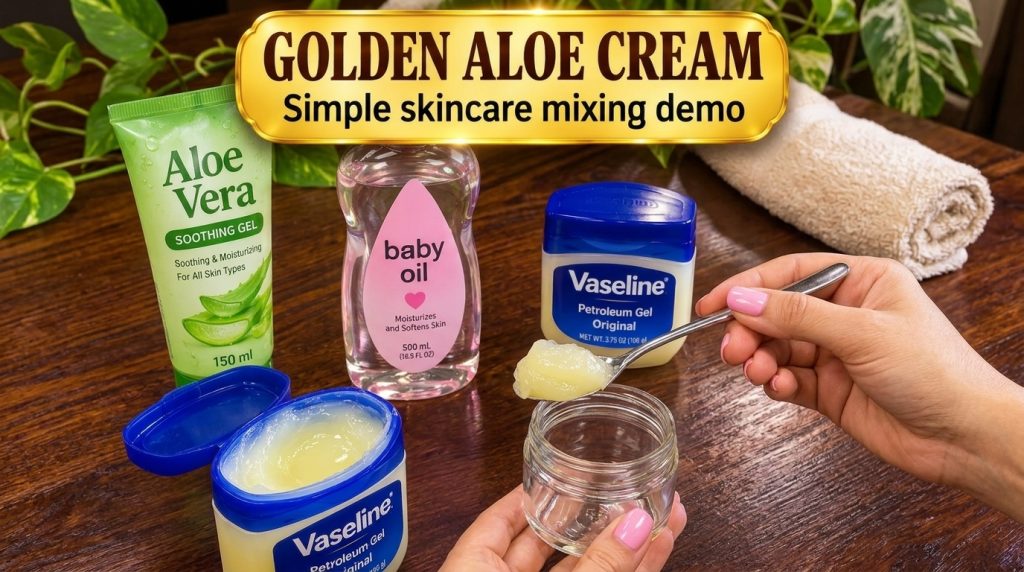
Who knew that a soft, rich, hydrating cream could come together right on your kitchen table? If you have been looking for a simple way to pamper dry or tired skin without spending a fortune, this easy homemade blend is a lovely place to start. In this guide, we will walk through a basic mixing idea using everyday skincare ingredients, plus a few friendly tips to help you get the best results.
Why Make Your Own Hydrating Cream?
Store-bought creams are convenient, but many of them contain long ingredient lists that can feel confusing. A homemade version lets you see exactly what goes into your jar. It is also a fun way to learn what different ingredients do for your skin. Plus, a small batch of DIY cream is budget-friendly and perfect for a relaxing self-care evening.
What You Will Need
- A small amount of petroleum jelly, which helps lock in moisture
- Pure aloe vera gel, known for its soothing and cooling feel
- A few drops of baby oil or another gentle plant-based oil for extra softness
- A clean, empty glass jar with a tight lid
- A clean spoon or small spatula for mixing
Always use clean tools and containers. Freshness matters, especially when you are making skincare at home.
Step-by-Step: Mixing Your Hydrating Cream
- Prepare your space. Wipe down your table and wash your hands. Good hygiene keeps your blend fresh for longer.
- Add the base. Spoon a small scoop of petroleum jelly into your clean glass jar. This creates a rich, protective base.
- Blend in the aloe. Add a similar amount of aloe vera gel and stir gently until the mixture looks smooth and even.
- Add a touch of oil. Drizzle in a few drops of baby oil and mix again. Start small, since a little goes a long way.
- Check the texture. The blend should feel soft and spreadable. If it is too thick, add a tiny bit more aloe. If it is too runny, add a little more petroleum jelly.
- Seal and label. Close the lid tightly, write the date on the jar, and store it in a cool, dry place.
How to Use Your Hydrating Cream
Apply a small amount to clean, slightly damp skin, especially on dry areas like elbows, heels, or cheeks. Gently massage it in with upward strokes. Because this blend is rich, a pea-sized amount is usually enough for your face. Use it as a night cream for the best results, since your skin repairs itself while you rest.
Helpful Tips for Best Results
- Do a patch test first. Apply a little to your inner arm and wait 24 hours to make sure your skin feels comfortable.
- Choose pure aloe. Look for aloe vera gel with few additives for a gentler blend.
- Avoid heavy use on acne-prone skin. Rich textures can feel too heavy for oily or breakout-prone areas, so use only a thin layer there or skip those spots.
- Keep it small. Make a small batch you can use within a few weeks to keep it fresh.
Common Mistakes to Avoid
Many beginners add too much oil at once, which can make the cream greasy. Others skip the patch test and find out later that their skin is sensitive. Another common slip is using dirty spoons, which can introduce bacteria. Keeping these simple points in mind will help your homemade cream feel smooth, safe, and enjoyable.
Final Thoughts
Making your own hydrating cream is a simple, relaxing way to care for your skin with ingredients you already understand. Start with a small batch, pay attention to how your skin responds, and adjust the recipe to suit your needs. Your skin will thank you for the extra moisture and gentle attention.
Have you tried making your own skincare at home? Share your favorite simple blend in the comments and let us know how your skin feels!