Tired of the same old carrot recipes? These carrot bread rolls are a delightful change. They turn out wonderfully soft, lightly sweet, and gently savory, and they pair well with almost any meal, from a weeknight soup to a family dinner.
Baking with carrots is a simple way to add color, natural sweetness, and moisture to bread. Carrots also contribute fiber and vitamins, so these rolls feel a little more wholesome than standard dinner rolls. You do not need any special bread-making experience to succeed. This guide walks you through every step, from cooking the carrot to shaping and baking the rolls.
Why You’ll Love These Carrot Bread Rolls
- Soft, pillowy texture that stays tender for days
- Gentle sweetness from the carrot and a touch of honey
- Beginner-friendly steps with no fancy equipment
- Perfect alongside soups, salads, or roasted meats
- Makes a batch of 12 rolls, great for family dinners
- Freezes well, so you can bake ahead
Recipe Summary
- Prep Time: 25 minutes
- Cook Time: 18 minutes
- Total Time: About 2 hours 15 minutes, including rising
- Servings: 12 rolls
- Difficulty Level: Easy
- Course: Bread, Side Dish
- Cuisine: Home-style
- Diet Type: Vegetarian
Ingredients
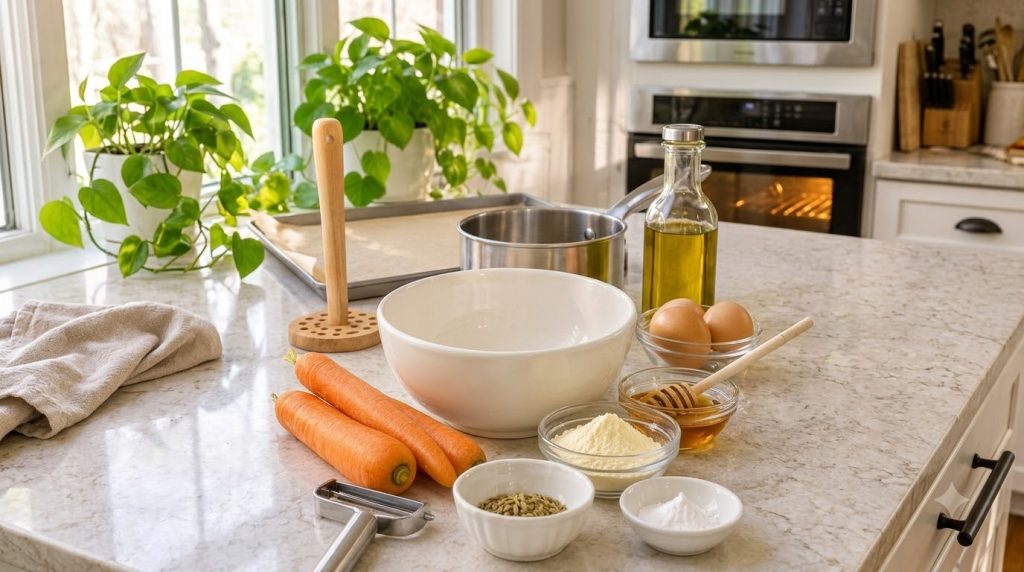
- 1 medium carrot, peeled and chopped (about 1 cup cooked and mashed)
- 1 cup whole milk, warmed to about 110°F (43°C) (or dairy-free milk of choice)
- 2 ¼ teaspoons (1 packet, about 7 g) active dry yeast
- 1 tablespoon sugar
- 3 cups (375 g) all-purpose flour, plus extra for dusting
- 1 teaspoon fine salt
- 3 tablespoons unsalted butter, softened (or dairy-free butter)
- 1 large egg, at room temperature
- 1 tablespoon honey (optional, for extra sweetness)
- 1 tablespoon melted butter, for brushing after baking
Equipment Needed
- Small saucepan with a lid
- Blender, food processor, or potato masher
- Large mixing bowl
- Measuring cups and spoons
- Kitchen thermometer (helpful, but optional)
- Baking sheet lined with parchment paper
- Clean kitchen towel or plastic wrap
- Wire cooling rack
Step-by-Step Instructions
Step 1: Cook and Mash the Carrot
Place the chopped carrot in a small saucepan and cover it with water. Bring to a boil, then reduce the heat and simmer for 10 to 12 minutes, until a knife slides in easily. Drain well and let it cool for about 5 minutes. Mash or blend until completely smooth, about 1 cup. The puree should be thick, not watery. If it seems wet, let it sit in a strainer for a few minutes.
Step 2: Activate the Yeast
Warm the milk until it feels comfortably warm to the touch, around 110°F (43°C). It should not be hot, because high heat can harm the yeast. Pour the warm milk into a small bowl, stir in the sugar and yeast, and let it rest for 5 to 8 minutes. You should see a light foam on top. If nothing foams, the yeast may be old, so start again with fresh yeast.
Step 3: Mix the Dough
In a large mixing bowl, whisk together the flour and salt. Add the yeast mixture, the carrot puree, the egg, the honey if using, and the softened butter. Stir with a spatula or wooden spoon until a shaggy dough forms. It will look a little sticky at first, which is normal.
Step 4: Knead Until Smooth
Turn the dough onto a lightly floured surface and knead for 8 to 10 minutes. Press the dough away from you with the heel of your hand, fold it back over itself, and turn it a quarter turn. Keep going until the dough is smooth, springy, and only slightly tacky. Add flour one tablespoon at a time only if the dough is very sticky.
Step 5: First Rise
Shape the dough into a ball and place it in a lightly greased bowl. Turn it once so the top is coated, then cover with a clean towel or plastic wrap. Let it rise in a warm spot for 60 to 75 minutes, until doubled in size.
Step 6: Divide and Shape
Gently press the dough down to release the air. Divide it into 12 equal pieces, about 60 g each, using a knife or bench scraper. Roll each piece between your palms into a smooth ball, tucking the seams underneath. Arrange the balls on the lined baking sheet, leaving about 2 inches (5 cm) between them.
Step 7: Second Rise
Cover the rolls loosely and let them rise for 30 to 40 minutes, until puffy and nearly touching. While they rise, preheat your oven to 375°F (190°C) with a rack in the middle position.
Step 8: Bake
Bake for 15 to 18 minutes, until the tops are golden brown and the rolls sound hollow when tapped on the bottom. For an accurate check, the center should reach about 190°F (88°C). Remove the tray and brush the tops right away with melted butter for a soft, shiny finish.
Step 9: Cool
Transfer the rolls to a wire rack and let them cool for at least 10 minutes before serving. This helps the inside set so the texture stays soft rather than gummy.
Nutrition Highlights
- Made with real carrot, which adds natural sweetness and color
- Contains some fiber from the carrot and whole milk
- Naturally sweetened with a small amount of sugar and optional honey
- Made with ordinary pantry ingredients, so you control what goes in
Ingredient Benefits
- Carrot: Adds moisture, gentle sweetness, and a soft crumb.
- Milk: Makes the dough tender and helps with browning.
- Yeast: Causes the dough to rise and gives the bread its airy structure.
- Flour: Provides the structure that holds the rolls together.
- Butter and egg: Add richness, softness, and flavor.
- Honey: Adds subtle sweetness and helps keep the crumb moist.
Expert Tips
- Cook the carrot until very soft so the puree stays smooth and the dough does not feel lumpy.
- Let the carrot puree cool to lukewarm before adding it, so it does not harm the yeast.
- Check that the dough feels smooth and springy before the first rise. Under-kneaded dough can turn out dense.
- Use a kitchen thermometer for the milk if you have one. It takes the guesswork out of the yeast step.
- For a savory twist, add ½ teaspoon of dried thyme or a pinch of black pepper to the flour.
- For a richer flavor, use half whole wheat flour and half all-purpose flour, adding a splash more milk if needed.
- Store leftover rolls in an airtight container at room temperature for up to 2 days.
Recipe Variations
- Dairy-free version: Use plant-based milk and dairy-free butter.
- Herb version: Add 1 tablespoon finely chopped fresh parsley or chives to the dough.
- Cheesy version: Fold in ½ cup finely grated cheddar before shaping.
- Cinnamon version: Add 1 teaspoon ground cinnamon to the flour and brush the baked rolls with cinnamon sugar.
Storage Instructions
- Room temperature: Keep in an airtight container for up to 2 days.
- Refrigerator: Refrigeration can make bread dry faster, so it is best to avoid it.
- Freezer: Cool completely, then wrap tightly in freezer bags. They keep for up to 3 months.
- Reheating: Warm frozen rolls in a 300°F (150°C) oven for 8 to 10 minutes.
Frequently Asked Questions
Can I make the dough ahead of time?
Yes. After the first knead, cover the dough and refrigerate it for up to 12 hours. Let it sit at room temperature for 30 minutes before shaping.
Can I freeze these rolls?
Yes. Freeze the cooled rolls in an airtight bag, and thaw them at room temperature for about 1 hour.
Can I use grated raw carrot instead?
You can, but cooked and mashed carrot gives a smoother dough. If you use raw grated carrot, squeeze out the excess moisture first.
What milk works best?
Whole milk gives the softest result, but 2% milk, oat milk, or soy milk also work well.
Can children eat these rolls?
Yes. They are mild, lightly sweet, and a good way to introduce vegetables to kids. Cut them into smaller pieces for younger children.
Why did my rolls turn out dense?
Common causes include expired yeast, milk that was too hot, or a rise that was too short. Make sure the dough doubles in size during the first rise.
Conclusion
These soft carrot bread rolls prove that carrots can be more than a side dish. With simple pantry ingredients and a few easy steps, you can bake a batch that is tender, lightly sweet, and perfect for any meal. Give them a try this week, and enjoy the warm, homemade aroma filling your kitchen. Happy baking!