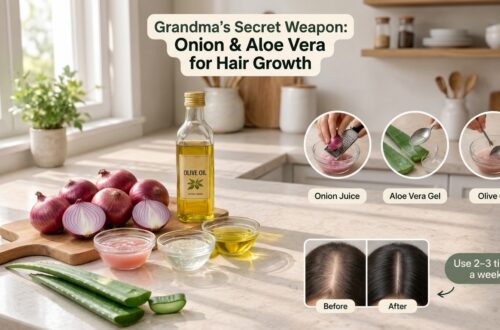
Unlock Nature’s Secrets: DIY Herbal Hair Oils for Gorgeous Hair
Dreaming of hair that shines with health, feels strong from root to tip, and has that undeniable vibrancy? You’re not alone, beauty bestie! We all yearn for luscious hair that makes us feel confident and beautiful. And guess what? You don’t always need expensive salon treatments or chemical-laden products to achieve it. Nature, in her infinite wisdom, holds some truly incredible secrets for gorgeous hair, right in your pantry or garden!
For centuries, women and men across cultures have turned to botanical ingredients to nourish their locks. From the ancient practices of Ayurveda to remedies passed down through generations, herbal hair oils have been a cornerstone of healthy hair routines. These aren’t just old wives’ tales; there’s a beautiful synergy in how these natural ingredients work to support scalp health, moisturize strands, and enhance the natural beauty of your hair.
Today, we’re diving deep into four powerful natural ingredients that can completely transform your hair oil routine: hibiscus, fenugreek, curry leaves, and onion. These aren’t magic potions, but consistent, gentle care with these botanical treasures can help you achieve hair that looks and feels its best. We’ll show you how to harness the best of nature for truly vibrant, strong hair, helping you say goodbye to dull hair days and hello to a naturally radiant mane. Ready to elevate your hair oil game the natural way?
Table of Contents
- Why Herbal Hair Oils Have Been Used for Generations
- How Herbal Hair Oils Support a Healthy Hair Care Routine
- Choosing the Right Carrier Oil
- Recipe #1 – Hibiscus Hair Oil
- Recipe #2 – Fenugreek & Onion Hair Oil
- Recipe #3 – Curry Leaf Hair Oil
- Recipe #4 – Onion Hair Oil
- General Tips for Using DIY Hair Oils
- Common Questions & Answers About DIY Hair Oils
- Embrace Your Natural Hair Journey
Why Herbal Hair Oils Have Been Used for Generations
When we look back through history, almost every culture has its own treasury of natural beauty remedies, and hair care is often at the forefront. Herbal hair oils aren’t a new fad; they are a timeless tradition, a testament to humanity’s connection with nature and the profound understanding of its nourishing power.
Think about grandmothers in India meticulously preparing special oil blends for their families, or ancient Egyptians infusing botanicals to keep their hair lustrous. These practices weren’t just about beauty; they were about wellness, passed down from one generation to the next, becoming an integral part of self-care rituals. Why? Because they simply worked to keep hair looking healthy and beautiful.
Traditional wisdom teaches us that plants possess unique properties that can interact gently with our bodies. In the context of hair, herbs and natural oils offer a holistic approach. Instead of harsh chemicals that can strip hair of its natural oils, herbal infusions work to support the scalp’s ecosystem, provide essential moisture, and strengthen strands from the outside in. They embrace the philosophy that true beauty stems from nature, nurturing our bodies with gentle, wholesome ingredients.
This enduring legacy isn’t just sentimental; it’s backed by centuries of empirical observation and experience. People noticed how certain plants made their hair feel softer, look shinier, and appear stronger. They saw how regular oiling helped maintain the health and beauty of their hair, protecting it from environmental stressors and the wear and tear of daily life. This collective knowledge forms the bedrock of why herbal hair oils remain cherished even in our modern, fast-paced world.
How Herbal Hair Oils Support a Healthy Hair Care Routine
Now that we appreciate the rich history, let’s chat about how these amazing herbal hair oils actually support a healthy hair care routine today. It’s not magic, but rather a beautiful combination of nourishment, protection, and gentle care that helps your hair look its best.
Nourishing Your Scalp: The Root of Healthy Hair
Just like a garden needs healthy soil to grow vibrant plants, your hair needs a healthy scalp to thrive. Herbal hair oils are fantastic for giving your scalp some much-needed love! When you gently massage an infused oil into your scalp, you’re not just applying product; you’re engaging in a self-care ritual that can help to:
- Moisturize the Scalp: Dry, flaky scalps are no fun! Carrier oils, infused with herbs, can help restore moisture, making your scalp feel more comfortable and less prone to dryness.
- Support Scalp Circulation: The act of massaging itself helps stimulate blood flow to the scalp. This increased circulation can deliver more nutrients to your hair follicles, supporting their overall health and encouraging the appearance of healthier hair.
- Balance Natural Oils: Some herbal infusions, like those with onion, can help balance the scalp’s natural oil production, which is great for both oily and dry scalp concerns.
Moisturizing and Strengthening Hair Strands
Beyond the scalp, herbal hair oils work wonders for the entire length of your hair. They act as a protective and conditioning treatment, helping your hair look and feel softer, shinier, and more resilient:
- Deep Conditioning: The oils penetrate the hair shaft, providing deep conditioning that can reduce the appearance of dryness and frizz, leaving your hair feeling incredibly soft and smooth.
- Enhancing Shine: When hair is well-moisturized, its cuticles lie flat, reflecting light more effectively. This is where that gorgeous, natural shine comes from! Herbs like hibiscus are especially known for adding a beautiful sheen.
- Supporting Hair Strength: While no topical oil can stop hair fall completely, well-nourished hair tends to be more flexible and less prone to breakage from styling or environmental factors. Ingredients like fenugreek can help improve the overall feel and strength of your hair.
- Protecting from Damage: A light coating of oil can create a barrier that helps protect your hair from environmental stressors like pollution, sun, and even the heat from styling tools.
It’s important to remember that these natural remedies are about consistent, gentle care. They work with your body’s natural processes to enhance the appearance of healthy hair over time. Patience and a regular routine are your best friends on this natural hair care journey!
Choosing the Right Carrier Oil
Before we dive into our amazing herbal recipes, let’s talk about the foundation of any good hair oil: the carrier oil! These are the base oils that carry the goodness of our herbs to your scalp and strands. Choosing the right one can make a big difference in how your DIY hair oil feels and performs for your specific hair type.
Here are some popular and effective carrier oils, each with its own unique benefits:
1. Coconut Oil
- Best for: Almost all hair types, especially dry, damaged, or coarse hair.
- Why we love it: Coconut oil is a superstar for a reason! It’s rich in lauric acid, which can penetrate the hair shaft, providing deep moisture and helping to reduce protein loss. It’s fantastic for adding shine and softness. It’s also widely available and affordable.
- Considerations: It can be a bit heavy for very fine hair if used in large quantities. It solidifies at cooler temperatures, so you might need to warm it gently before use.
2. Almond Oil (Sweet Almond Oil)
- Best for: Dry, dull, or easily tangled hair.
- Why we love it: Light and non-greasy, sweet almond oil is packed with Vitamin E, fatty acids, and magnesium. It helps to moisturize and soften hair, making it smoother and easier to manage. It’s also gentle on the scalp.
- Considerations: If you have nut allergies, it’s best to avoid almond oil.
3. Jojoba Oil
- Best for: All hair types, especially oily scalp, fine hair, or sensitive scalp.
- Why we love it: Jojoba oil is technically a liquid wax, and its structure is very similar to the natural sebum produced by our scalp. This makes it incredibly balancing. It won’t weigh down fine hair and can help regulate oil production on an oily scalp, while still providing moisture where needed.
- Considerations: Can be a bit pricier than other carrier oils.
4. Olive Oil
- Best for: Dry, thick, damaged, or chemically treated hair.
- Why we love it: Extra virgin olive oil is deeply moisturizing and conditioning. It’s rich in antioxidants and Vitamin E, which can help nourish the scalp and hair. It adds a lovely shine and can help improve hair elasticity.
- Considerations: It’s a heavier oil, so use sparingly on fine hair to avoid a greasy feel. Has a distinct scent.
5. Argan Oil
- Best for: Dry, frizzy, dull, or damaged hair.
- Why we love it: Often called ‘liquid gold,’ argan oil is rich in fatty acids and Vitamin E. It’s a fantastic moisturizer, helps to tame frizz, adds shine, and makes hair feel silky soft without being too heavy.
- Considerations: It’s one of the more expensive carrier oils, but a little goes a long way.
Pro Tip: You can also create your own blend of carrier oils! For instance, a mix of coconut oil (for deep moisture) and jojoba oil (for lightness and scalp balance) could be perfect for many. Feel free to experiment and see what works best for your unique hair needs!
Recipe #1 – Hibiscus Hair Oil: The Bloom of Beauty
Hibiscus flowers and leaves aren’t just pretty to look at; they are a powerhouse of natural goodness for your hair! Known for their conditioning and beautifying properties, hibiscus has been a cherished ingredient in traditional hair care for ages. It can help enhance your hair’s natural shine and feel softer to the touch.
Benefits of Hibiscus for Hair
- Natural Conditioner: Hibiscus has a mucilage (a slimy substance) that provides excellent natural conditioning, making hair feel incredibly soft and smooth.
- Adds Shine: It can help boost your hair’s natural luster, giving it a healthy, radiant sheen.
- Supports Hair Strength: Rich in amino acids, hibiscus can contribute to the overall feel and strength of your hair strands.
- Scalp Love: It’s gentle on the scalp and can help maintain a healthy environment for your hair.
What You’ll Need: Ingredients
- 1/2 cup fresh hibiscus flowers (about 5-7 flowers) and/or leaves (about 10-15 leaves), chopped
- 1 cup carrier oil of your choice (coconut oil, sweet almond oil, or olive oil work wonderfully here)
- Small saucepan
- Strainer or cheesecloth
- Clean, airtight glass bottle for storage
Step-by-Step Preparation
- Prepare Hibiscus: If using fresh hibiscus, gently wash the flowers and leaves and pat them completely dry. Chop them into smaller pieces to help release their beneficial compounds. If using dried hibiscus, you can skip this step.
- Combine & Heat: Pour your chosen carrier oil into a small saucepan. Add the chopped fresh hibiscus flowers/leaves (or dried hibiscus powder/petals).
- Gentle Infusion: Heat the mixture on very low heat. You don’t want to fry the ingredients, just gently warm them to infuse the oil. Simmer for about 10-15 minutes, or until you see the flowers/leaves darken and crisp up slightly, and the oil takes on a subtle reddish tint.
- Cool Down: Remove the saucepan from the heat and let the oil cool completely. This allows for further infusion as it settles.
- Strain & Store: Once cool, strain the oil through a fine-mesh strainer or cheesecloth into your clean, airtight glass bottle. Squeeze out all the oil from the hibiscus remnants.
How to Use Your Hibiscus Hair Oil
- Application: Take a small amount of the infused oil and gently massage it into your scalp using your fingertips. Work your way down to the ends of your hair, ensuring even coverage.
- Massage: Spend 5-10 minutes massaging your scalp to help stimulate circulation and distribute the oil.
- Rest: Leave the oil on for at least 30 minutes, or for a deeper conditioning treatment, you can leave it on overnight. Cover your hair with a shower cap or an old towel to protect your pillow.
- Wash Out: Shampoo your hair thoroughly (you might need two washes) and condition as usual.
Beauty Bestie Tips for Hibiscus Hair Oil
- Consistency is Key: Use this oil 1-2 times a week for best results.
- Dried vs. Fresh: If fresh hibiscus isn’t available, you can use dried hibiscus powder or petals (about 2-3 tablespoons per cup of oil).
- Patch Test: Always do a patch test on a small area of skin before full application to ensure no irritation.
Recipe #2 – Fenugreek & Onion Hair Oil: A Duo for Delightful Hair
This powerful duo brings together the conditioning prowess of fenugreek seeds and the scalp-stimulating qualities of onion. Fenugreek, also known as Methi, is renowned for its ability to moisturize and strengthen hair, while onion is a popular traditional remedy for supporting scalp health and enhancing shine.
Benefits of Fenugreek & Onion for Hair
- Fenugreek (Methi):
- Deep Conditioning: Contains mucilage that provides slip and conditioning, making hair feel softer and easier to detangle.
- Supports Hair Strength: Rich in protein and nicotinic acid, which can contribute to the overall strength and appearance of hair.
- Scalp Nourishment: Helps to soothe and nourish the scalp.
- Onion:
- Scalp Support: Traditionally used to support a healthy scalp environment.
- Adds Shine: Can contribute to a healthy, natural luster in hair.
What You’ll Need: Ingredients
- 2 tablespoons fenugreek seeds
- 1 small red onion, peeled and roughly chopped
- 1.5 cups carrier oil (coconut oil or sesame oil are great choices for this recipe)
- Small saucepan
- Strainer or cheesecloth
- Clean, airtight glass bottle for storage
Step-by-Step Preparation
- Prepare Ingredients: Lightly crush the fenugreek seeds (a mortar and pestle or spice grinder works well) to help release their compounds. Roughly chop the onion.
- Combine & Heat: Pour the carrier oil into a small saucepan. Add the crushed fenugreek seeds and chopped onion.
- Gentle Infusion: Heat the mixture on very low heat. Simmer gently for about 15-20 minutes. You’ll notice the onion bits will turn brownish and crisp, and the fenugreek seeds will also darken. Keep an eye on it to ensure it doesn’t burn.
- Cool Down: Remove the saucepan from the heat and let the oil cool completely. This helps the infusion process.
- Strain & Store: Once cool, strain the oil through a fine-mesh strainer or cheesecloth into your clean, airtight glass bottle. Squeeze out all the oil from the solid ingredients.
How to Use Your Fenugreek & Onion Hair Oil
- Application: Take a generous amount of the infused oil and massage it into your scalp, ensuring good coverage. Then, apply it along the lengths of your hair.
- Massage: Give yourself a relaxing scalp massage for 5-10 minutes to help the oil penetrate and stimulate circulation.
- Rest: Leave the oil on for at least 1-2 hours. For an intensive treatment, you can leave it on overnight (with a shower cap or old towel).
- Wash Out: Shampoo your hair thoroughly (you might need two washes to remove the onion scent) and condition as usual.
Beauty Bestie Tips for Fenugreek & Onion Hair Oil
- The Scent: Onion has a strong smell. While it usually washes out, if you’re sensitive, add a few drops of a pleasant-smelling essential oil (like rosemary or lavender) to the cooled, strained oil before storing.
- Consistency: Use once a week for visible benefits.
- Storage: Due to onion, this oil is best used within 2-3 weeks if stored at room temperature, or up to a month if refrigerated.
Recipe #3 – Curry Leaf Hair Oil: The Aromatic Elixir
Curry leaves, also known as ‘Kadi Patta,’ are more than just a culinary herb. In traditional Indian hair care, they are celebrated for their nourishing properties, believed to contribute to vibrant, healthy-looking hair. They are a wonderful addition to your DIY hair oil arsenal for a touch of natural conditioning and shine.
Benefits of Curry Leaves for Hair
- Hair Nourishment: Curry leaves are packed with antioxidants, amino acids, and essential nutrients that can help to nourish hair follicles and strands.
- Adds Shine: They are known to enhance the natural luster of hair, leaving it looking glossy and healthy.
- Supports Hair Strength: Can contribute to the overall appearance of stronger hair, making it feel more resilient.
- Natural Aroma: Imparts a subtle, pleasant aroma to the hair.
What You’ll Need: Ingredients
- 1/2 cup fresh curry leaves (about 20-30 leaves), washed and pat dry
- 1 cup carrier oil (coconut oil or sweet almond oil work beautifully)
- Small saucepan
- Strainer or cheesecloth
- Clean, airtight glass bottle for storage
Step-by-Step Preparation
- Prepare Curry Leaves: Ensure the curry leaves are completely dry after washing to prevent water from reacting with the hot oil.
- Combine & Heat: Pour your chosen carrier oil into a small saucepan. Add the dried curry leaves.
- Gentle Infusion: Heat the mixture on very low heat. Simmer gently for about 10-15 minutes. The leaves will start to darken and crisp up, and you’ll notice a lovely aroma. Be careful not to burn them.
- Cool Down: Remove the saucepan from the heat and let the oil cool completely. This step is crucial for allowing the leaves to infuse their goodness into the oil.
- Strain & Store: Once cool, strain the oil through a fine-mesh strainer or cheesecloth into your clean, airtight glass bottle. Squeeze out as much oil as possible from the infused leaves.
How to Use Your Curry Leaf Hair Oil
- Application: Take a small amount of the infused oil and gently massage it into your scalp, working your way down to the ends of your hair.
- Massage: Enjoy a relaxing scalp massage for 5-10 minutes.
- Rest: Leave the oil on for at least an hour. You can also leave it overnight for a more intense conditioning treatment, covering your hair with a cap or towel.
- Wash Out: Shampoo your hair thoroughly and condition as usual.
Beauty Bestie Tips for Curry Leaf Hair Oil
- Fresh is Best: While dried curry leaves can be used, fresh ones will give you the most potent infusion and aroma.
- Combine with Other Herbs: You can experiment by adding a few drops of rosemary essential oil (after the oil cools) for an extra boost.
- Regular Use: Use this oil 1-2 times a week as part of your regular hair care routine.
Recipe #4 – Onion Hair Oil: Simple Scalp & Shine Support
You might be surprised to see onion as a standalone star in a hair oil recipe, but its traditional use in hair care is well-documented. While the smell can be a bit strong for some, the benefits for scalp health and enhancing hair’s natural shine make it a popular natural remedy.
Benefits of Onion for Hair
- Scalp Health: Onion is traditionally used to support a clean and healthy scalp environment.
- Enhances Shine: It can help to bring out the natural luster and vibrancy of your hair.
- Nourishment: Contains vitamins and minerals that can provide a nourishing effect to the scalp.
What You’ll Need: Ingredients
- 1 medium red onion, peeled and roughly chopped
- 1 cup carrier oil (coconut oil or sesame oil are ideal)
- Small saucepan
- Strainer or cheesecloth
- Clean, airtight glass bottle for storage
Step-by-Step Preparation
- Prepare Onion: Roughly chop the red onion into small pieces. The smaller the pieces, the more surface area for infusion.
- Combine & Heat: Pour the carrier oil into a small saucepan. Add the chopped onion.
- Gentle Infusion: Heat the mixture on very low heat. Simmer gently for about 15-20 minutes, or until the onion pieces turn brownish and crispy. Ensure the heat is low enough that the onion doesn’t burn, just infuses its goodness into the oil.
- Cool Down: Remove the saucepan from the heat and let the oil cool completely.
- Strain & Store: Once cool, strain the oil through a fine-mesh strainer or cheesecloth into your clean, airtight glass bottle. Press firmly on the onion pieces to extract all the infused oil.
How to Use Your Onion Hair Oil
- Application: Take a small amount of the infused oil and massage it into your scalp using your fingertips. You can also apply it lightly to the lengths of your hair.
- Massage: Gently massage your scalp for 5-10 minutes to help stimulate the area.
- Rest: Leave the oil on for at least 1-2 hours. If the smell isn’t too overpowering for you, it can be left overnight.
- Wash Out: Shampoo your hair thoroughly. You may need to wash twice to completely remove the onion scent. Follow with your regular conditioner.
Beauty Bestie Tips for Onion Hair Oil
- Combatting the Scent: To help with the onion smell, you can add a few drops of essential oils like lavender, rosemary, or peppermint to the *cooled and strained* oil before storing.
- Frequency: Use once a week.
- Storage: Store in a cool, dark place. Due to the fresh ingredients, it’s best to use this oil within 2-3 weeks, or refrigerate for up to a month.
General Tips for Using DIY Hair Oils
Making your own herbal hair oils is super rewarding, but a few general tips can help you get the most out of your creations and ensure a smooth, enjoyable experience!
1. Always Do a Patch Test
This is crucial, especially when trying a new ingredient. Before applying the oil all over your scalp, dab a small amount on a discreet area of skin (like behind your ear or on your inner arm) and wait 24 hours. Check for any redness, itching, or irritation. If all looks good, you’re ready to go!
2. Consistency is Your Best Friend
Natural remedies work gently and gradually. Don’t expect immediate, miraculous results after one use. Regular application (1-2 times a week) is key to seeing the benefits over time. Think of it as nurturing your hair, not a quick fix.
3. Massage Matters
When applying hair oil, don’t just slather it on! Take 5-10 minutes to gently massage the oil into your scalp with your fingertips. This not only helps distribute the oil but also stimulates blood flow to the scalp, which can create a more supportive environment for healthier-looking hair.
4. Don’t Overdo It
A little goes a long way, especially with DIY oils. Applying too much can leave your hair greasy and difficult to wash out. Start with a small amount and add more if needed. Focus on the scalp first, then lightly coat the lengths.
5. Proper Storage for Longevity
Since these oils are homemade with fresh ingredients, they don’t have the same shelf life as store-bought products with preservatives. Store your infused oils in clean, airtight glass bottles in a cool, dark place. For recipes containing fresh ingredients like onion, it’s often best to use them within 2-4 weeks or store them in the refrigerator to extend their life.
6. Warm Up Your Oil (Optional but Lovely)
Gently warming your hair oil before application can enhance the experience. You can place the bottle in a bowl of hot water for a few minutes (never microwave oil directly). Warm oil can feel more soothing and might spread more easily, but always test the temperature before applying to avoid burns!
7. Protect Your Bedding
If you’re leaving the oil on overnight for a deep conditioning treatment, make sure to cover your hair with a shower cap or wrap an old towel around your pillow to protect your linens from oil stains.
Common Questions & Answers About DIY Hair Oils
You’ve got questions, and I’ve got answers! Let’s clear up some common thoughts you might have about using your homemade herbal hair oils.
Q: How often should I use these DIY hair oils?
A: For best results, aim for 1-2 times a week. This allows enough time for the oils to work their magic without over-saturating your scalp or weighing down your hair. Consistency is more important than daily use!
Q: Can I leave these hair oils on overnight?
A: Absolutely! Leaving the oil on overnight can provide a deeper conditioning treatment, especially if your hair is dry or needs extra love. Just make sure to cover your hair with a shower cap or an old towel to protect your pillowcase. If you find the overnight treatment too heavy, a 1-2 hour application works great too.
Q: Will homemade hair oils make my hair greasy?
A: If used correctly, they shouldn’t! The key is to use a moderate amount, focus on massaging into the scalp, and then lightly coating the lengths. If your hair feels greasy after washing, you might be using too much oil, or your shampoo isn’t strong enough to remove it. Try a clarifying shampoo or a second wash.
Q: Are there any side effects to using herbal hair oils?
A: Generally, natural ingredients are gentle, but everyone’s body is different. The most common