Unlock Radiant Skin: Your Guide to a DIY Hydrating Overnight Face Gel
Hey there, beauty besties! ✨ Do you dream of waking up to wonderfully soft, glowing skin without a hefty price tag or complicated routines? If so, you’re in the right place! We all want that fresh, revitalized look, and guess what? The secret might just be hiding in your kitchen cabinet. Today, we’re diving into the wonderful world of homemade skincare with a special focus on a truly remarkable creation: our very own DIY overnight hydrating face gel. This isn’t about magical quick fixes, but rather about harnessing the gentle power of nature to support your skin’s natural radiance and hydration.
Forget confusing labels and endless ingredient lists. We’re going back to basics with simple, yet potent, ingredients that have been cherished for centuries for their skin-loving properties. Imagine combining the soothing touch of aloe vera gel, the nourishing qualities of okra gel, the antioxidant boost from clove skincare and green tea skincare, and the skin-loving benefits of vitamin E gel and glycerin skincare. Together, these natural wonders form a powerhouse homemade moisturizer designed to work its magic while you sleep.
This comprehensive guide will walk you through everything you need to know about creating and using your own hydrating face gel. We’ll explore the incredible benefits of each ingredient, provide a detailed step-by-step recipe, and share essential tips for safe and effective use. Our goal is to empower you to nourish your skin the natural way, promoting a healthy, dewy complexion that feels as good as it looks. Ready to embark on your journey to beautiful, well-hydrated skin? Let’s get started!
Table of Contents
- Understanding the Power of Your Ingredients
- Your Step-by-Step DIY Overnight Hydrating Face Gel Recipe
- How to Use Your DIY Overnight Gel for Best Results
- Your Morning Skincare Routine After Using the Gel
- Storage and Shelf Life Tips
- Important Safety Tips for DIY Skincare
- The Importance of Patch Testing
- Frequently Asked Questions About DIY Hydrating Gels
- Final Thoughts on Your Natural Beauty Journey
- Disclaimer: Important Information to Consider
Understanding the Power of Your Ingredients
Before we dive into the recipe, let’s get to know the stars of our DIY night gel. Each ingredient brings unique benefits that contribute to hydrated, soft, and healthy-looking skin.
Aloe Vera Gel: The Ultimate Soother
Aloe vera is a true skincare superstar, renowned for its incredible soothing and hydrating properties. It’s packed with vitamins, enzymes, minerals, and amino acids. When applied to the skin, aloe vera gel can provide a refreshing burst of moisture, helping to calm irritated skin and promote a healthy glow. Its natural polysaccharides bind moisture to the skin, making it an excellent base for any homemade moisturizer. (Consider internal link to an article about ‘Aloe Vera Beauty Hacks’)
Okra Gel: Nature’s Hydrating Secret
Okra, often known for its culinary uses, is gaining traction in the beauty world for its mucilage content. This natural gel-like substance found in okra pods is incredibly hydrating and provides a silky smooth texture. Okra gel can help to moisturize the skin, making it feel supple and soft. It also contains vitamins C and A, which are beneficial for skin health, supporting a smoother appearance.
Cloves: Aromatic Antioxidant Boost
More than just a spice, cloves offer powerful antioxidant properties. In clove skincare, a small amount of clove extract (often in the form of a diluted infusion) can help protect the skin from environmental stressors. While its strong nature means it must be used sparingly and diluted, its potential to promote a clear complexion is noteworthy. Remember, less is often more with potent natural ingredients like cloves.
Green Tea: The Calming Antioxidant Powerhouse
Green tea isn’t just a refreshing drink; it’s a skin savior! Rich in polyphenols, especially catechins like EGCG, green tea skincare is celebrated for its antioxidant and anti-inflammatory benefits. Applying green tea topically can help soothe the skin, reduce the appearance of redness, and protect against free radical damage. It’s a wonderful ingredient for promoting a calm, even-toned complexion. (Consider internal link to an article on ‘Benefits of Green Tea for Skin’)
Vitamin E Oil: The Skin’s Best Friend
Vitamin E is a fat-soluble antioxidant that plays a crucial role in maintaining healthy skin. When incorporated into your DIY night gel, vitamin E gel (or oil) can help nourish the skin, supporting its natural barrier function. It’s often praised for its ability to improve the appearance of skin texture and provide a boost of hydration, leaving your skin feeling smooth and soft.
Glycerin: The Humectant Hero
Glycerin is a humectant, meaning it draws moisture from the air into your skin. This makes it an incredibly effective hydrating ingredient, especially when combined with other moisturizing components. Glycerin skincare can help keep your skin feeling hydrated and plump, improving its elasticity and softness. It’s a staple in many commercial moisturizers for a good reason – it works! Even dermatologists often recommend glycerin for its gentle yet powerful moisturizing capabilities.
Your Step-by-Step DIY Overnight Hydrating Face Gel Recipe
Now for the exciting part! Here’s how you can create your very own homemade moisturizer for overnight skincare. Remember, precision is key for consistent results and safety.
What You’ll Need:
- Fresh Okra Pods: 3-4 medium-sized pods
- Aloe Vera Leaf or Pure Aloe Vera Gel: 2 tablespoons (if using fresh, prepare gel first)
- Dried Cloves: 5-6 whole cloves
- Green Tea Bag or Loose Green Tea Leaves: 1 bag or 1 teaspoon loose leaves
- Vitamin E Oil: 1 capsule (approximately 400 IU)
- Vegetable Glycerin: 1/2 teaspoon
- Distilled Water: 1/2 cup (for green tea and okra)
- Small saucepan
- Fine mesh strainer or cheesecloth
- Clean, airtight container (glass jar recommended)
Instructions:
-
Prepare the Okra Gel:
- Wash the okra pods thoroughly.
- Slice them into small pieces.
- In a small saucepan, combine the sliced okra with 1/2 cup of distilled water.
- Bring to a gentle boil, then reduce heat and simmer for 10-15 minutes, or until the water thickens and the okra turns soft and slimy. This is the mucilage we want!
- Let it cool completely.
- Strain the okra mixture through a fine mesh strainer or cheesecloth, pressing gently to extract all the gel. Discard the solids. You should have about 2-3 tablespoons of okra gel.
-
Brew the Clove and Green Tea Infusion:
- In a separate heat-proof cup, place the dried cloves and green tea (from the bag or loose leaves).
- Boil about 1/4 cup of distilled water and pour it over the cloves and green tea.
- Let it steep for 15-20 minutes, allowing the beneficial compounds to infuse into the water.
- Strain the liquid, discarding the solids. Let it cool completely. You will use about 1 tablespoon of this concentrated infusion.
-
Combine All Ingredients:
- In your clean, airtight container, add the prepared okra gel and aloe vera gel.
- Add 1 tablespoon of the cooled clove and green tea infusion.
- Carefully snip open the vitamin E capsule and squeeze its oil into the mixture.
- Add the 1/2 teaspoon of vegetable glycerin.
-
Mix Thoroughly:
- Using a clean spoon or a small whisk, mix all the ingredients thoroughly until well combined and you achieve a smooth, consistent gel-like texture.
- Ensure there are no lumps and all components are fully integrated.
-
Your DIY hydrating face gel is ready!
How to Use Your DIY Overnight Gel for Best Results
Applying your overnight skincare gel correctly is just as important as making it! Follow these steps for optimal absorption and benefits:
-
Cleanse Your Skin:
Before applying any treatment, always start with a clean canvas. Use a gentle cleanser to remove makeup, dirt, and impurities from your face and neck. Pat your skin dry with a clean towel.
-
Tone (Optional):
If you use a toner, apply it now to balance your skin’s pH and prepare it for the gel.
-
Apply the Gel:
Take a small, pea-sized amount of your DIY night gel onto your fingertips. Gently massage it evenly over your face and neck using upward, circular motions. Avoid getting it too close to your eyes. Remember, a little goes a long way!
-
Let it Absorb:
Allow the gel a few minutes to fully absorb into your skin before lying down. This prevents it from transferring to your pillow and ensures your skin gets all the goodness.
-
Sleep and Let it Work:
Leave the gel on overnight. As you sleep, the nourishing ingredients will work to hydrate and revitalize your skin. This is the beauty of overnight skincare – it works when your body is naturally in repair mode.
-
Consistency is Key:
For best results, incorporate this homemade moisturizer into your nightly routine 2-3 times a week, or as needed, depending on your skin type and concerns. Listen to your skin!
Your Morning Skincare Routine After Using the Gel
Waking up to soft, refreshed skin is a wonderful feeling! Here’s how to follow up your overnight skincare routine in the morning:
-
Gentle Cleansing:
In the morning, rinse your face with lukewarm water. You can use a very mild cleanser if your skin feels oily, but often a splash of water is enough to remove any residue from the gel. Pat dry.
-
Tone (Optional):
Follow with your usual morning toner.
-
Serum (Optional):
If you use any morning serums (like a Vitamin C serum), apply them now.
-
Day Moisturizer:
Apply your regular daytime moisturizer to lock in hydration.
-
Sunscreen:
This step is non-negotiable! Always finish your morning routine with a broad-spectrum sunscreen with at least SPF 30, even on cloudy days. Sun protection is crucial for maintaining healthy, radiant skin, especially when using active ingredients.
Storage and Shelf Life Tips
Since this DIY hydrating face gel is made with natural ingredients and no harsh preservatives, proper storage is vital to maintain its efficacy and prevent bacterial growth.
-
Airtight Container:
Always store your gel in a clean, airtight glass container. Glass is preferred as it’s non-reactive and easy to sanitize.
-
Refrigeration:
This is crucial! Due to the fresh ingredients, your gel must be stored in the refrigerator. The cool temperature helps slow down spoilage.
-
Avoid Contamination:
Always use a clean spatula or spoon to scoop out the gel, rather than dipping your fingers directly into the container. This minimizes the introduction of bacteria.
-
Labeling:
Clearly label your container with the date you made the gel. This will help you keep track of its freshness.
Shelf Life:
Given the fresh nature of the ingredients, your homemade moisturizer will have a relatively short shelf life. When stored properly in the refrigerator, it should last for **1 to 2 weeks**. If you notice any changes in color, smell, or texture, or if any mold appears, discard it immediately. It’s always better to make smaller batches more frequently than risk using an expired product.
Important Safety Tips for DIY Skincare
While natural ingredients can be wonderful for your skin, it’s essential to approach DIY skincare with caution and awareness. Your skin’s health is paramount!
-
Hygiene is Key:
Ensure all your tools, containers, and hands are thoroughly clean and sterilized before you begin preparing the gel. This prevents the introduction of bacteria that can cause spoilage or skin reactions.
-
Ingredient Quality:
Use high-quality, fresh ingredients. For aloe vera, if using a fresh leaf, ensure it’s well-washed. For store-bought ingredients, opt for pure, organic, and reputable brands.
-
Avoid Eyes and Mucous Membranes:
Be careful when applying the gel, especially around your delicate eye area and other sensitive mucous membranes. Ingredients like clove can be irritating if used too close to these areas.
-
Listen to Your Skin:
Pay close attention to how your skin reacts. If you experience any redness, itching, burning, or discomfort, rinse the product off immediately with cool water and discontinue use.
-
No Substitutions for Medical Advice:
Remember, DIY skincare is meant to complement a healthy routine, not replace professional dermatological advice or medical treatments for skin conditions. If you have persistent skin issues or concerns, always consult a dermatologist. They can provide guidance based on scientific evidence, a point emphasized by organizations like the American Academy of Dermatology (AAD) and the Mayo Clinic.
The Importance of Patch Testing
This step cannot be stressed enough, especially with DIY skincare! Even natural ingredients can cause allergic reactions or sensitivities in some individuals.
How to Perform a Patch Test:
-
Choose a Small, Inconspicuous Area:
Select a small patch of skin, such as behind your ear, on your inner forearm, or on the side of your neck.
-
Apply a Small Amount:
Apply a tiny amount of your DIY hydrating face gel to this area.
-
Wait and Observe:
Leave the gel on for at least 24-48 hours without washing it off. During this time, check the area for any signs of redness, itching, burning, swelling, or irritation.
-
Evaluate Results:
- No Reaction: If you don’t experience any adverse reactions, it’s generally safe to proceed with applying the gel to your face.
- Reaction: If you notice any irritation, immediately wash off the gel and discontinue use. It means one or more ingredients might not be suitable for your skin.
Patch testing is a simple, yet crucial step to ensure your natural beauty journey is a safe and enjoyable one. This is a common recommendation by skincare experts and health organizations like the National Institutes of Health (NIH) when introducing new products.
Frequently Asked Questions About DIY Hydrating Gels
Let’s address some common questions you might have about this DIY night gel and homemade moisturizer.
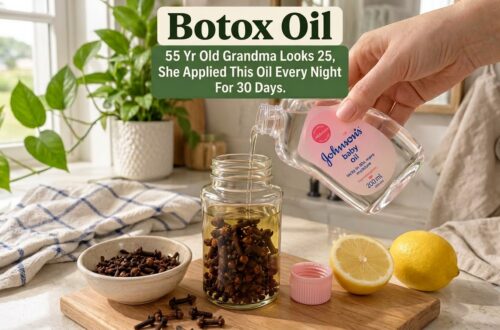
Q1: Can this DIY gel erase wrinkles or provide ‘Botox-like’ effects?
A: No. It’s important to have realistic expectations. This DIY hydrating face gel is formulated to provide deep hydration, improve skin softness, and support your skin’s natural barrier. While well-hydrated skin can appear plumper and smoother, giving a more youthful look, homemade remedies cannot erase wrinkles or replicate the effects of medical procedures like Botox. It focuses on supporting skin health and radiance through natural means, not on reversing signs of aging in a clinical way.
Q2: How often should I use this overnight skincare gel?
A: We recommend using this homemade moisturizer 2-3 times a week as part of your overnight skincare routine. If your skin is particularly dry, you might use it more frequently, but always listen to your skin and adjust as needed. Pay attention to how your skin feels and looks after each application.
Q3: Is this gel suitable for all skin types?
A: While the ingredients are generally gentle, individual skin reactions can vary. Aloe vera is known to be soothing for many, and glycerin is well-tolerated. However, sensitive skin types should be particularly diligent with patch testing, especially due to the clove infusion. If you have very oily or acne-prone skin, observe how your skin responds, as some ingredients might be richer than what your skin is used to. Generally, it’s formulated for normal to dry skin types seeking hydration.
Q4: Why can’t I use fresh clove oil instead of an infusion?
A: Pure clove oil is highly concentrated and can be very irritating or even sensitizing when applied directly to the skin, particularly on the face. Using a dilute infusion made from whole cloves allows you to extract some of their beneficial compounds (like antioxidants) in a much milder form, significantly reducing the risk of irritation. Always prioritize safety when using potent natural ingredients.
Q5: Can I add other ingredients to this DIY night gel?
A: While it might be tempting to experiment, we advise sticking to the provided recipe, especially when you’re just starting out. Adding new ingredients can change the gel’s stability, shelf life, and potentially introduce new allergens or irritants. If you do wish to customize, research the new ingredient thoroughly and perform a new patch test with your modified gel.
Final Thoughts on Your Natural Beauty Journey
Embracing natural beauty through DIY skincare is a rewarding journey. This DIY hydrating face gel offers a beautiful way to connect with nature’s goodness and provide your skin with the hydration and care it deserves. By choosing simple, potent ingredients like aloe vera gel, okra gel, clove skincare, green tea skincare, vitamin E gel, and glycerin skincare, you’re investing in a routine that is gentle, effective, and deeply nourishing. Remember, true radiance comes from consistent, loving care and listening to your skin’s needs. Enjoy the process of creating something wonderful for yourself, and revel in the feeling of soft, supple, naturally glowing skin each morning.
We hope this guide inspires you to try this wonderful homemade moisturizer and experience the benefits for yourself. Your skin will thank you!
Disclaimer: Important Information to Consider
Please note that the information provided in this article about the DIY hydrating face gel is for educational and informational purposes only and is not intended as medical advice. While natural ingredients offer many benefits, DIY skincare remedies are not a substitute for professional dermatological care or medical treatments. Individual results may vary, and allergic reactions or sensitivities can occur even with natural ingredients. Always perform a patch test before applying any new product to your face. If you have any pre-existing skin conditions, allergies, or concerns, please consult with a qualified dermatologist or healthcare professional before trying any new skincare regimen. The creators of this content are not responsible for any adverse reactions or outcomes from using the recipes or information presented herein. Your health and safety are our top priority.
Are you excited to give this amazing DIY night gel a try? Tell us what natural ingredients you swear by for glowing skin!
Comment ‘Recipe’ below if you’re ready to unlock radiant skin!