Who doesn’t dream of that radiant, almost translucent complexion known as “glass skin”? This coveted look, popularized by Korean beauty, often seems reserved for those with extensive routines and expensive products. But guess what, beauty bestie? Achieving that pore-less, dewy glow isn’t just a fantasy! We’re here to reveal a secret recipe using humble, everyday ingredients you might already have in your pantry.
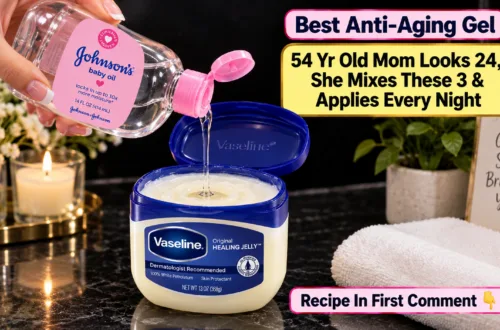
Forget luxury serums for a moment! Two simple staples – baby oil and petroleum jelly (like Vaseline) – can be blended with a few other skin-loving kitchen ingredients to create a deeply nourishing overnight mask. This DIY miracle works its magic by infusing your skin with lightweight, occlusive moisture, locking in hydration, and smoothing out rough textures. The result? Light bounces off your face evenly, giving you that incredible lit-from-within glow when you wake up.
What is “Glass Skin” and Why Do We Love It?
Glass skin refers to a complexion that is so incredibly smooth, clear, and luminous that it appears almost transparent, like a pane of glass. It’s not about being pale, but about having skin that is intensely hydrated, healthy, and reflective. It embodies vitality and youth, making it a highly sought-after beauty goal.
The secret lies in deep hydration and a smooth skin texture, allowing light to reflect evenly and create that signature glow. And the best part? You don’t need a fancy dermatologist or an endless budget to achieve it.
Your DIY “Glass Skin” Overnight Mask: The Secret Recipe
This powerful overnight mask harnesses the benefits of occlusive ingredients to seal in moisture and natural skin-boosters to nourish and rejuvenate. Let’s dive into the magic formula!
Why These Ingredients Work Wonders
- Baby Oil: A fantastic lightweight occlusive that helps prevent water loss from the skin, keeping it soft and supple.
- Petroleum Jelly (Vaseline): A classic occlusive that creates a protective barrier, locking in moisture and aiding skin barrier repair. It’s surprisingly non-comedogenic for most.
- Aloe Vera Gel: A soothing and hydrating powerhouse, rich in vitamins and antioxidants, known for its healing and moisturizing properties.
- Rice Water Concentrate: Packed with vitamins, minerals, and amino acids, rice water brightens, smooths, and minimizes pores, contributing to that glass-like texture.
- Raw Honey: A natural humectant, honey draws moisture from the air into your skin, providing intense hydration. It also has antiseptic and anti-inflammatory properties.
- Vitamin E Oil: A potent antioxidant that helps protect skin from damage, promotes healing, and adds a boost of nourishment for a healthy glow.
Ingredients You’ll Need:
- Baby oil – 1 tsp
- Vaseline petroleum jelly – ½ tsp
- Aloe-vera gel (fresh or store-bought) – 1 tsp
- Rice-water concentrate* – 1 tsp
- Raw honey – ½ tsp
- Vitamin E oil (from a capsule) – 3 drops
*To make rice-water concentrate: Rinse 2 tablespoons of raw rice thoroughly. Place it in a bowl and cover with ½ cup of warm water. Swirl gently and let it sit for about 15 minutes. Strain the liquid into a small saucepan. Boil the liquid on low heat until it reduces significantly, leaving you with about 1 tablespoon of concentrated rice water. Let it cool completely before use.
Step-by-Step Procedure:
- Melt & Mix the Bases: Place the baby oil and Vaseline in a sterile, heat-safe glass bowl.
- Gentle Warming: To help the Vaseline melt and blend smoothly, place this small bowl inside a larger bowl filled with hand-hot (not boiling) water. Let it sit for a few minutes, stirring gently until the Vaseline has fully melted and combined with the baby oil.
- Add Your Boosters: Once the baby oil and Vaseline mixture is smooth and slightly cooled (but still liquid), stir in the aloe-vera gel, rice-water concentrate, raw honey, and vitamin E oil.
- Whisk to Perfection: Whisk all the ingredients together thoroughly until you achieve a uniform, creamy consistency.
- Store Safely: Transfer your freshly made glass skin mask into a clean, airtight container. Store it in the refrigerator to keep it fresh. It should last for about 5-7 days.
How to Apply Your Glass Skin Mask for Best Results
This mask is designed to work its magic overnight! For the best results, incorporate it into your evening routine:
- Cleanse: Start with a thoroughly cleansed face. Remove all makeup and wash your face with a gentle cleanser.
- Tone (Optional): If you use a toner, apply it before the mask.
- Apply Generously: Take a small amount of your DIY glass skin mask and gently apply a thin, even layer all over your face, avoiding the immediate eye area. A little goes a long way!
- Sleep On It: Let the mask work its magic while you sleep. The occlusive layers will help seal in all that goodness.
- Rinse in the Morning: In the morning, gently wash your face with lukewarm water. You’ll wake up to incredibly soft, dewy, and luminous skin!
Tips for Maintaining Your Glow
- Consistency is Key: Use this mask 2-3 times a week for noticeable results.
- Sun Protection: Always follow up with a broad-spectrum SPF during the day, especially after using deeply hydrating treatments.
- Hydrate from Within: Drink plenty of water throughout the day to support skin health.
- Gentle Skincare: Avoid harsh cleansers or exfoliants that can strip your skin’s natural barrier.
Achieving glass skin doesn’t have to break the bank or involve complicated steps. With this simple, natural DIY overnight mask, you can wake up to a dewy, lit-from-within complexion at any age. Give it a try and embrace your beautiful, healthy glow!