Are your plants looking a little lackluster? Do you dream of a thriving garden bursting with vibrant flowers and bountiful vegetables, all grown with natural, organic care? You’re in luck! Nurturing your garden doesn’t require expensive, chemical-laden products. In fact, some of the most effective plant foods can be made right in your own home with everyday ingredients. This not only saves you money but also contributes to a healthier, more sustainable garden environment.
At Garden – L. Quyên, we believe that gardening should be enjoyable, accessible, and kind to the earth. That’s why we’re excited to share six fantastic DIY organic fertilizer recipes that will help your plants flourish. From rich compost tea to calcium-packed eggshell extracts, these homemade solutions provide essential nutrients for robust growth, stronger roots, and more resilient plants.
Why Go Natural with Your Plant Food?
Using natural and homemade fertilizers offers numerous benefits:
- Cost-Effective: You’ll use materials you might otherwise discard, saving money on commercial fertilizers.
- Environmentally Friendly: Reduces chemical runoff and supports beneficial soil microorganisms.
- Improves Soil Health: Organic matter enriches the soil structure, water retention, and nutrient availability long-term.
- Safe for You and Your Pets: No harsh chemicals means a safer environment for everyone.
- Customizable: You can tailor the nutrients to your plants’ specific needs.
Key Principles for DIY Organic Fertilizers
Before you start brewing, keep these tips in mind:
- Dilution is Key: Always dilute your homemade concentrates. Strong solutions can burn plants.
- Observe Your Plants: Pay attention to how your plants respond. Adjust frequency and dilution as needed.
- Store Properly: Most liquid fertilizers are best used fresh. If storing, keep them in airtight containers in a cool, dark place, and label them clearly.
- Smell Test: Some natural fertilizers can have a strong odor. Apply early in the morning or late in the evening.
6 Natural Liquid Fertilizer Recipes for Thriving Home Gardens
1. Homemade Compost Tea Recipe
Compost tea is a liquid goldmine for your garden, packed with beneficial microbes and nutrients. It’s a fantastic all-purpose fertilizer that boosts soil health and plant vitality.
Ingredients:
- 1 part mature compost (from your compost bin!)
- 5 parts non-chlorinated water (rainwater or tap water left out for 24 hours)
- A porous bag (like a burlap sack or old pillowcase)
- A large bucket or container
Instructions:
- Prepare: Place the compost into the porous bag.
- Steep: Submerge the bag of compost in the bucket filled with water.
- Brew: Let it steep for 24-48 hours.
- Aeration: Stir the mixture daily to oxygenate it, which helps beneficial microbes multiply.
- Strain: Remove the compost bag. The liquid remaining is your compost tea.
- Apply: Pour the undiluted compost tea directly around the base of your plants, near the roots. You can also use it as a foliar spray for an extra boost.
2. Bone Meal Slurry
Bone meal is an excellent source of phosphorus and calcium, crucial for strong root development, flowering, and fruiting. A slurry makes these nutrients readily available.
Ingredients:
- 1 cup bone meal
- 1 gallon water
- A bucket with a lid
Instructions:
- Combine: Add the bone meal to the water in the bucket.
- Soak: Cover and let it soak overnight (8-12 hours).
- Mix: Before applying, shake or stir the mixture vigorously to ensure the bone meal is well suspended.
- Apply: Use this slurry to water plants that are flowering or setting fruit, or to encourage strong root growth in young plants.
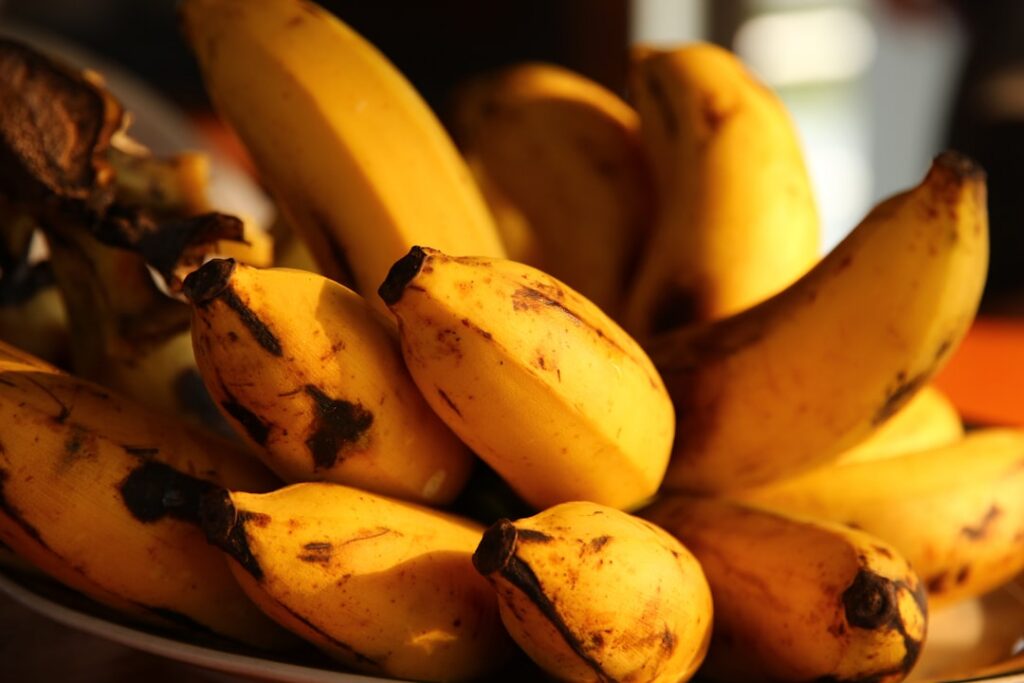
3. Banana Peel Soak Fertilizer
Don’t toss those banana peels! They’re rich in potassium, a vital nutrient for overall plant health, strong stems, disease resistance, and fruit development. This banana peel soak fertilizer is easy to make and highly effective.
Ingredients:
- 2-3 banana peels, chopped
- 1 gallon water
- A large jar or container with a lid
Instructions:
- Chop: Cut the banana peels into small pieces to increase their surface area.
- Ferment: Place the chopped peels into the container and fill with water. Cover loosely to allow for gas exchange.
- Steep: Let the mixture ferment for approximately 5 days in a warm spot. You’ll notice some bubbling and a slightly sweet, earthy smell.
- Strain: Strain out the banana peel pieces.
- Dilute & Apply: Dilute the banana peel liquid with water at a 1:4 ratio (1 part banana concentrate to 4 parts water). Use this potassium-rich solution to water your flowering and fruiting plants, such as tomatoes, peppers, and roses.
4. Fish Emulsion
Fish emulsion is a potent, nitrogen-rich fertilizer that promotes lush, leafy growth. While it might smell a bit strong, your plants will thank you for the nutrient boost.
Ingredients:
- 1 part fish scraps (bones, heads, guts – ask your local fishmonger!)
- 3 parts water
- A large, airtight bucket or container
Instructions:
- Combine: Place the fish scraps in the bucket and cover with water.
- Ferment: Seal the bucket tightly and let it ferment for at least 2 weeks in a well-ventilated outdoor area (it will smell!).
- Stir: Stir the mixture every few days to aid decomposition.
- Strain: After 2 weeks, strain the liquid through a fine mesh or cheesecloth to remove solids.
- Dilute & Apply: Dilute the concentrate heavily at a 1:10 ratio (1 part fish emulsion to 10 parts water). Use for leafy greens, herbs, and any plant needing a nitrogen boost.
5. Eggshell & Vinegar Extract Liquid Calcium
An eggshell vinegar extract liquid calcium solution is excellent for plants requiring extra calcium, preventing issues like blossom end rot in tomatoes and peppers. This is one of the most effective DIY organic fertilizer recipes for calcium deficiency.
Ingredients:
- 10-12 clean, crushed eggshells
- 2 cups white vinegar
- A glass jar with a lid
Instructions:
- Crush: Thoroughly wash and dry eggshells, then crush them into small pieces. The finer they are, the faster they’ll dissolve.
- Soak: Place the crushed eggshells in the glass jar and pour vinegar over them.
- React: Cover loosely. The mixture will fizz as the acid in the vinegar reacts with the calcium carbonate in the eggshells. Let it sit for 24-48 hours, or until the fizzing stops.
- Strain & Store: Once the fizzing has ceased, strain out any remaining eggshell pieces. The liquid is your calcium concentrate. Store in a sealed container.
- Dilute & Apply: Use 1 tablespoon of this concentrate per gallon of water. Apply to plants that need a calcium boost, especially fruiting vegetables.
6. Seaweed Concentrate
Seaweed is a powerhouse of trace minerals, hormones, and micronutrients that can stimulate growth, strengthen roots, and enhance plant resilience. If you live near the coast, it’s a fantastic free resource!
Ingredients:
- 1 part dried seaweed (rinsed well if collected from the beach)
- 5 parts water
- A large bucket or container with a lid
Instructions:
- Prepare: If using fresh seaweed, rinse it thoroughly to remove salt. Chop it into smaller pieces.
- Soak: Place the seaweed in the bucket and cover with water.
- Ferment: Cover the bucket and let it soak for 2-3 weeks. Stir occasionally.
- Strain: Strain the liquid to remove the seaweed solids.
- Dilute & Apply: Dilute the seaweed concentrate with water at a 1:5 ratio (1 part concentrate to 5 parts water). Use as a soil drench or, even better, as a foliar spray directly onto plant leaves for quick absorption.
Important Considerations for Using Homemade Fertilizers
- Observe Your Plants: Every plant is unique. Pay attention to how your plants react to these fertilizers. If you notice yellowing, wilting, or stunted growth, adjust your application.
- Less is More: It’s always better to under-fertilize than over-fertilize. Too much of a good thing can lead to nutrient burn.
- Regularity: Apply these fertilizers periodically, perhaps every 2-4 weeks during the active growing season, rather than a single heavy application.
- Soil Testing: For advanced gardeners, occasional soil testing can help you understand your garden’s specific nutrient deficiencies and tailor your homemade solutions even more effectively.
Cultivate a Healthier Garden, Naturally!
Embracing these DIY organic fertilizer recipes is a rewarding step towards a more sustainable and vibrant garden. You’ll not only save money but also gain a deeper connection to your plants and the natural cycles of growth. Experiment with these homemade plant food solutions, observe the amazing results, and enjoy the satisfaction of knowing you’re nurturing your garden with the best nature has to offer.
Which of these natural liquid fertilizer recipes are you excited to try first? Share your experiences and any other DIY plant food tips in the comments below!