Baking is a wonderful way to show affection, and what could be more delightful than a sweet treat with a hidden surprise? Our ‘Hidden Heart Cupcakes’ are pure magic, revealing a vibrant red heart baked right inside a fluffy vanilla cupcake. Imagine the smiles when your loved ones discover this charming secret!
This step-by-step guide makes creating these adorable treats a breeze, perfect for birthdays, anniversaries, Valentine’s Day, or just to spread some everyday joy. Not only will we walk you through the classic Hidden Heart Cupcakes, but we’ll also explore other fun variations to keep the surprises coming. Get ready to bake some love!
Quick Overview
- Main topic: Surprise Cupcake Recipes
- Best for: Celebrations, gifting, impressing guests, showing love
- Number of recipes: 7
- Prep style: Baking, creative desserts
- Reader benefit: Easy-to-follow instructions for unique and heartwarming treats
Recipe 1: Hidden Heart Vanilla Cupcakes
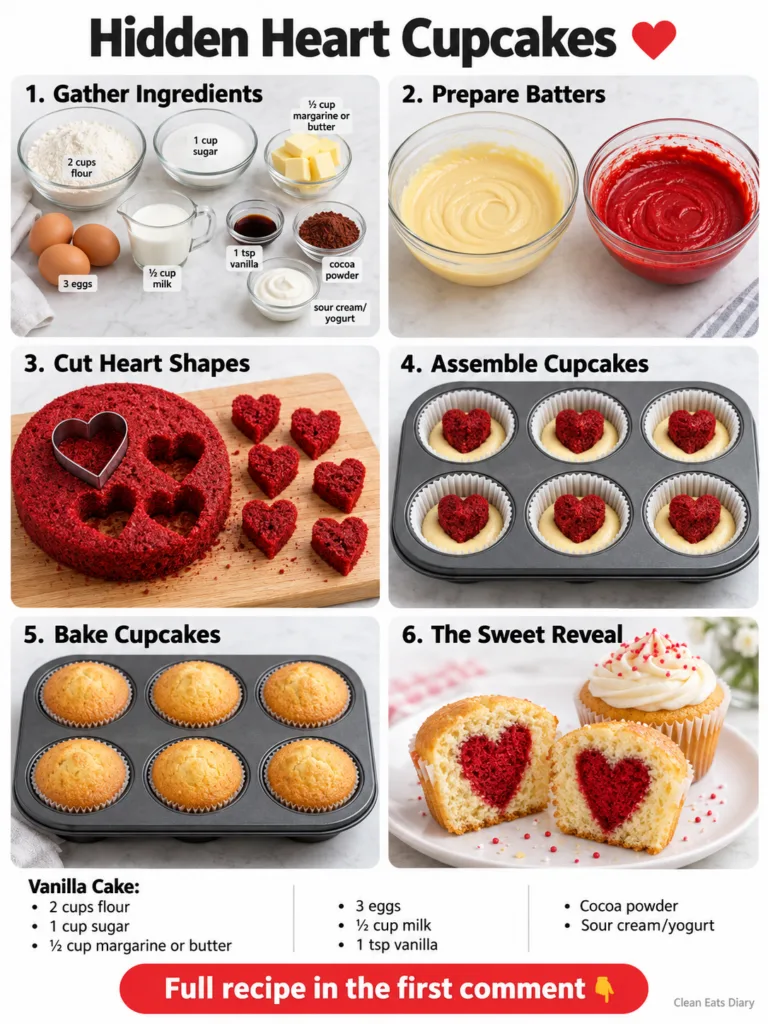
Surprise someone special with these adorable Hidden Heart Vanilla Cupcakes. The magic is in the reveal when they bite into a fluffy vanilla cake to find a vibrant red heart!
Servings: 12 cupcakes
Prep time: 45 minutes
Cook / chill / rest time: 20-22 minutes (cupcakes) + 15 minutes (heart cake)
Ingredients:
For the Red Heart Cake:
- 1 cup all-purpose flour
- ½ cup granulated sugar
- ½ cup milk
- ¼ cup unsalted butter, softened
- 1 large egg
- 1 tsp vanilla extract
- 1 tsp baking powder
- ¼ tsp salt
- Red gel food coloring (a generous amount for vibrant color)
For the Vanilla Cupcake Base:
- 2 cups all-purpose flour
- 1 cup granulated sugar
- ½ cup unsalted butter or margarine, softened
- 3 large eggs
- ½ cup whole milk
- 1 tsp vanilla extract
- 2 tsp baking powder
- ¼ tsp salt
For the Vanilla Buttercream Frosting:
- ½ cup unsalted butter, softened
- 2 cups powdered sugar
- 1-2 tablespoons milk or heavy cream
- ½ tsp vanilla extract
- Pinch of salt
Instructions:
- Prepare the Red Heart Cake: Preheat oven to 350°F (175°C). Grease and flour an 8×8 inch baking pan or a similar shallow pan. In a medium bowl, cream together the softened butter and sugar until light and fluffy. Beat in the egg and vanilla extract until well combined. In a separate bowl, whisk together the flour, baking powder, and salt. Gradually add the dry ingredients to the wet ingredients, alternating with the milk, mixing until just combined. Stir in a generous amount of red gel food coloring until a vibrant red color is achieved. Pour the batter into the prepared pan and bake for 10-15 minutes, or until a toothpick inserted into the center comes out clean. Let cool completely on a wire rack.
- Cut Heart Shapes: Once the red cake is cooled, use a small heart-shaped cookie cutter to cut out as many heart shapes as possible. Set aside.
- Prepare the Vanilla Cupcake Base: Reduce oven temperature to 325°F (160°C). Line a 12-cup muffin tin with paper liners. In a large bowl, cream together the softened butter/margarine and sugar until light and fluffy. Beat in the eggs one at a time, then stir in the vanilla extract. In a separate bowl, whisk together the flour, baking powder, and salt. Gradually add the dry ingredients to the wet ingredients, alternating with the milk, mixing until just combined.
- Assemble the Cupcakes: Spoon about 1 tablespoon of vanilla batter into the bottom of each cupcake liner. Stand a red heart upright in the center of the batter in each liner. Carefully spoon additional vanilla batter around and over the heart, filling each liner about two-thirds full. Ensure the heart is fully covered and centered.
- Bake the Cupcakes: Bake for 20-22 minutes, or until a toothpick inserted into the vanilla portion of a cupcake comes out clean. Let the cupcakes cool in the muffin tin for a few minutes before transferring them to a wire rack to cool completely.
- Make the Buttercream Frosting: In a medium bowl, beat the softened butter until creamy. Gradually add the powdered sugar, one cup at a time, beating until smooth. Add the milk or cream, vanilla extract, and salt, and beat until the frosting is light and fluffy.
- Frost and Serve: Once the cupcakes are completely cool, pipe or spread the vanilla buttercream frosting on top. You can add sprinkles for extra fun!
Storage / Serving / Usage Note:
Store cupcakes in an airtight container at room temperature for up to 3 days. For the best surprise, serve them freshly baked and cut in half for the big reveal!
Recipe 2: Chocolate Chip Surprise Cupcakes
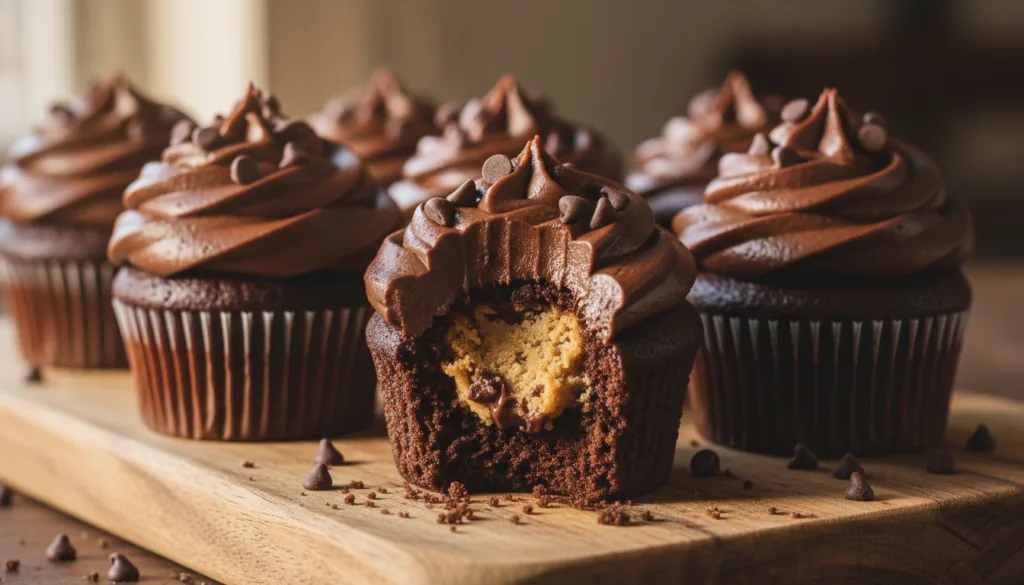
Who doesn’t love cookie dough? These cupcakes hide a delicious, edible chocolate chip cookie dough ball inside for a double dessert delight!
Servings: 12 cupcakes
Prep time: 30 minutes
Cook / chill / rest time: 18-22 minutes
Ingredients:
For the Edible Cookie Dough:
- ¼ cup unsalted butter, softened
- ¼ cup packed light brown sugar
- 2 tablespoons granulated sugar
- ½ tsp vanilla extract
- 2 tablespoons milk
- ½ cup all-purpose flour (heat-treated)
- ¼ cup mini chocolate chips
For the Vanilla Cupcakes:
- 1 ½ cups all-purpose flour
- 1 cup granulated sugar
- ½ cup unsalted butter, softened
- 2 large eggs
- ¾ cup whole milk
- 1 tsp vanilla extract
- 1 ½ tsp baking powder
- ¼ tsp salt
For the Chocolate Frosting:
- ½ cup unsalted butter, softened
- 2 cups powdered sugar
- ¼ cup unsweetened cocoa powder
- 2-3 tablespoons milk or cream
- ½ tsp vanilla extract
Instructions:
- Prepare Edible Cookie Dough: In a medium bowl, cream together butter and sugars. Beat in vanilla and milk. Gradually add heat-treated flour (toasting flour in the oven at 300°F for 5-7 mins removes harmful bacteria, then cool) until combined. Stir in mini chocolate chips. Roll into 12 small balls and chill for 15 minutes.
- Prepare Cupcakes: Preheat oven to 350°F (175°C) and line a 12-cup muffin tin. In a large bowl, cream butter and sugar. Beat in eggs and vanilla. Alternate adding dry ingredients (flour, baking powder, salt) with milk, mixing until just combined.
- Assemble: Fill each liner with about 1 tablespoon of batter. Place a chilled cookie dough ball in the center of each, then top with remaining batter, filling two-thirds full.
- Bake: Bake for 18-22 minutes, or until a toothpick comes out clean. Cool completely.
- Make Chocolate Frosting: Beat softened butter until creamy. Gradually add powdered sugar and cocoa powder. Beat in milk/cream and vanilla until smooth and fluffy.
- Frost and Serve: Frost cooled cupcakes with chocolate frosting and garnish with extra mini chocolate chips if desired.
Storage / Serving / Usage Note:
Store in an airtight container in the refrigerator for up to 3 days due to the cookie dough filling. Bring to room temperature before serving for best texture.
Recipe 3: Rainbow Swirl Cupcakes
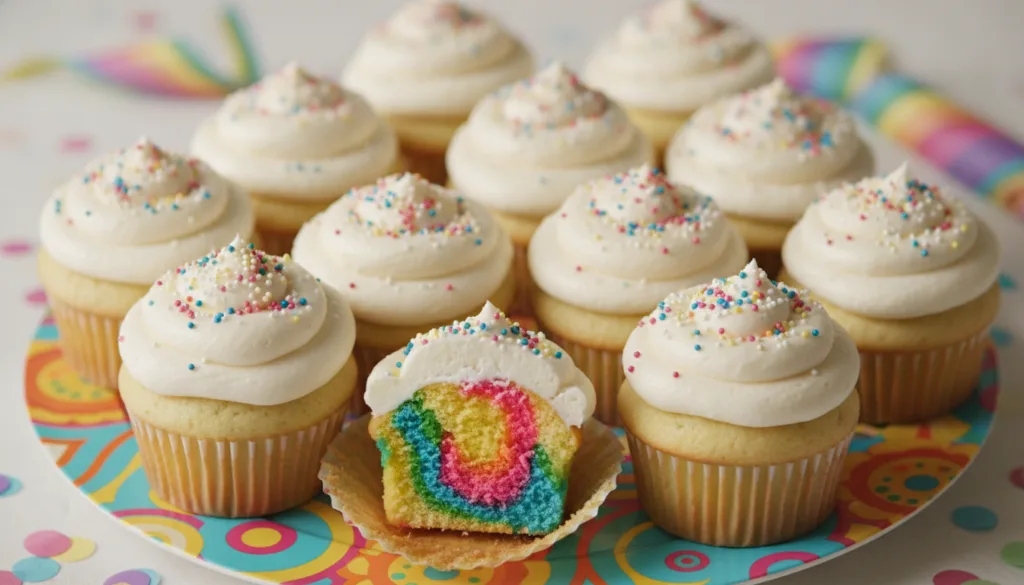
Bring a burst of color to any occasion with these fun Rainbow Swirl Cupcakes. The vibrant, swirled batter inside is a delightful surprise that kids and adults will love!
Servings: 12 cupcakes
Prep time: 30 minutes
Cook / chill / rest time: 18-20 minutes
Ingredients:
For the Vanilla Cupcakes:
- 1 ½ cups all-purpose flour
- 1 cup granulated sugar
- ½ cup unsalted butter, softened
- 2 large eggs
- ¾ cup whole milk
- 1 tsp vanilla extract
- 1 ½ tsp baking powder
- ¼ tsp salt
- Gel food coloring: red, orange, yellow, green, blue, purple
For the Vanilla Buttercream Frosting:
- ½ cup unsalted butter, softened
- 2 cups powdered sugar
- 1-2 tablespoons milk or heavy cream
- ½ tsp vanilla extract
Instructions:
- Prepare Batter: Preheat oven to 350°F (175°C) and line a 12-cup muffin tin. Prepare vanilla cupcake batter as in Recipe 1 (cream butter/sugar, beat eggs/vanilla, alternate dry/wet).
- Divide and Color: Divide the batter evenly into 6 small bowls. Add a different gel food coloring to each bowl (red, orange, yellow, green, blue, purple) and mix until vibrant.
- Assemble Swirl: Spoon alternating dollops of each colored batter into the cupcake liners until two-thirds full. Use a skewer or toothpick to gently swirl the colors together once or twice (do not overmix).
- Bake: Bake for 18-20 minutes, or until a toothpick comes out clean. Cool completely.
- Make Frosting: Prepare vanilla buttercream frosting as in Recipe 1.
- Frost and Serve: Frost cooled cupcakes and decorate with rainbow sprinkles.
Storage / Serving / Usage Note:
Store in an airtight container at room temperature for up to 3 days. Best enjoyed fresh for the most vibrant colors.
Recipe 4: Lemon Meringue Surprise Cupcakes
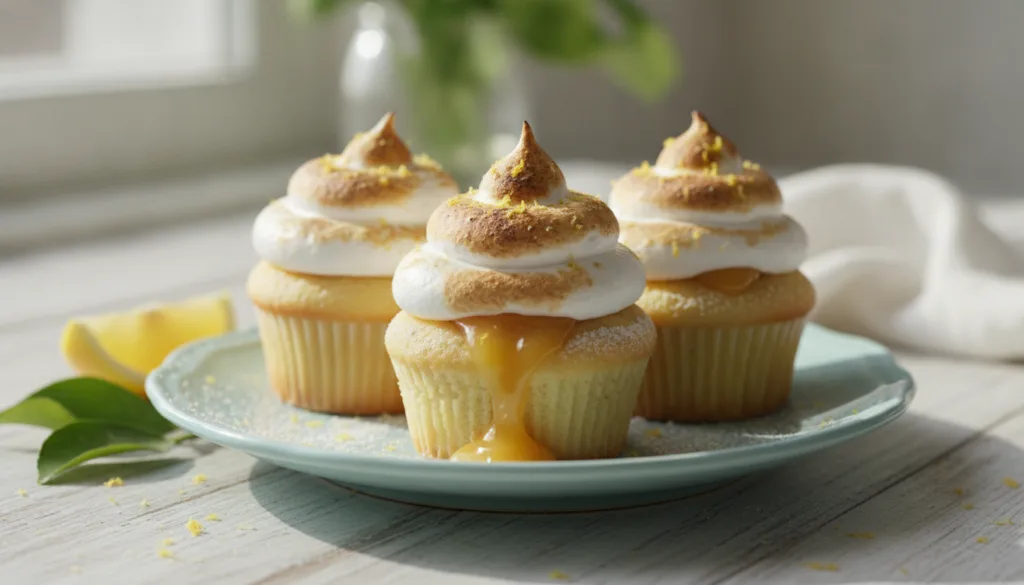
These elegant cupcakes feature a delightful surprise—a burst of zesty lemon curd hidden inside, topped with a cloud of toasted meringue.
Servings: 12 cupcakes
Prep time: 40 minutes
Cook / chill / rest time: 20-22 minutes (cupcakes) + 5 minutes (meringue torching)
Ingredients:
For the Lemon Cupcakes:
- 1 ½ cups all-purpose flour
- 1 cup granulated sugar
- ½ cup unsalted butter, softened
- 2 large eggs
- ¾ cup buttermilk (or milk + 1 tsp lemon juice)
- 1 tsp vanilla extract
- 2 tsp lemon zest
- 1 ½ tsp baking powder
- ¼ tsp salt
For the Lemon Curd Filling:
- ½ cup granulated sugar
- 2 large egg yolks
- 3 tablespoons lemon juice
- 2 tablespoons unsalted butter, cold and cubed
- Pinch of salt
For the Meringue Frosting:
- 3 large egg whites
- ¾ cup granulated sugar
- ¼ tsp cream of tartar
- ½ tsp vanilla extract
Instructions:
- Prepare Lemon Curd: In a small saucepan, whisk together sugar, egg yolks, lemon juice, and salt. Cook over medium-low heat, stirring constantly, until mixture thickens (about 5-7 minutes). Remove from heat, stir in cold butter until melted and smooth. Transfer to a bowl, cover with plastic wrap directly on the surface, and chill for at least 30 minutes.
- Prepare Lemon Cupcakes: Preheat oven to 350°F (175°C) and line a 12-cup muffin tin. In a large bowl, cream butter and sugar until light and fluffy. Beat in eggs, vanilla, and lemon zest. Alternate adding dry ingredients (flour, baking powder, salt) with buttermilk, mixing until just combined.
- Bake Cupcakes: Fill cupcake liners two-thirds full. Bake for 20-22 minutes, or until a toothpick comes out clean. Cool completely on a wire rack.
- Fill Cupcakes: Once cooled, use a cupcake corer or small knife to scoop out the center of each cupcake, creating a well. Fill each well with about 1 tablespoon of chilled lemon curd.
- Prepare Meringue: In a heatproof bowl set over a saucepan of simmering water (bain-marie), combine egg whites, sugar, and cream of tartar. Whisk constantly until sugar dissolves and mixture reaches 160°F (71°C). Remove from heat. Using an electric mixer, beat on high speed until stiff, glossy peaks form (about 5-7 minutes). Beat in vanilla.
- Frost and Torch: Pipe or spread meringue generously onto filled cupcakes. Use a kitchen torch to lightly toast the meringue until golden brown.
Storage / Serving / Usage Note:
Store in an airtight container in the refrigerator for up to 2 days. Best served the day they are made for optimal meringue texture.
Recipe 5: Strawberry Cheesecake Cupcakes
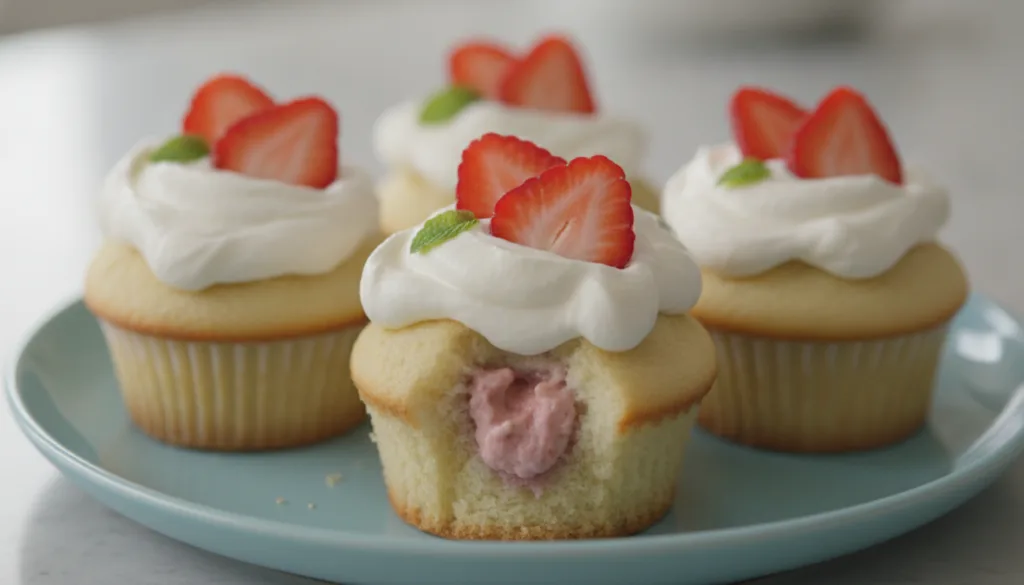
Indulge in these delightful Strawberry Cheesecake Cupcakes, featuring a creamy, tangy cheesecake filling baked right into the center of a moist vanilla cupcake.
Servings: 12 cupcakes
Prep time: 30 minutes
Cook / chill / rest time: 20-22 minutes (cupcakes) + 1 hour (chill)
Ingredients:
For the Cheesecake Filling:
- 4 oz cream cheese, softened
- ¼ cup granulated sugar
- 1 large egg yolk
- ½ tsp vanilla extract
- ¼ cup finely diced fresh strawberries
For the Vanilla Cupcakes:
- 1 ½ cups all-purpose flour
- 1 cup granulated sugar
- ½ cup unsalted butter, softened
- 2 large eggs
- ¾ cup whole milk
- 1 tsp vanilla extract
- 1 ½ tsp baking powder
- ¼ tsp salt
For the Topping:
- Whipped cream or cream cheese frosting
- Fresh strawberry slices for garnish
Instructions:
- Prepare Cheesecake Filling: In a small bowl, beat softened cream cheese and sugar until smooth. Beat in egg yolk and vanilla extract until well combined. Fold in diced strawberries. Set aside.
- Prepare Vanilla Cupcakes: Preheat oven to 350°F (175°C) and line a 12-cup muffin tin. Prepare vanilla cupcake batter as in Recipe 1 (cream butter/sugar, beat eggs/vanilla, alternate dry/wet).
- Assemble: Fill each cupcake liner about one-third full with vanilla batter. Spoon about 1 tablespoon of the cheesecake filling mixture onto the center of the batter in each liner. Top with remaining vanilla batter, filling each liner two-thirds full.
- Bake: Bake for 20-22 minutes, or until a toothpick inserted into the vanilla portion comes out clean (avoid testing the cheesecake center). Cool completely on a wire rack, then chill in the refrigerator for at least 1 hour to set the cheesecake filling.
- Garnish and Serve: Top chilled cupcakes with whipped cream or cream cheese frosting and garnish with fresh strawberry slices.
Storage / Serving / Usage Note:
Due to the cream cheese filling, store these cupcakes in an airtight container in the refrigerator for up to 3 days. They are best served chilled.
Recipe 6: Confetti Burst Funfetti Cupcakes
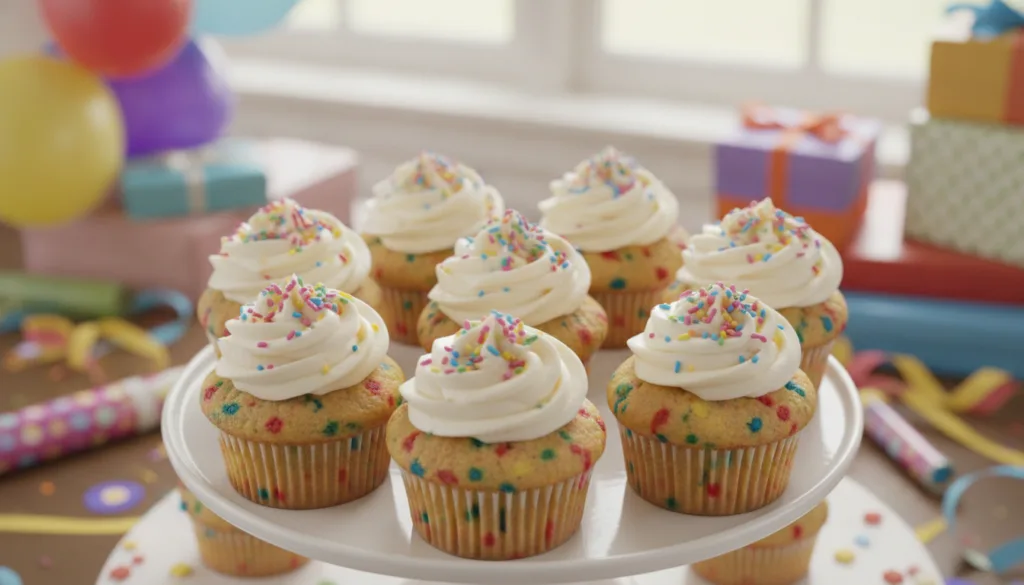
These Funfetti Cupcakes are a party in every bite! Bursting with colorful sprinkles throughout the batter, they’re a joyful surprise for any celebration.
Servings: 12 cupcakes
Prep time: 25 minutes
Cook / chill / rest time: 18-20 minutes
Ingredients:
For the Funfetti Cupcakes:
- 1 ¾ cups all-purpose flour
- 1 cup granulated sugar
- ½ cup unsalted butter, softened
- 2 large eggs
- ¾ cup whole milk
- 1 tsp vanilla extract
- 1 ½ tsp baking powder
- ¼ tsp salt
- ½ cup rainbow sprinkles (jimmie style work best)
For the Vanilla Buttercream Frosting:
- ½ cup unsalted butter, softened
- 2 cups powdered sugar
- 1-2 tablespoons milk or heavy cream
- ½ tsp vanilla extract
Instructions:
- Prepare Batter: Preheat oven to 350°F (175°C) and line a 12-cup muffin tin. In a large bowl, cream butter and sugar until light and fluffy. Beat in eggs and vanilla. Alternate adding dry ingredients (flour, baking powder, salt) with milk, mixing until just combined.
- Add Sprinkles: Gently fold in the rainbow sprinkles. Be careful not to overmix, as this can cause the colors to bleed.
- Bake: Fill cupcake liners two-thirds full. Bake for 18-20 minutes, or until a toothpick comes out clean. Cool completely on a wire rack.
- Make Frosting: Prepare vanilla buttercream frosting as in Recipe 1.
- Frost and Serve: Frost cooled cupcakes and top with additional rainbow sprinkles.
Storage / Serving / Usage Note:
Store in an airtight container at room temperature for up to 3 days. The colors of the sprinkles are most vibrant when freshly baked.
Recipe 7: Peanut Butter Cup Cupcakes
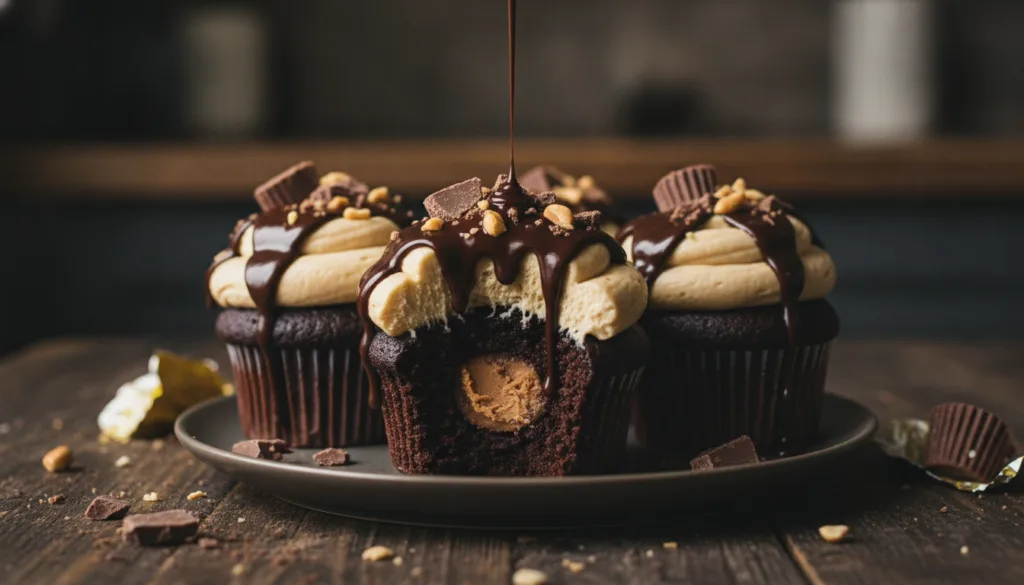
For peanut butter and chocolate lovers, these cupcakes hide a delightful mini peanut butter cup in their fudgy center, topped with a luscious peanut butter frosting.
Servings: 12 cupcakes
Prep time: 30 minutes
Cook / chill / rest time: 18-22 minutes
Ingredients:
For the Chocolate Cupcakes:
- 1 ½ cups all-purpose flour
- ½ cup unsweetened cocoa powder
- 1 cup granulated sugar
- ½ cup unsalted butter, softened
- 2 large eggs
- ¾ cup whole milk
- 1 tsp vanilla extract
- 1 ½ tsp baking powder
- ½ tsp baking soda
- ¼ tsp salt
- 12 mini peanut butter cups, unwrapped
For the Peanut Butter Frosting:
- ½ cup unsalted butter, softened
- ½ cup creamy peanut butter
- 2 cups powdered sugar
- 2-3 tablespoons milk or cream
- ½ tsp vanilla extract
Instructions:
- Prepare Cupcakes: Preheat oven to 350°F (175°C) and line a 12-cup muffin tin. In a large bowl, cream butter and sugar until light and fluffy. Beat in eggs and vanilla. In a separate bowl, whisk together flour, cocoa powder, baking powder, baking soda, and salt. Alternate adding dry ingredients with milk to the wet ingredients, mixing until just combined.
- Assemble: Fill each liner with about 1 tablespoon of chocolate batter. Place one unwrapped mini peanut butter cup in the center of the batter in each liner. Top with remaining chocolate batter, filling two-thirds full.
- Bake: Bake for 18-22 minutes, or until a toothpick inserted into the cake portion comes out clean (avoid the melted peanut butter cup). Cool completely on a wire rack.
- Make Peanut Butter Frosting: In a medium bowl, beat softened butter and creamy peanut butter until smooth. Gradually add powdered sugar. Beat in milk/cream and vanilla until smooth and fluffy.
- Frost and Serve: Frost cooled cupcakes with peanut butter frosting. Garnish with a drizzle of melted chocolate or chopped peanuts if desired.
Storage / Serving / Usage Note:
Store in an airtight container at room temperature for up to 3 days. The peanut butter cup center will be gooey when warm.
Simple Tips for Best Results
- Room Temperature Ingredients: Ensure butter, eggs, and milk are at room temperature for a smoother, more even batter and better rise.
- Don’t Overmix: Mix batter just until ingredients are combined. Overmixing can lead to tough cupcakes.
- Accurate Measurements: Use proper measuring techniques (e.g., spooning flour into a measuring cup and leveling) for consistent results.
- Even Filling: Use an ice cream scoop or measuring cup to fill cupcake liners evenly for uniform baking and size.
- Cool Completely: Always let cupcakes cool entirely before frosting. Warm cupcakes will melt your frosting.
- Gel Food Coloring: For vibrant colors, especially for hidden shapes or swirls, use gel food coloring instead of liquid dyes.
FAQ
How do I heat-treat flour for edible cookie dough?
To heat-treat flour, spread it evenly on a baking sheet and bake at 300°F (150°C) for 5-7 minutes, or microwave it in a microwave-safe bowl on high for 1 minute and 15 seconds, stirring halfway through. This kills any potential bacteria. Let it cool completely before using.
Can I prepare the cupcake batter ahead of time?
It’s generally best to bake cupcake batter immediately after mixing. The leavening agents start working once they are wet, and waiting too long can result in less rise and a denser texture. You can prepare ingredients (mise en place) a day ahead.
What is the best way to store frosted cupcakes?
Frosted cupcakes are best stored in an airtight container. If they have dairy-based fillings or cream cheese frosting, store them in the refrigerator. Otherwise, most frosted cupcakes can be stored at room temperature for 2-3 days.
Final Thoughts
Baking these hidden heart cupcakes and their delightful variations is more than just making a dessert; it’s about creating moments of joy and surprise. Whether it’s a vibrant heart, a chewy cookie dough center, or a zesty lemon burst, these treats are sure to bring smiles to those you share them with. So, gather your ingredients, unleash your creativity, and get ready to bake some magic!