Imagine stepping into your garden, basket in hand, ready to gather crisp lettuce, ripe tomatoes, and fragrant herbs, only to find your precious plants nibbled down to nubs by uninvited guests. It’s a frustrating reality many gardeners face, but it doesn’t have to be yours!
Transforming a simple idea into a bountiful, protected reality is one of the most rewarding journeys in gardening. A secure, animal-proof kitchen garden ensures your homegrown goodies stay exactly where they belong: with you. This isn’t just about keeping critters out; it’s about cultivating peace of mind, fostering healthier plants, and maximizing your harvest. Get ready to learn how to design, build, and nurture a vibrant kitchen garden that yields a steady supply of fresh produce for your table, safe from the local wildlife.
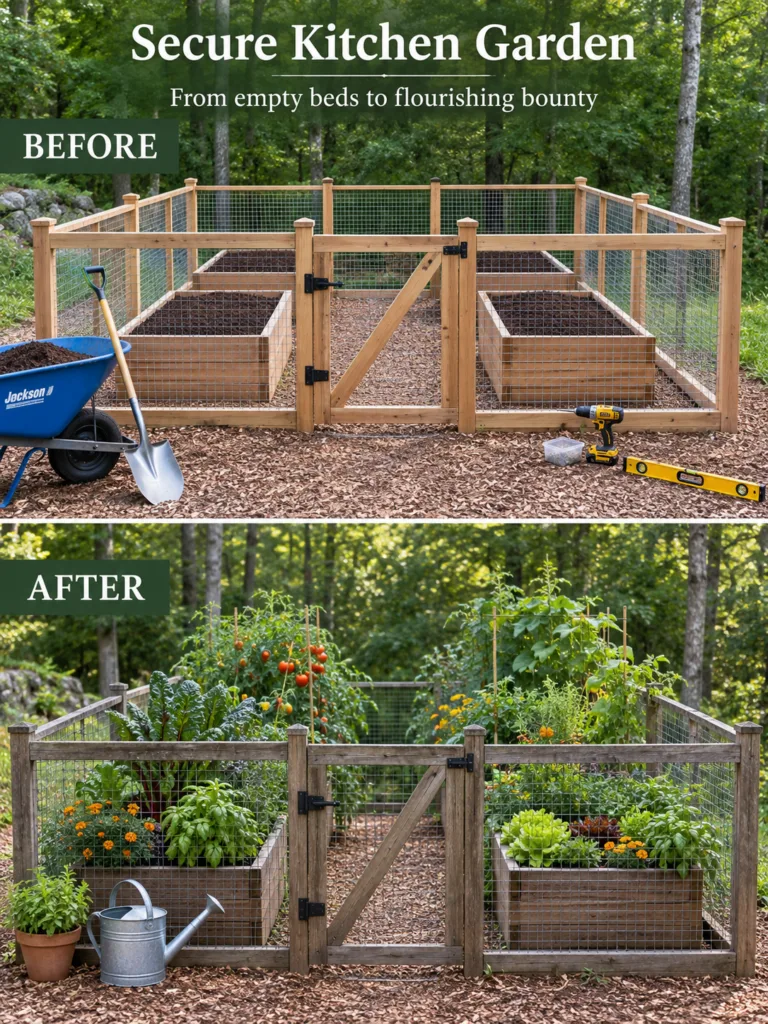
The Core Principle: Protection for Peak Production
At the heart of a truly productive kitchen garden lies protection. Animals like rabbits, deer, squirrels, and even neighborhood pets can quickly decimate a garden. By creating a secure enclosure, you not only deter pests but also establish a microclimate that can benefit your plants. Raised beds further enhance this by offering superior drainage, controlled soil composition, and easier access for planting and harvesting. This combined approach allows you to focus on cultivation rather than constant critter vigilance, leading to healthier, more abundant yields.
Designing Your Animal-Proof Sanctuary
The first step to a secure harvest is thoughtful design. Consider these elements:
Fencing: Your Garden’s First Line of Defense
Your fence needs to be both tall enough to deter jumpers (like deer) and secure enough to prevent burrowing (like rabbits). A minimum height of 6 feet is recommended for deer, while a 12-18 inch buried section or L-footer for the bottom wire will stop burrowers. Use sturdy materials like woven wire mesh or hardware cloth, securely attached to robust wooden posts. Don’t forget a well-fitted gate that latches securely, as this is often a weak point.
Raised Beds: The Foundation for Growth
Raised beds offer numerous advantages: they warm up faster in spring, provide excellent drainage, and allow you to create ideal soil conditions. Wooden raised beds, like those pictured, are popular for their aesthetic appeal and durability. Choose rot-resistant wood such as cedar or redwood, or use untreated lumber and line the interior with a food-safe barrier. A common size is 4×8 feet, allowing easy reach to the center from all sides, and a depth of at least 10-12 inches for most vegetables.
Location and Layout
Select a site that receives at least 6-8 hours of direct sunlight daily for most vegetables. Ensure easy access to a water source and proximity to your kitchen for convenient harvesting. Lay down wood chips or gravel on pathways between beds to keep weeds down and provide a clean walking surface.
Tools for the Job: As you saw in the ‘Before’ stage, essential tools for building include a shovel for digging post holes, a wheelbarrow for moving soil and mulch, a cordless drill for assembly, and a spirit level to ensure your beds and posts are plumb and level. These will make your construction much smoother.
Building Healthy Soil for Bountiful Harvests
Once your raised beds are constructed, filling them correctly is crucial. Good soil is the lifeblood of your garden.
The Art of Layering
Don’t just dump in plain topsoil! For deep raised beds, consider the