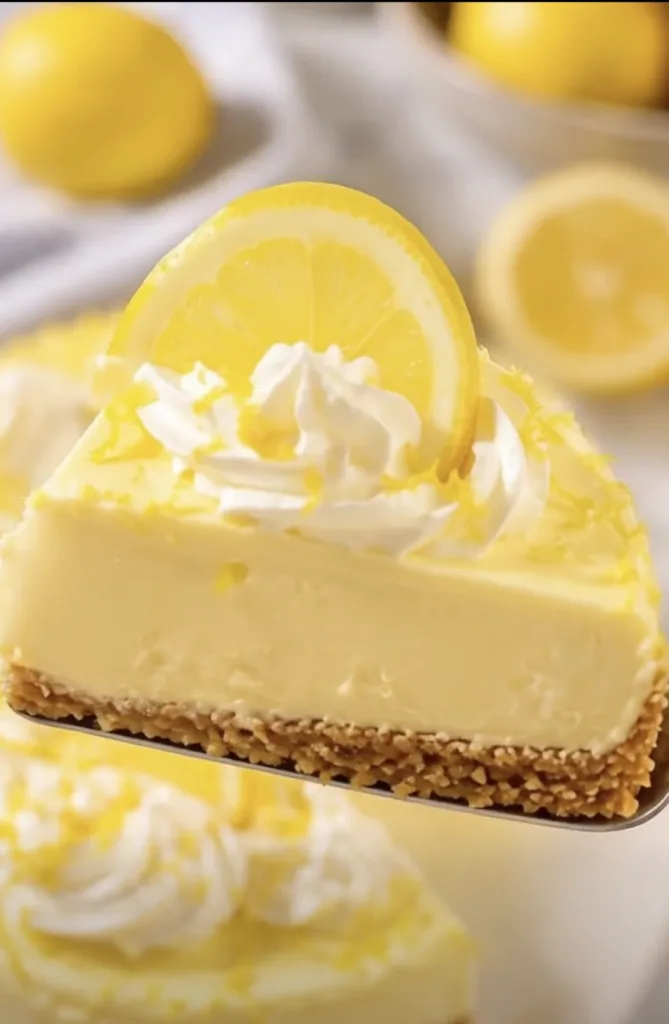
If you love fresh lemon desserts but don’t want to turn on the oven, this No-Bake Lemon Cheesecake is perfect.
It has a buttery golden graham cracker crust and an ultra-smooth lemon filling made with cream cheese, sweetened condensed milk, fresh lemon juice, and lemon zest.
The recipe is simple enough for beginners, but the finished cheesecake looks beautiful enough for a party or special occasion.
Prep time: 20 minutes
Chill time: 6 hours or overnight
Servings: 8–10 slices
Difficulty: Easy
🛒 Ingredients
For the Graham Cracker Crust
- 2 cups graham cracker crumbs
- ½ cup unsalted butter, melted
- 2 tablespoons granulated sugar
For the Lemon Cheesecake Filling
- 16 oz (450 g) full-fat cream cheese, softened
- 1 can (14 oz / 397 g) sweetened condensed milk
- ⅓ cup fresh lemon juice
- 1 tablespoon finely grated lemon zest
- 1 teaspoon vanilla extract, optional
For Decorating
- Whipped cream
- Thin lemon slices
- Fresh lemon zest
Equipment
You will need:
- 8-inch or 9-inch springform pan
- 2 mixing bowls
- Whisk or electric hand mixer
- Rubber spatula
- Offset spatula
- Measuring cups and spoons
- Fine grater or zester
- Cake server
Step 1 – Soften the Cream Cheese
Take the cream cheese out of the refrigerator about 30–60 minutes before making the cheesecake.
You want it soft enough to mix smoothly.
Cold cream cheese can create small lumps in the filling, so this simple step makes a big difference.
For the creamiest cheesecake, use full-fat block cream cheese rather than whipped cream cheese.
Step 2 – Crush the Graham Crackers
Crush the graham crackers until they become fine crumbs.
You can use a food processor or place them in a sealed bag and crush them with a rolling pin.
Measure 2 cups of fine crumbs.
The finer the crumbs, the easier it will be to create a firm, clean crust.
Step 3 – Add Melted Butter and Sugar
Place the graham cracker crumbs in a bowl.
Pour in:
- ½ cup melted butter
- 2 tablespoons sugar
Stir until every crumb is evenly coated.
The mixture should resemble wet sand and hold together when pressed between your fingers.
If it still feels very dry, add another teaspoon of melted butter.
Step 4 – Press the Crust Into the Pan
Pour the crumb mixture into your springform pan.
Use the bottom of a drinking glass or measuring cup to press the crumbs down firmly.
Start in the center and work toward the edges.
Make sure the crust is compact and level.
A tightly packed crust is less likely to fall apart when you slice the cheesecake later.
Place the pan in the refrigerator while you prepare the filling.
Step 5 – Prepare the Lemons
Wash and dry your lemons.
Finely grate the yellow outer skin to get 1 tablespoon lemon zest.
Avoid grating deeply into the white part underneath because it can taste bitter.
Then squeeze enough fresh lemon juice to measure ⅓ cup.
Fresh lemon juice gives this cheesecake a much brighter flavor than bottled lemon juice.
Step 6 – Beat the Cream Cheese Until Smooth
Place 16 oz softened cream cheese in a large bowl.
Beat or whisk until completely smooth and creamy.
Scrape down the sides of the bowl several times.
At this stage, there should be no visible cream cheese lumps.
Step 7 – Add the Sweetened Condensed Milk
Slowly pour in 1 can sweetened condensed milk while mixing.
Add it gradually rather than all at once.
Continue whisking until the cream cheese and condensed milk become completely combined.
The mixture should now look thick, glossy, and silky.
Step 8 – Add Lemon Juice
Slowly pour in ⅓ cup fresh lemon juice.
Mix continuously.
As the lemon juice combines with the cream cheese mixture, the filling will become beautifully thick and creamy.
Do not add significantly more lemon juice simply to make the flavor stronger, because too much liquid can prevent the cheesecake from setting properly.
Step 9 – Add Lemon Zest
Add 1 tablespoon finely grated lemon zest.
If desired, add 1 teaspoon vanilla extract as well.
Mix gently until the zest is evenly distributed throughout the filling.
The finished mixture should be pale yellow, thick, and extremely smooth.
Step 10 – Check the Filling Texture
Lift your whisk or spatula.
The filling should fall back into the bowl in a thick ribbon, rather than pouring like a thin liquid.
If it looks smooth, creamy, and holds soft folds, it is ready.
Avoid beating excessively once everything is combined. You do not need to whip lots of air into a no-bake cheesecake.
Step 11 – Pour the Filling Over the Crust
Remove the springform pan from the refrigerator.
Slowly pour the lemon filling into the center of the graham cracker crust.
Use a rubber spatula to scrape the bowl clean.
The filling should spread naturally toward the edges.
Step 12 – Smooth the Surface
Use an offset spatula to gently smooth the top.
Move the spatula lightly across the surface until it is even.
Try not to press down aggressively.
For a very clean finish, rotate the pan while holding the spatula almost flat against the surface.
Step 13 – Chill the Cheesecake
Cover the cheesecake and place it in the refrigerator.
Chill for at least 6 hours.
For the cleanest slices and best texture, leave it in the refrigerator overnight.
This is important: this cheesecake should be refrigerated, not baked.
You also do not need to freeze it solid.
The goal is a cheesecake that holds its shape but stays soft, silky, and creamy when you take a bite.
Step 14 – Remove the Springform Pan
Once completely chilled, remove the cheesecake from the refrigerator.
Carefully release the springform latch.
Slowly lift away the outer ring.
You should see a smooth pale-yellow cheesecake sitting on a compact golden crust.
If the cheesecake feels very soft, refrigerate it a little longer before removing the ring.
Step 15 – Decorate
Now make it beautiful.
Pipe small whipped cream rosettes around the top edge.
Add a few thin lemon slices.
Finish with a light sprinkle of fresh lemon zest.
Keep the decorations simple so the smooth lemon cheesecake remains the star.
Step 16 – Cut Clean Slices
Use a long, sharp knife.
Dip the blade in hot water and wipe it completely dry.
Cut one slice.
Clean the knife again before making the next cut.
Repeating this process gives you much cleaner cheesecake slices.
Step 17 – The Creamy Texture Test
Slide a cake server underneath one slice and slowly lift it away.
You should see:
Golden graham cracker crust → thick pale-yellow lemon filling → smooth creamy interior.
Take a small dessert spoon and press it into the filling.
The spoon should glide through easily.
The ideal texture is smooth, velvety, rich, creamy, and slightly mousse-like, while still being firm enough to hold a beautiful slice.
⭐ Tips So Anyone Can Make It Successfully
Use softened cream cheese. This is the easiest way to avoid a lumpy filling.
Use full-fat cream cheese. Low-fat versions usually create a softer filling.
Use fresh lemon juice. It gives the cheesecake much better flavor.
Measure the lemon juice. Too much can make the filling too loose.
Pack the crust firmly. A loose crust will crumble when sliced.
Give it enough chilling time. Six hours is good; overnight is even better.
Don’t freeze it rock-hard. This is supposed to be a creamy chilled cheesecake, not a frozen dessert.
Clean the knife between cuts. This makes every slice look much more professional.
🍋 Easy Variations
Lemon Blueberry Cheesecake
Add fresh blueberries on top before serving or spoon blueberry sauce over each slice.
Lemon Strawberry Cheesecake
Decorate with sliced strawberries and fresh lemon zest.
Lemon Raspberry Cheesecake
Serve with raspberries for a beautiful tart-sweet combination.
Lemon Coconut Cheesecake
Add a little toasted coconut to the graham cracker crust and sprinkle more over the finished cheesecake.
Extra-Lemony Cheesecake
For stronger lemon flavor, increase the lemon zest, rather than adding a large amount of extra lemon juice.
❄️ How to Store It
Keep the cheesecake covered in the refrigerator.
It is best enjoyed within 3–4 days.
For the freshest presentation, add whipped cream and lemon slices shortly before serving.
🍋 Why This Recipe Works
This cheesecake is beginner-friendly because there is:
No oven. No water bath. No complicated baking technique.
The whole process is simply:
Make the crust → mix the lemon filling → pour → smooth → chill → decorate → slice.
The result is a refreshing dessert with a buttery crunchy crust and silky lemon filling that tastes rich without feeling overly heavy.
If you’ve never made cheesecake before, this is a great recipe to start with.
And when you cut that first clean slice and scoop into the soft, creamy lemon center, it looks just as good as it tastes. 🍋🍰✨
Comment “LEMON” for the recipe and save this one for later!