Are you tired of dry, lackluster skin, brittle hair, or cooking oils that just don’t deliver that rich, authentic flavor? Most people reach for store-bought coconut oil, often unaware of the profound difference a traditional preparation method can make. This isn’t just about ‘virgin’ or ‘cold-pressed’ – it’s about an age-old process that infuses the oil with a unique depth and potency that modern methods often miss. The secret lies in a step most people never realize exists, and it’s surprisingly simple to recreate in your own kitchen.
What is Traditional Coconut Oil?
Traditional coconut oil, often referred to as ‘village-made’ or ‘artisan’ oil, stands apart from its mass-produced counterparts. Unlike refined coconut oil which undergoes bleaching, deodorizing, and other chemical processes, or even some cold-pressed virgin oils, traditional methods often involve a gentle heat extraction that begins with the raw coconut itself. This technique, passed down through generations, emphasizes natural processing and minimal intervention, resulting in an oil that retains more of its inherent aroma, flavor, and beneficial compounds.
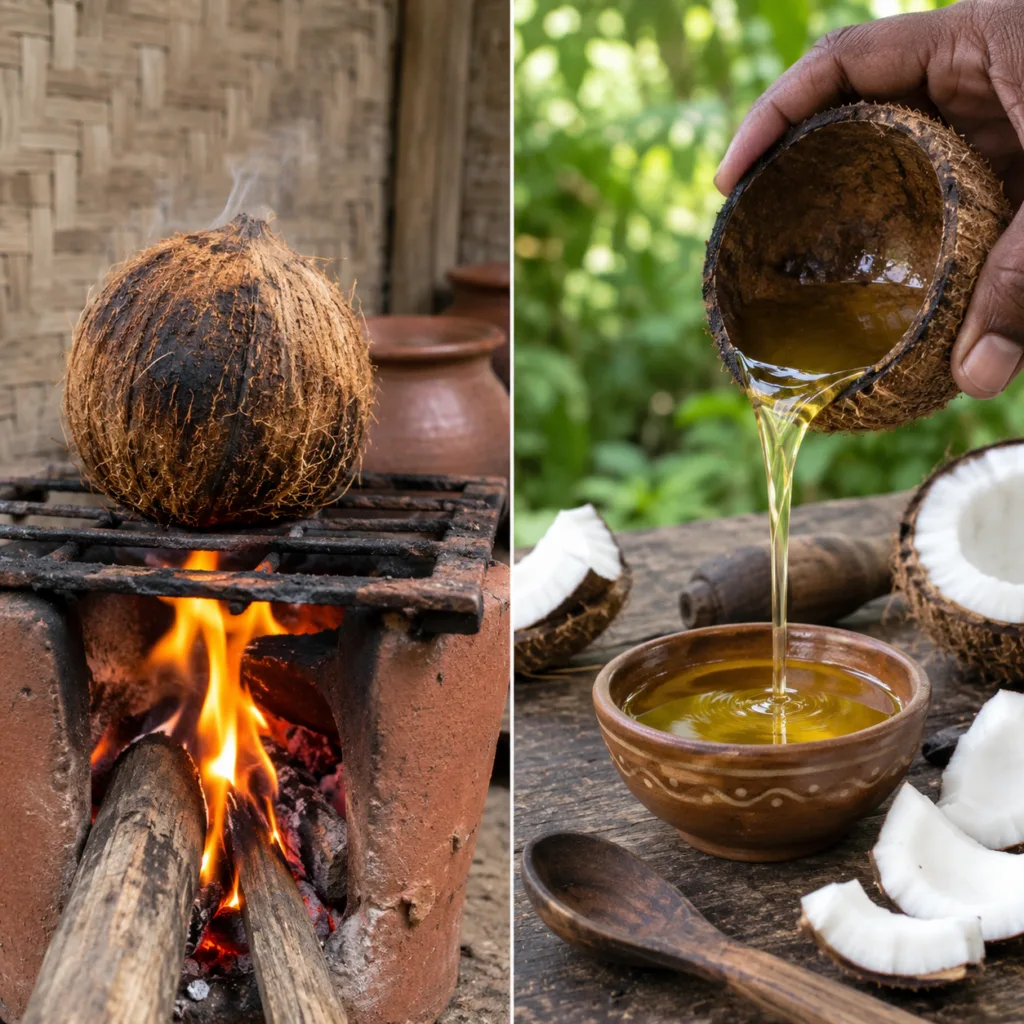
The key characteristic of truly traditional coconut oil is how it’s made. It typically involves roasting the whole coconut or its flesh, then grating, pressing the milk, and finally carefully separating the oil through natural methods, often involving slow cooking or fermentation. This artisanal approach preserves the integrity of the coconut’s nutrients, offering a richer, more aromatic product compared to standard commercial oils.
Ingredients
The beauty of traditional coconut oil lies in its simplicity:
- Mature Coconuts: You’ll need mature, brown coconuts. Look for coconuts that feel heavy for their size, have no cracks, and still contain liquid when shaken. The fresher, the better.
That’s it! No additives, no preservatives, just pure coconut goodness.
Approximate Measurements
The yield of coconut oil can vary depending on the size and maturity of your coconuts. As a general guide:
- For 1 liter (approximately 34 fl oz) of oil: You will typically need about 10-12 large, mature coconuts. This quantity will give you a good amount to work with, allowing for potential variations in coconut size and oil content.
Remember, this is an approximate measurement. It’s always better to have a few extra coconuts on hand, especially when you’re first experimenting with this traditional method.
Formula / Recipe Overview
The traditional method for making coconut oil follows several key stages:
- Roasting: Gently roasting whole coconuts over an open flame.
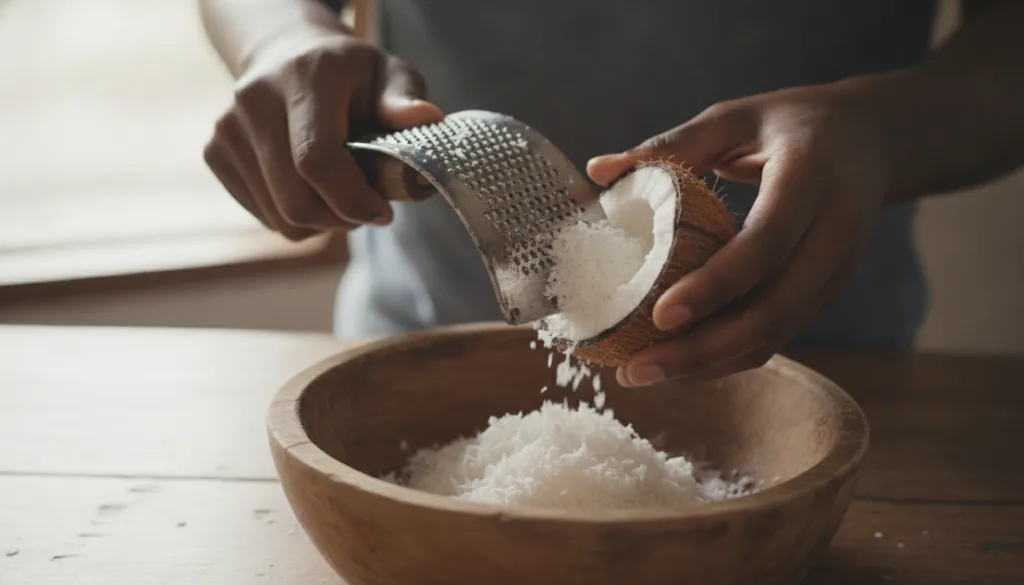
- Grating: Extracting the white flesh from the roasted coconut.
- Pressing Milk: Squeezing rich coconut milk from the grated flesh.
- Separation: Allowing the coconut milk to separate naturally, often with gentle heat or fermentation.
- Clarification: Slowly cooking the separated cream to yield pure oil.
Each step is crucial to achieving the distinctive quality of traditional coconut oil.
Step-by-Step Method: Crafting Your Own Liquid Gold
Making traditional coconut oil at home is a rewarding process that connects you to ancient practices. Here’s how to do it:
1. Roasting the Coconuts (The Unexpected Secret)
- Preparation: Gently wash your whole, mature coconuts.
- Method: Place the whole coconuts directly over a low to medium open flame (a gas stove burner, charcoal grill, or outdoor fire pit works well). Turn them frequently, allowing the outer shell to blacken and crack. The goal is to gently warm and dry the meat inside, not to burn it completely. This step takes about 15-20 minutes per coconut, depending on the heat. You’ll hear the water inside boiling, and the shell will start to crack easily.
- Why this step: This gentle roasting helps to release the coconut meat from the shell more easily and imparts a subtle, smoky aroma to the oil, a hallmark of true traditional preparation.
2. Extracting the Coconut Flesh
- Cooling: Once roasted, let the coconuts cool completely.
- Cracking: Carefully crack open the roasted coconuts using a hammer or a heavy blunt object. The roasting process makes this much easier.
- Separating Flesh: Use a sturdy spoon or a coconut scraper to pry the white coconut flesh from the hardened shell. Discard any overly charred bits.
Did You Know? The roasting step not only makes it easier to extract the meat but also contributes to the unique nutty aroma and flavor profile that distinguishes traditional coconut oil.
3. Grating and Making Coconut Milk
- Grating: Grate the coconut flesh finely using a hand grater or a food processor.
- Warm Water: Place the grated coconut into a large bowl. Add just enough warm (not hot) water to cover the grated coconut.
- Squeezing Milk: Vigorously squeeze the grated coconut with your hands for 5-10 minutes to extract the rich coconut milk. Alternatively, use a strong blender to blend the grated coconut with warm water, then strain.
- Straining: Strain the mixture through a cheesecloth or a fine-mesh sieve, squeezing out as much liquid as possible. This is your first extraction of coconut milk. Repeat this process one or two more times with slightly less water to get a second and third extraction, combining them all.
4. Separating the Oil
There are two main traditional methods for separating the oil from the milk:
Method A: Fermentation (Slower, but often yields clearer oil)
- Set Aside: Pour the collected coconut milk into a large, clean glass jar or ceramic pot.
- Ferment: Cover it loosely and let it sit at room temperature for 12-24 hours. The cream will separate and rise to the top, while a clear liquid (coconut water) settles at the bottom. A layer of coconut oil will form on top of the cream.
- Scoop Cream: Gently scoop out the thick layer of cream and the developing oil into a clean pan. Discard the clear liquid.
Method B: Gentle Heating (Faster)
- Slow Cook: Pour the collected coconut milk into a large, heavy-bottomed pot.
- Heat: Cook over very low heat, stirring occasionally. Do not boil. The water will slowly evaporate, and the coconut cream will begin to separate, forming oil. This process can take several hours.
5. Clarification and Collection
- Continue Heating: Whichever separation method you chose, once you have the cream/oil mixture in a pan, continue to heat it very gently over low heat.
- Monitor: The oil will separate from the solid residue (known as ‘latik’ in some cultures). Stir occasionally to prevent the solids from burning. The solids will turn golden brown and sink to the bottom.
- Filter: Once the oil is clear and golden, and the solids have settled, remove from heat. Let it cool slightly. Carefully strain the oil through a fine-mesh sieve lined with cheesecloth into a clean, dry glass bottle or jar.
Quick Tip: Ensure all your equipment (pots, jars, strainers) is scrupulously clean and dry to prevent contamination and extend the shelf life of your homemade oil.
How to Use Traditional Coconut Oil
This artisanal oil is incredibly versatile:
- Culinary Delight: Its rich, nutty flavor makes it exceptional for cooking, frying, and baking. Use it for sautéing vegetables, in curries, or even to add a tropical twist to baked goods.
- Skin Nourishment: Apply directly to skin as a natural moisturizer, especially after bathing. It can help soothe dry patches and give a healthy glow.
- Hair Treatment: Massage into scalp and hair as a pre-shampoo treatment. Leave for at least 30 minutes (or overnight) before washing for deep conditioning, improved shine, and reduced frizz.
- Oil Pulling: Swish a tablespoon in your mouth for 10-20 minutes daily for oral hygiene benefits.
How Often to Use
- Cooking: Use as you would any other cooking oil, daily if desired.
- Skin Moisturizer: Daily, or as needed for dry skin.
- Hair Treatment: 1-2 times per week for deep conditioning.
- Oil Pulling: Daily, preferably in the morning on an empty stomach.
How to Buy / How to Choose Ingredients
If you’re making it yourself, choose coconuts that are:
- Mature: Brown outer shell, usually with clear liquid inside when shaken.
- Heavy: Indicates good water and meat content.
- Intact: No cracks or mold.
If buying, look for: