Tired of Expensive Night Creams?
Do you ever feel like you’re caught in an endless cycle of spending a fortune on night creams that promise the world but drain your wallet? We’ve all been there – staring at complicated labels and hefty price tags, hoping for that magic bullet to transform our skin. What if we told you there’s a luxurious, deeply nourishing night cream just waiting to be made by YOU, with just TWO simple, natural ingredients?
Imagine waking up to soft, glowing skin, knowing exactly what pure goodness you’ve put on your face. This homemade secret isn’t just kind to your budget; it’s a wonderful way to take control of your skincare routine and embrace simple, effective beauty. Say goodbye to complicated labels and hello to radiant skin!
The Secret to Radiant Skin: Your Two-Ingredient Power Duo
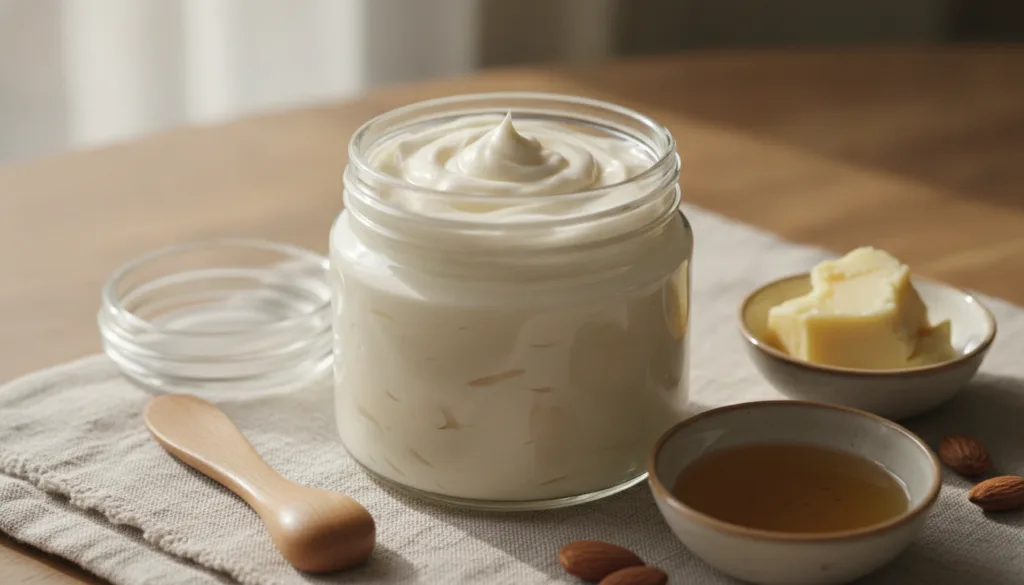
You don’t need a lab full of chemicals to achieve beautiful, healthy skin. Nature provides us with incredible ingredients that can do wonders. For this recipe, we’re harnessing the power of two skincare superstars: Shea Butter and Sweet Almond Oil.
Why These Ingredients Are Amazing:
- Shea Butter: This incredible natural fat, extracted from the nuts of the African shea tree, is a powerhouse of vitamins and fatty acids. It’s renowned for its intense moisturizing properties, helping to heal dry, cracked skin, reduce inflammation, and even boost collagen production. It creates a protective barrier on the skin, locking in moisture without clogging pores.
- Sweet Almond Oil: A light, gentle oil packed with Vitamin E, Vitamin A, essential fatty acids, proteins, potassium, and zinc. It’s fantastic for all skin types, known for its ability to soothe and moisturize, reduce puffiness and dark circles, improve complexion and skin tone, and even help reduce the appearance of scars and stretch marks.
Easy DIY Night Cream Recipe
Get ready to create your new favorite skincare product!
What You’ll Need:
- 1/2 cup pure, unrefined Shea Butter
- 1/4 cup pure Sweet Almond Oil
- A small, clean, airtight glass jar (sanitized)
- A heat-safe bowl
- A small saucepan (for a double boiler) or a microwave-safe bowl
- A spoon or whisk for mixing
Step-by-Step Guide:
- Melt the Shea Butter: Place the shea butter in your heat-safe bowl. Create a double boiler by placing the bowl over a small saucepan filled with an inch or two of simmering water. Gently melt the shea butter until it’s liquid, stirring occasionally. Alternatively, you can carefully microwave it in short bursts (30 seconds), stirring after each burst, until melted.
- Combine with Almond Oil: Once the shea butter is completely melted, remove it from the heat. Add the sweet almond oil to the melted shea butter and stir thoroughly until well combined.
- Cool and Thicken: Allow the mixture to cool down slightly at room temperature for about 15-20 minutes. For a quicker set, you can place it in the refrigerator for about 10-15 minutes, but make sure it doesn’t solidify completely – you want it to be firm but still somewhat pliable.
- Whip It Up (Optional, but Recommended!): Once the mixture has cooled and started to thicken (it should be opaque and slightly solid, like soft butter), use a spoon or whisk to whip it vigorously for a few minutes. This will incorporate air and give your night cream a light, fluffy texture, making it easier to apply.
- Transfer and Store: Spoon the whipped cream into your clean, airtight glass jar. Store it in a cool, dark place.
Why This DIY Cream is a Game-Changer
- Cost-Effective Beauty: Seriously, compare the cost of these two natural ingredients to that $70 cream. Your wallet will thank you!
- Pure & Natural Goodness: No obscure chemicals, no artificial fragrances, no unnecessary fillers. You know exactly what’s going onto your precious skin.
- Customizable Care: As you get more comfortable, you can explore adding a drop or two of skin-safe essential oils (like lavender or frankincense for anti-aging benefits, patch test first!) or other natural oils to tailor it to your specific needs.
- Empowering Your Routine: There’s a wonderful sense of accomplishment and self-care in creating your own beauty products. It connects you more deeply with the natural world and your own well-being.
Tips for Best Results & Storage
- Application: A little goes a long way! After cleansing and toning your face in the evening, take a small pea-sized amount, warm it between your fingertips, and gently massage it onto your face and neck.
- Patch Test: Always perform a patch test on a small area of your skin (like behind your ear or on your inner forearm) before applying any new product to your entire face, especially if you have sensitive skin.
- Shelf Life: Because this cream contains no preservatives, it’s best to use it within 3-6 months. Keep it in a cool, dark place away from direct sunlight and humidity to maintain its freshness and consistency. If you notice any changes in smell or texture, it’s time to make a fresh batch.
Embrace Your Natural Glow!
Ready to try making your own luxurious, budget-friendly night cream? We promise, once you experience the difference of natural, homemade skincare, you’ll wonder why you didn’t start sooner. It’s all about simple ingredients, effective results, and embracing the beauty that nature provides.
Tell us in the comments, what’s one natural ingredient you swear by for your skin? We’d love to hear your secrets!