Transform Your Yard: Replace That Old Fence with a Vibrant Living Privacy Hedge
Does your garden feel exposed? Are you tired of looking at a decaying, leaning fence that offers little privacy and even less charm? Imagine a boundary that not only secures your space but also adds breathtaking beauty, supports local wildlife, and improves with every passing year. A living privacy hedge is more than just a barrier; it’s a dynamic, eco-friendly garden feature that can truly transform your outdoor living area from drab to delightful.
Many gardeners face the dilemma of an aging fence. While fences serve a purpose, they often require constant maintenance, rot, break, and provide a rigid, unwelcoming boundary. This guide will walk you through the rewarding process of replacing that old fence with a lush, vibrant living hedge, offering practical steps and expert tips to ensure your new green screen thrives for years to come.
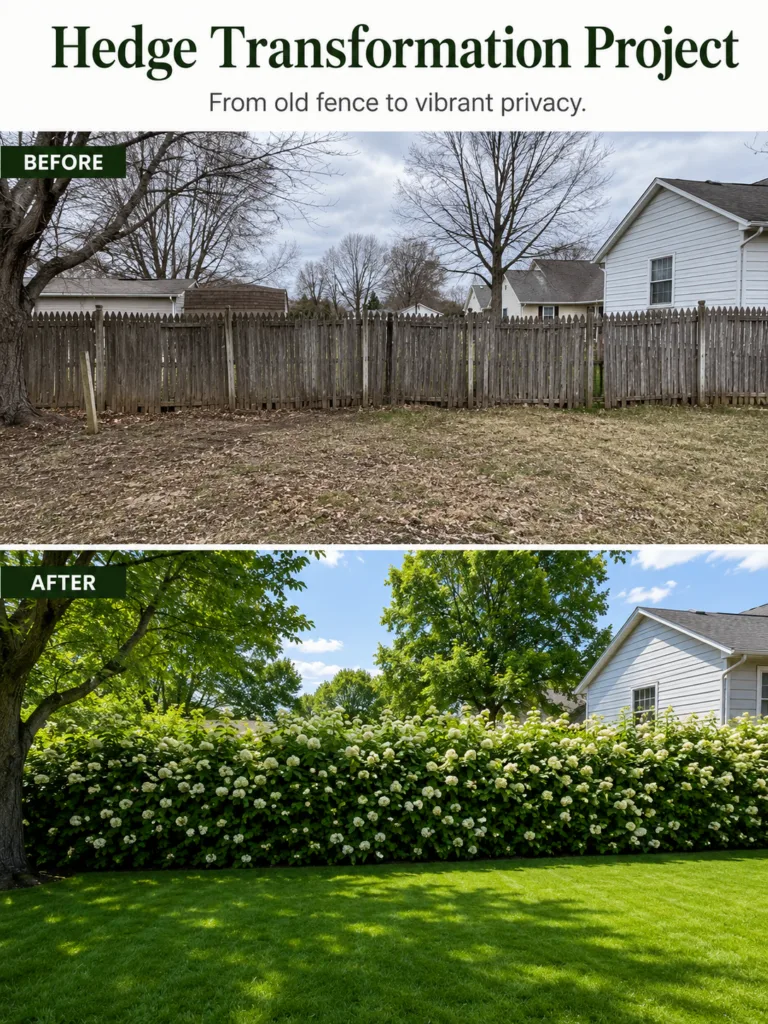
The Power of a Living Boundary
Opting for a living privacy hedge over a traditional fence brings a wealth of benefits. Unlike rigid structures, hedges grow, change with the seasons, and offer a soft, natural aesthetic that integrates seamlessly with your garden. They provide habitat and food for birds and pollinators, improve air quality by absorbing carbon dioxide, and can even help reduce noise pollution. Furthermore, while a fence depreciates and eventually needs replacement, a well-maintained hedge becomes denser and more beautiful over time, potentially increasing your property’s value.
Choosing the Right Plants for Your Hedge
The first and most critical step is selecting the appropriate plants for your climate and desired aesthetic. The image shows a beautiful flowering hedge, likely a type of Viburnum, but many options exist depending on your needs for year-round privacy, flowering, or growth rate.
Key Considerations for Plant Selection:
- USDA Hardiness Zones: This determines if a plant can survive winter temperatures in your region. Choose plants hardy to your specific zone.
- Sunlight Exposure: Most hedging plants prefer full sun (6+ hours direct sunlight) to partial sun (4-6 hours), but some tolerate shade.
- Mature Size and Growth Rate: Consider the ultimate height and spread of the plant to ensure it meets your privacy needs without becoming unwieldy.
- Deciduous vs. Evergreen: Evergreen hedges provide year-round privacy, while deciduous hedges lose their leaves in winter, offering seasonal beauty.
- Soil Preferences: Most plants prefer well-draining soil, but some are more tolerant of wet or dry conditions.
Popular Hedging Plant Options:
- Flowering Hedges (like the one pictured):
- Snowball Viburnum (Viburnum opulus ‘Roseum’): Known for its large, spherical white flowers in spring, similar to the image. It’s deciduous but creates a dense screen when in leaf.
- Hydrangea (Hydrangea paniculata varieties): Many varieties can be pruned into hedges, offering stunning late-summer blooms. Deciduous.
- Lilac (Syringa vulgaris): Fragrant spring flowers, creating a lovely informal hedge. Deciduous.
- Evergreen Hedges (for year-round privacy):
- Arborvitae (Thuja occidentalis): Fast-growing, columnar evergreens perfect for tall, narrow screens. Hardy in USDA Zones 3-7.
- Boxwood (Buxus sempervirens): Classic choice for formal, low to medium hedges. Slow-growing, dense foliage. Hardy in USDA Zones 5-9.
- Privet (Ligustrum species): Very fast-growing and tolerant of various conditions, but can be invasive in some areas. Requires frequent pruning. Many are semi-evergreen or deciduous.
- Holly (Ilex species): Many varieties, from dense evergreens to deciduous, offering berries for winter interest.
- Cherry Laurel (Prunus laurocerasus): Fast-growing evergreen with glossy leaves, creating a dense screen. Hardy in USDA Zones 6-9.
Preparing Your Site for Planting
Once you’ve chosen your plants, proper site preparation is key to success:
- Remove the Old Fence: Carefully dismantle and remove your existing fence and any posts. Ensure all debris is cleared from the planting area.
- Clear the Area: Remove weeds, grass, and any roots from the proposed hedge line. A clear strip at least 2-3 feet wide is ideal.
- Amend the Soil: Dig a trench along the planting line, about twice as wide as your plant’s root balls and just as deep. Incorporate plenty of organic matter like compost or well-rotted manure to improve soil structure, drainage, and fertility. Good soil is the foundation for healthy growth.
- Check Drainage: After amending, fill the trench with water. If it drains slowly, you may need to amend further or consider raised beds for plants that dislike wet feet.
Planting Your Living Hedge
Timing is important. The best times to plant most hedges are in early spring after the last frost or in early fall, giving plants time to establish roots before extreme weather hits.
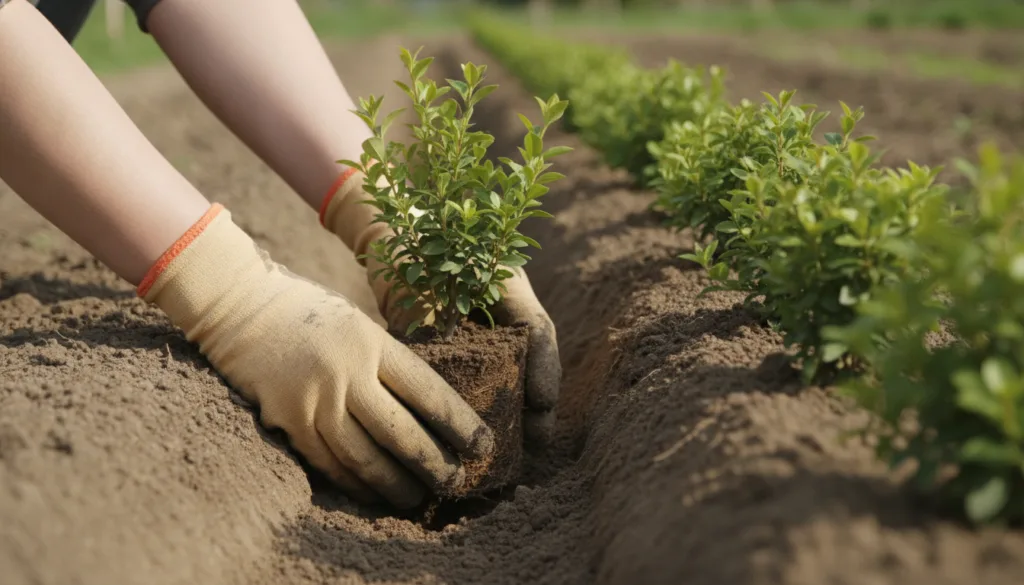
Step-by-Step Planting:
- Spacing: This is crucial for hedge density. For most hedging shrubs, space plants 1 to 3 feet apart on center, depending on their mature spread. Closer spacing creates a quicker, denser hedge, but can lead to overcrowding later if not managed. Refer to your plant’s specific recommendations.
- Planting Depth: Dig each hole so the top of the root ball is level with or slightly above the surrounding soil surface. This prevents crown rot.
- Prepare the Plant: Gently remove the plant from its container. If roots are circling tightly, tease them apart slightly to encourage outward growth.
- Position and Backfill: Place the plant in the hole, ensuring it’s straight. Backfill with your amended soil, gently firming it around the roots to remove air pockets.
- Water Thoroughly: Water deeply immediately after planting. This settles the soil and provides essential moisture. Continue to water regularly, especially during dry spells, until plants are well-established.
Essential Care for a Thriving Hedge
Once planted, your hedge will need ongoing care to become that vibrant privacy screen you envisioned.
- Watering: Young hedges need consistent moisture. Water deeply 2-3 times per week, especially in dry conditions. As plants mature, they’ll become more drought-tolerant, but still appreciate a good soak during prolonged dry periods. The soil should feel moist but not waterlogged a few inches down.
- Sunlight: Ensure your hedge receives the recommended amount of sunlight. Insufficient light can lead to sparse growth and reduced flowering.
- Soil Health: Maintain soil health by adding a layer of organic mulch (2-4 inches deep) around the base of the hedge. This conserves moisture, suppresses weeds, and slowly enriches the soil. Keep mulch a few inches away from the plant stems.
- Pruning for Shape and Density: Regular pruning is essential for a dense, healthy hedge.
- Initial Pruning: After planting, lightly trim the top and sides to encourage branching.
- Maintenance Pruning: For formal hedges, prune 1-2 times a year, typically after the main flush of new growth. For flowering hedges, prune after they finish blooming to avoid cutting off next year’s flower buds. Remove dead, damaged, or crossing branches.
- Shaping: Always prune a hedge slightly wider at the bottom than at the top. This allows sunlight to reach the lower branches, preventing them from becoming leggy and bare.
- Fertilization: Most healthy hedges don’t need heavy fertilization. A balanced slow-release granular fertilizer in early spring, or a top-dressing of compost, can provide sufficient nutrients if growth seems slow.
- Pest and Disease Management: Healthy plants are more resistant. Monitor your hedge regularly for any signs of pests or diseases. Address issues promptly using the least disruptive methods first, such as insecticidal soap for aphids or manual removal of larger pests. Ensure good air circulation through proper spacing and pruning to prevent fungal issues.
Regional and Seasonal Considerations for U.S. Gardeners
Gardening across the United States means adapting to diverse climates:
- Northern Zones (USDA 3-5): Choose extremely cold-hardy varieties. Planting in spring is often best to allow maximum root establishment before harsh winters. Focus on winter protection for newly planted hedges.
- Mid-Atlantic and Midwest (USDA 6-7): Both spring and fall planting are viable. Pay attention to summer watering during dry spells and consider plants with good heat and humidity tolerance.
- Southern Zones (USDA 8-11): Fall and winter planting are often preferred to avoid the intense summer heat, allowing roots to establish in cooler, moister soil. Select plants tolerant of heat, humidity, and potentially drought. Some plants considered annuals elsewhere may be perennial here.
- Pacific Northwest: Moderate temperatures allow for planting almost year-round, but spring and fall are ideal. Focus on good drainage, as this region can be very wet.
Always check your local extension service for specific plant recommendations and planting calendars tailored to your microclimate.
Common Mistakes to Avoid
Steering clear of these common pitfalls will boost your hedge’s success:
- Choosing the Wrong Plant: Selecting a plant not suited for your USDA zone, sunlight, or soil type is a recipe for struggle. Research thoroughly!
- Improper Spacing: Planting too far apart leaves gaps; too close causes overcrowding, poor air circulation, and competition for resources.
- Inadequate Watering After Planting: The first few weeks and months are critical. Don’t let new plants dry out.
- Over-pruning or Pruning at the Wrong Time: Aggressive pruning can stress plants, and pruning flowering shrubs before they bloom will remove the season’s flowers.
- Ignoring Soil Preparation: Planting in poor, unamended soil severely limits your hedge’s potential.
Embrace the Green Transformation
Replacing an old fence with a vibrant living hedge is a truly rewarding gardening project. It’s an investment in the beauty, privacy, and ecological health of your outdoor space. While it requires careful planning and consistent care, the sight of a lush, thriving green screen, perhaps dotted with beautiful blooms, will be a testament to your efforts.
Are you ready to say goodbye to that old fence and welcome a living, growing masterpiece into your garden? Take the first step today – research plants suitable for your area and envision the stunning transformation awaiting your outdoor haven!