Dreaming of a radiant, rejuvenated glow? Achieving beautiful, healthy-looking skin doesn’t always require expensive serums or complicated routines. Sometimes, the secret lies in simple, natural ingredients that you might already have at home! Today, we’re excited to share a wonderfully easy and effective homemade night gel recipe that many people are trying to support a youthful, hydrated complexion.
This DIY ‘collagen-boosting’ night gel (we’ll explain why we use that term!) is designed to deeply moisturize your skin overnight, helping it appear smoother and more supple by morning. It’s a fantastic way to pamper your skin naturally and embrace the power of homemade beauty.
Why Choose a DIY Night Gel?
In a world filled with countless skincare products, opting for a DIY solution offers several compelling benefits:
- Natural Ingredients: You have full control over what goes onto your skin, avoiding harsh chemicals, synthetic fragrances, and preservatives often found in commercial products.
- Cost-Effective: Many natural ingredients are affordable and easily accessible, making DIY skincare a budget-friendly option.
- Personalized Care: You can tailor the recipe to your skin’s specific needs and sensitivities.
- Eco-Friendly: Reduce waste by reusing containers and choosing ingredients with minimal packaging.
Understanding ‘Collagen-Boosting’ in DIY Skincare
When we talk about a ‘collagen-boosting’ DIY night gel, it’s important to understand that homemade recipes cannot directly add collagen to your skin or create new collagen molecules. Collagen is a complex protein that gives skin its structure and firmness. What natural ingredients *can* do is:
- Provide Deep Hydration: Well-hydrated skin appears plumper and smoother, which can reduce the visibility of fine lines and wrinkles.
- Support Skin Health: Ingredients rich in antioxidants and vitamins can help protect skin from environmental stressors that can degrade existing collagen.
- Improve Skin Texture: Regular moisturization and nourishment can lead to a more even and radiant complexion.
This night gel focuses on delivering intense hydration and nourishment, giving your skin a smoother, more ‘filled-out’ appearance that contributes to a youthful glow.
Your Simple DIY Hydrating Night Gel Recipe
This recipe uses a few star ingredients known for their beneficial properties. Remember to always do a patch test before applying any new product to your entire face.
What You’ll Need (Ingredients):
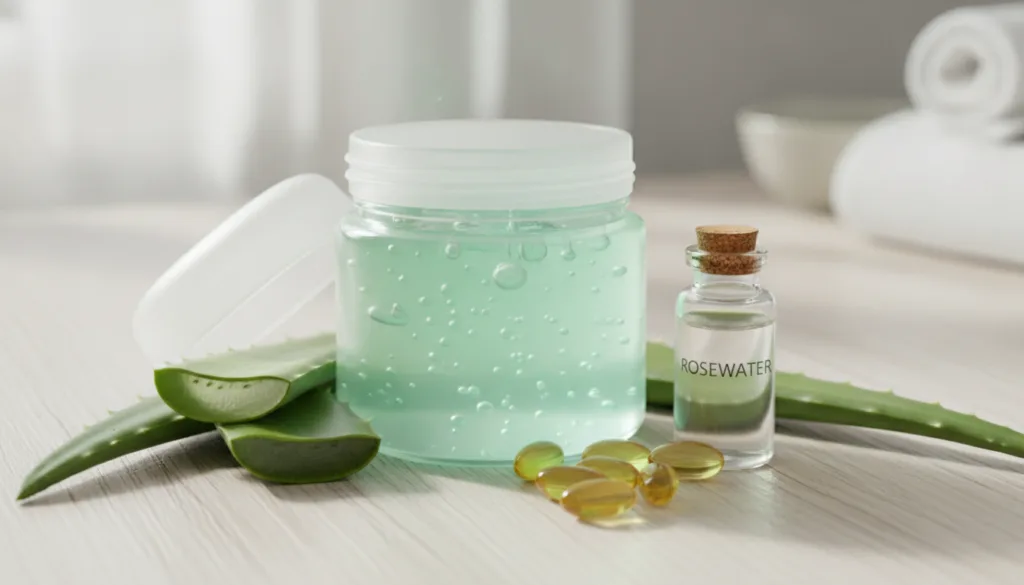
- 2 tablespoons pure Aloe Vera Gel: A fantastic moisturizer, soothing, and known for its hydrating properties. Ensure it’s 100% pure and ideally organic.
- 1 tablespoon Rosewater: Acts as a gentle toner, helps balance skin’s pH, and provides a lovely natural scent.
- 1 teaspoon Vegetable Glycerin: A powerful humectant that draws moisture from the air into your skin, enhancing hydration.
- 1 Vitamin E Capsule (or 1/2 teaspoon Vitamin E oil): A potent antioxidant that helps protect and nourish the skin.
- (Optional) 2-3 drops Lavender Essential Oil: Known for its calming properties and pleasant aroma. Ensure it’s high-quality and diluted properly. (Skip if you have sensitive skin or prefer unscented.)
- A clean, airtight container: A small glass jar or pump bottle works best for storage.
Step-by-Step Instructions:
- Prepare Your Space: Ensure all your utensils and the storage container are thoroughly clean and sterilized.
- Combine Base Ingredients: In a small bowl, add the pure aloe vera gel, rosewater, and vegetable glycerin.
- Add Vitamin E: If using a capsule, prick it with a clean pin and squeeze the oil into the mixture. If using liquid vitamin E oil, add 1/2 teaspoon.
- (Optional) Add Essential Oil: If desired, add 2-3 drops of lavender essential oil. Mix well.
- Whisk Thoroughly: Stir all ingredients together until they are fully combined and the mixture forms a smooth, gel-like consistency. This might take a minute or two of gentle whisking.
- Transfer to Container: Carefully pour or spoon your freshly made night gel into your clean, airtight container.
How to Use Your DIY Night Gel
For best results, incorporate this gel into your evening skincare routine:
- Cleanse: Start with a clean face. Gently wash away makeup and impurities.
- Tone (Optional): If you use a toner, apply it after cleansing.
- Apply Gel: Take a small pea-sized amount of your DIY night gel and gently massage it onto your face and neck using upward strokes. A little goes a long way!
- Let Absorb: Allow the gel to fully absorb into your skin before lying down.
- Use Nightly: Apply every evening for consistent hydration and nourishment.
Tips for Best Results & Storage
- Storage: Store your night gel in the refrigerator to extend its shelf life and provide a refreshing cooling sensation upon application.
- Shelf Life: Due to the lack of strong preservatives, this homemade gel is best used within 1-2 weeks. If you notice any change in color, smell, or consistency, discard it.
- Patch Test: Always perform a patch test on a small area of your skin (like behind your ear or on your inner arm) 24 hours before applying it to your face, especially if you have sensitive skin or are prone to allergies.
- Consistency: The consistency might be thinner than commercial gels; this is normal for homemade versions.
Embrace Your Natural Radiance
Making your own skincare products is a rewarding journey that connects you more deeply with the ingredients you use. This DIY hydrating night gel is a wonderful step towards a more natural and personalized beauty routine, helping your skin feel nourished and appear beautifully radiant. Give it a try and let your natural glow shine through!
Remember, consistency is key when it comes to any skincare routine, whether it’s store-bought or homemade. Enjoy your journey to naturally beautiful skin!