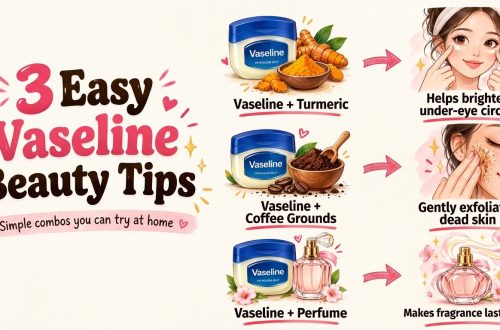
Are you searching for a natural and affordable way to achieve smoother, more radiant skin? Many people are turning to a simple, homemade beauty secret that’s been gaining significant buzz: a DIY rice and cream mixture, often incorporating Vaseline. This popular beauty routine is being celebrated for its potential to help with the appearance of wrinkles and fade the look of dark spots, leaving your complexion with a lovely glow.
At ‘BEAUTY 2’, we love exploring easy, effective DIY solutions that empower you to take charge of your skincare. Let’s dive into why this rice cream is capturing so much attention and how you can make it at home!

The Ancient Wisdom of Rice for Skin
Rice has been a staple in traditional Asian beauty routines for centuries, and for good reason. It’s believed to be packed with beneficial compounds that can contribute to skin health. Here’s why people love using rice in their skincare:
- Brightening Properties: Rice water and rice flour are often associated with helping to promote a brighter, more even skin tone.
- Antioxidants: Rice contains antioxidants like ferulic acid and allantonin, which may help protect the skin from environmental stressors.
- Soothing Effects: It’s known for its gentle, soothing properties, making it suitable for many skin types.
Why Add Vaseline (or a Rich Cream)?
When combined with rice, a rich emollient like Vaseline (petroleum jelly) or a thick moisturizing cream plays a crucial role in this DIY recipe. Here’s what it brings to the table:
- Moisture Lock: Vaseline is an occlusive, meaning it creates a protective barrier on the skin’s surface. This barrier helps to seal in moisture, keeping your skin hydrated and supple.
- Enhanced Absorption: By creating this barrier, it can help other ingredients, like those from the rice, to stay on the skin longer, potentially enhancing their perceived effects.
- Smoother Feel: The moisturizing power of Vaseline can contribute to a softer, smoother-looking skin texture, which may help minimize the appearance of fine lines and wrinkles.
How to Make Your Own Simple Rice Cream at Home
Ready to try this popular beauty hack for yourself? Here’s a simple recipe to get you started:
What You’ll Need:
- 1/4 cup uncooked white rice (any variety)
- 1 cup water
- 1-2 tablespoons Vaseline (petroleum jelly) or your favorite thick, unscented moisturizing cream
- Small saucepan
- Blender or food processor
- Fine mesh sieve or cheesecloth (optional, for extra smoothness)
- Clean, airtight container for storage
Step-by-Step Instructions:
- Rinse the Rice: Place the 1/4 cup of uncooked rice in a bowl and rinse it thoroughly under cold water a few times until the water runs mostly clear. This helps remove excess starch and impurities.
- Cook the Rice: Transfer the rinsed rice to a small saucepan and add 1 cup of water. Bring it to a boil, then reduce the heat to low, cover, and simmer for about 15-20 minutes, or until the rice is very soft and has absorbed most of the water.
- Blend the Rice: Once the rice is cooked, let it cool slightly. Transfer the cooked rice (along with any remaining water) to a blender or food processor. Blend until you achieve a very smooth, creamy paste. Add a tiny bit more water if needed to reach a smooth consistency, but avoid making it too watery.
- Strain (Optional): For an extra-smooth cream, you can press the blended rice paste through a fine mesh sieve or cheesecloth to remove any tiny grainy bits. This step is optional but recommended for a luxurious texture.
- Mix with Vaseline/Cream: In a clean bowl, combine the smooth rice paste with 1-2 tablespoons of Vaseline or your chosen moisturizing cream. Start with one tablespoon and add more if you prefer a thicker consistency. Mix thoroughly until the rice paste and cream are fully incorporated and smooth.
- Store Your Cream: Transfer your homemade rice cream to a clean, airtight container.
How to Incorporate it into Your Skincare Routine
Once your rice cream is ready, here’s how you can use it:
- Patch Test First: Always apply a small amount of the cream to a discreet area of your skin (like behind your ear or on your inner forearm) and wait 24-48 hours to check for any adverse reactions before applying it to your face.
- Cleanse Your Face: Begin with a clean, dry face.
- Apply Evenly: Take a small amount of the rice cream and gently massage it onto your face and neck, focusing on areas where you want to address the appearance of wrinkles or dark spots.
- Nighttime Use: Many people prefer to use this cream as an overnight treatment, allowing the ingredients to work while they sleep.
- Frequency: You can use this cream 2-3 times a week, or as your skin tolerates it. Listen to your skin’s needs.
Important Considerations Before You Try This DIY Hack
- Individual Results Vary: While many people report positive experiences, results are not guaranteed and can vary from person to face.
- Storage: Since this is a homemade product with natural ingredients, it has a limited shelf life. Store it in the refrigerator and aim to use it within 7-10 days. If you notice any change in smell, color, or consistency, discard it.
- Not a Medical Treatment: This DIY rice cream is a cosmetic treatment aimed at improving the *appearance* of skin. It is not a substitute for professional medical advice or treatments for skin conditions, severe wrinkles, or hyperpigmentation.
- Sun Protection: Always use a broad-spectrum SPF during the day, especially when trying new beauty routines that aim to address dark spots, as new skin can be more sensitive to the sun.
Embrace Your Natural Glow!
This simple rice cream is an exciting option for anyone looking to try a natural, budget-friendly approach to skincare. It combines the traditional wisdom of rice with the moisturizing benefits of Vaseline to help you achieve smoother-looking, glowing skin. Give it a try, and remember to always prioritize your skin’s health and safety!
Have you tried this rice cream or other DIY beauty recipes? Share your experiences in the comments below!