Most people buy mint for a recipe and let the rest wilt, or they struggle to keep it alive in an outdoor garden where it often takes over. What if you could have an endless supply of fresh, vibrant mint right from your kitchen counter, effortlessly regenerating itself?
You don’t need a green thumb or a sprawling garden to enjoy fresh mint year-round. This guide reveals the simple, foolproof method to propagate mint from cuttings indoors, ensuring you always have this versatile herb ready for your drinks, dishes, and natural remedies. The best part? It starts with just a few sprigs and a glass of water.
What It Is: Propagating Mint from Cuttings
Mint propagation from cuttings is the process of growing new mint plants from a piece of an existing plant. Instead of planting seeds, which can be slow and unreliable, you’re essentially cloning your favorite mint plant. This method is incredibly efficient, allowing you to multiply your mint supply quickly and easily.
We’ll focus on water propagation for rooting, a clean and satisfying method that lets you watch the roots grow before planting them in soil. It’s perfect for beginners and ensures a high success rate.
Ingredients & Tools You’ll Need
- Healthy Mint Plant: The source for your cuttings.
- Sharp Scissors or Pruners: Essential for clean cuts that heal well.
- Clean Glass Jar or Vase: Transparent is best so you can see the root development.
- Fresh Water: Tap water is usually fine, but filtered water can also be used.
Approximate Measurements & Selection
While there are no exact ‘measurements’ in the traditional sense, selecting the right cuttings is crucial:
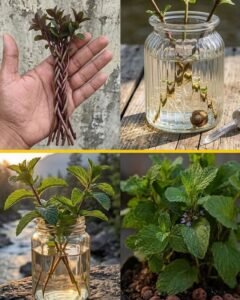
- Cuttings: Aim for 4-6 inch long sprigs from a healthy, mature mint plant. Each cutting should have at least 2-3 leaf nodes (the points where leaves attach to the stem) below where you will make your cut.
- Water: Enough to submerge the bottom 1-2 inches of the stems.
- Jar Size: Choose a jar that can comfortably hold your cuttings without overcrowding, allowing good air circulation around the leaves.
The Formula / Recipe: Water Propagation for Mint
This method transforms a simple sprig into a thriving new plant. It’s less of a recipe and more of a guided process:
- Select & Cut: Choose healthy, non-flowering stems from your mint plant.
- Prepare Cuttings: Remove lower leaves to expose nodes.
- Water Placement: Place prepared cuttings in water.
- Rooting: Wait for roots to develop.
- Potting: Transplant to soil once roots are established.
Step-by-Step Method for Propagating Mint
Step 1: Choose Your Source Plant & Take Cuttings
Look for a vibrant, mature mint plant with strong, green stems. Avoid stems that are woody, yellowing, or have flowers. Using sharp, clean scissors or pruners, snip off 4-6 inch long pieces just below a leaf node. Making a clean cut minimizes damage and promotes faster rooting.
Step 2: Prepare the Cuttings
Carefully remove all leaves from the bottom 1-2 inches of each cutting. These are the parts that will be submerged in water, and if leaves are left on, they will rot, contaminating the water and hindering root growth. Ensure there are at least 2-3 bare nodes at the bottom of each stem.
Step 3: Place Cuttings in Water
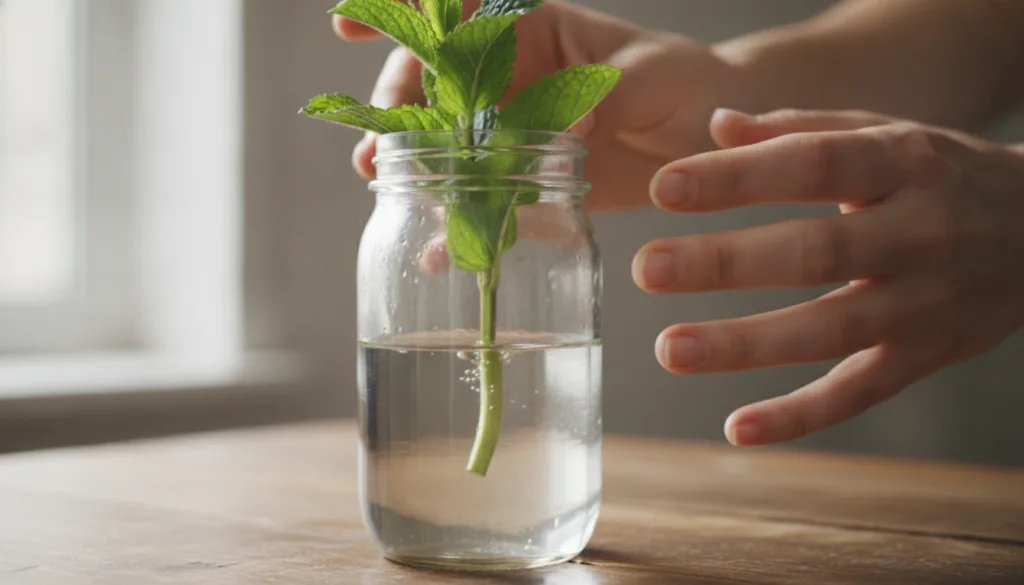
Fill your clean glass jar with fresh water. Place the prepared mint cuttings into the jar, ensuring the bare nodes are fully submerged. The leaves at the top should remain above the waterline. Don’t overcrowd the jar; give each cutting a little space.
Step 4: Provide the Right Environment for Rooting
Place your jar in a location that receives bright, indirect sunlight. A north or east-facing window is often ideal. Avoid direct, harsh sunlight, which can overheat the water and stress the cuttings. Room temperature (65-75°F / 18-24°C) is perfect for root development.
Step 5: Maintain & Observe
Change the water every 2-3 days to keep it fresh and prevent bacterial growth. You should start to see tiny white roots emerging from the nodes within 1-2 weeks. Once the roots are about 1-2 inches long (typically 3-4 weeks), your mint is ready for potting.
Step 6: Potting Your Rooted Cuttings
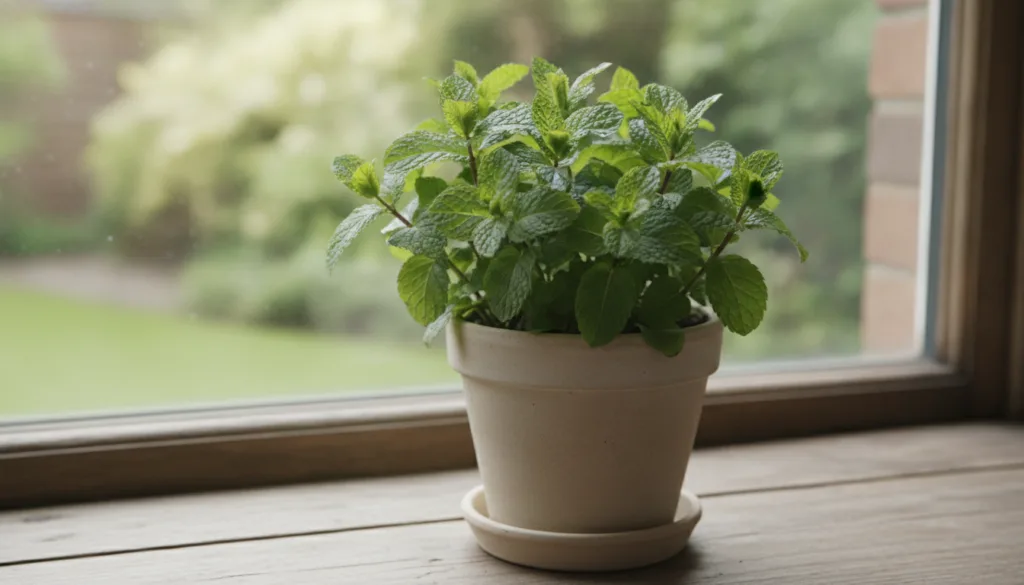
Prepare small pots with a well-draining potting mix. Gently remove a rooted cutting from the water and make a small hole in the soil. Carefully place the cutting in the hole, ensuring the roots are covered without being crushed. Lightly firm the soil around the stem and water thoroughly. Keep the soil consistently moist for the first few weeks as the plant transitions.
How to Use Your New Mint Plants
Once your mint plants are established in soil, you can start harvesting leaves. Snip off sprigs as needed for teas, cocktails, salads, or garnishes. Regular harvesting encourages bushier growth and prevents the plant from becoming leggy.
How Often to Use It
For propagation, you’ll be actively nurturing the cuttings for about a month. Once established, you can harvest mint leaves frequently, typically every few days or weekly, depending on your plant’s growth rate and your needs. Remember to prune regularly to encourage new growth.
Fresh vs. Dried Mint for Cuttings
Only fresh mint sprigs can be used for propagation. Dried mint lacks the living tissue needed to sprout roots and grow a new plant. Always choose healthy, vibrant green stems for the best success rate.
How to Choose Ingredients (Cuttings)
- Look for Vigor: Select stems that are robust and disease-free.
- Avoid Flowers: Stems that are flowering are putting energy into seed production, not root growth.
- Cleanliness: Ensure your scissors and jar are clean to prevent contamination.
Storage & Care for Your New Mint
Once potted, place your mint plant in a spot with good indirect light. Mint prefers consistently moist soil but doesn’t like to sit in waterlogged conditions, so ensure good drainage. Fertilize sparingly if desired, or repot with fresh soil annually. Indoor mint can continue to thrive for years with proper care.
Practical Tips for Success
- Humidity Boost: If your home is dry, consider placing a plastic bag loosely over the cuttings in water (creating a mini-greenhouse effect) or misting them daily until roots appear.
- Gentle Handling: Rooted cuttings are delicate. Handle them with care during potting to avoid damaging the fragile new roots.
- Pinch Back: Once your mint plant is established, regularly pinch off the top sets of leaves to encourage branching and a bushier plant.
Quick Tip: Transitioning to Soil
Don’t rush the potting process. Wait until the roots are at least 1-2 inches long. This ensures the plant has a strong foundation to absorb nutrients and water from the soil, minimizing transplant shock.
Common Mistakes to Avoid
Propagating mint is straightforward, but a few common errors can derail your efforts:
- Not Changing Water: Stagnant water quickly becomes a breeding ground for bacteria and algae, which can rot your cuttings. Regular water changes are vital.
- Overcrowding the Jar: Too many cuttings in one jar reduces air circulation and increases the risk of mold and rot.
- Using Flowered Stems: Stems that have flowered have less energy to put into root development.
- Insufficient Light: While direct sun is too harsh, too little light will prevent cuttings from photosynthesizing efficiently, slowing down root growth.
- Planting Too Early: If roots are too short when planted in soil, they may struggle to establish. Patience is key!
- Improper Cutting: Crushing the stem or making a jagged cut can hinder healing and rooting.
Cautions / Who Should Avoid It
Mint is generally safe and easy to grow. However, be aware that mint is an aggressive spreader if planted directly in a garden bed. When growing indoors, this isn’t an issue, but if you decide to move it outdoors later, plant it in a contained pot to prevent it from taking over your garden. There are no known specific cautions for propagating mint from cuttings itself, though individuals with specific plant allergies should always exercise caution.
Comparison: Water vs. Direct Soil Propagation for Rooting
| Method | Pros | Cons | Best For |
|---|---|---|---|
| Water Propagation | Easy to monitor root growth; visually satisfying; less mess | Roots can be fragile during transplant; slower transition to soil | Beginners; visual learners; smaller batches |
| Direct Soil Planting | Potentially faster establishment; less transplant shock | Harder to monitor root growth; needs consistent moisture; higher initial failure rate | Experienced gardeners; larger batches; when time is critical |
Quick Summary
- Best Preparation: Water propagation from healthy, non-flowering cuttings.
- Best Use-Case: Ensuring a continuous supply of fresh mint for culinary and remedial purposes.
- Storage: Once rooted, plant in a well-draining pot indoors.
- When to Use: Any time you want fresh mint or wish to expand your plant collection.
- What to Avoid: Stagnant water, overcrowded jars, direct harsh sunlight, planting roots that are too short.
FAQ
- Can I use any type of mint for propagation? Yes, most mint varieties (peppermint, spearmint, chocolate mint, etc.) can be propagated this way.
- How long does it take for mint cuttings to root? You should see roots in 1-2 weeks, and they’ll be ready for potting in 3-4 weeks.
- When should I plant the rooted cuttings in soil? When the roots are 1-2 inches long.
- What kind of soil is best for new mint plants? A good quality, well-draining potting mix is ideal.
- Why are my mint leaves turning yellow in the water? This could be due to old water, lack of nutrients, or not enough light. Change the water regularly and ensure adequate indirect light.
- Can I skip the water propagation step and plant directly in soil? Yes, but success rates can be lower, and it’s harder to monitor root development. Keep the soil consistently moist if you choose this method.
- How much light does indoor mint need? Bright, indirect sunlight is best. A few hours of morning sun is fine, but avoid harsh afternoon sun.
- How often should I water my potted mint? Keep the soil consistently moist, but not waterlogged. Check the top inch of soil; if it feels dry, it’s time to water.
Conclusion
Propagating your own mint is an incredibly rewarding experience that ensures a perpetual supply of this fragrant herb. With minimal effort and just a few simple steps, you can transform a few sprigs into a lush, thriving plant that brings freshness and flavor to your home all year long. Say goodbye to wilting store-bought mint and embrace the satisfaction of growing your own!
You may also like: DIY Lemon Balm Tea: Your Calming Home Remedy
Read more: The Best Herbs for Indoor Gardening