Unlock the secret to a visibly smoother, brighter complexion with this simple homemade rice and clove gel. This DIY beauty recipe is designed to help you achieve a radiant ‘glass skin’ appearance, often associated with a hydrated and luminous glow.
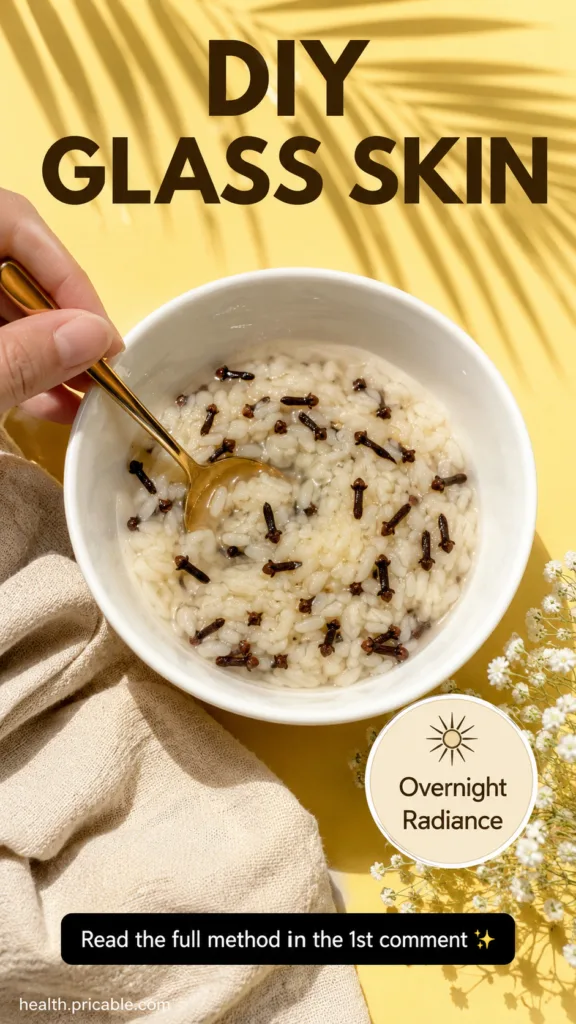
Quick Recipe
Prep time: 15 minutes
Best for: Dullness, uneven texture, supporting a ‘glass skin’ appearance
Use type: Topical gel/mask
Main ingredients:
- Rice
- Cloves
- Water
Ingredients
- 1/4 cup uncooked white rice (such as jasmine or basmati)
- 5-7 whole cloves
- 1 cup filtered water, plus extra for rinsing
How to Make It
- Rinse the Rice: Place the 1/4 cup of uncooked rice in a fine-mesh sieve and rinse thoroughly under cool running water until the water runs clear. This helps remove excess starch and impurities.
- Boil and Infuse: Transfer the rinsed rice and 5-7 whole cloves into a small saucepan. Add 1 cup of filtered water. Bring the mixture to a gentle boil over medium heat, then reduce the heat to low, cover, and simmer for about 10-15 minutes, or until the rice is very soft and has absorbed most of the water. The cloves will infuse their properties into the rice water.
- Blend to Gel: Remove the saucepan from the heat and let it cool slightly. Carefully transfer the cooked rice, cloves, and any remaining liquid into a blender or food processor. Blend until you achieve a very smooth, creamy paste or gel-like consistency. You may need to add a tablespoon or two of extra filtered water if the mixture is too thick to blend properly.
- Strain for Smoothness: To ensure a truly smooth gel, push the blended mixture through a fine-mesh sieve or a piece of cheesecloth into a clean bowl. Press firmly with a spoon or your fingers to extract as much of the smooth gel as possible, leaving behind any fibrous rice particles or clove bits.
- Store: Transfer the freshly made rice and clove gel into a clean, airtight glass container. Store it in the refrigerator.

How to Use It
- Cleanse Your Skin: Before applying the gel, ensure your face is clean and dry.
- Apply Evenly: Take a small amount of the chilled rice and clove gel and gently apply a thin, even layer over your face and neck, avoiding the immediate eye area.
- Leave Overnight: Allow the gel to dry on your skin for a few minutes. It’s intended to be an overnight treatment, so leave it on while you sleep.
- Rinse in the Morning: In the morning, rinse your face thoroughly with lukewarm water. Gently pat your skin dry and follow with your usual morning skincare routine, including moisturizer and SPF.
How Often to Use It
You can use this DIY rice and clove gel 2-3 times per week as part of your evening skincare routine. Consistent use is key to supporting a visible improvement in skin texture and radiance.
Why These Ingredients Are Used
Rice
Rice has been a staple in traditional Asian beauty remedies for centuries. It’s often associated with promoting a smoother-looking complexion. Rice water and rice extracts contain compounds that may help brighten the skin’s appearance, improve texture, and support a more even skin tone, contributing to that coveted ‘glass skin’ look. It’s also known for its gentle exfoliating and hydrating properties.
Cloves
Cloves are known for their aromatic and traditional uses. In beauty, they are sometimes included in remedies for their warming sensation and properties that may help in invigorating the skin’s appearance. When used topically in diluted forms, cloves are traditionally believed to help clarify the skin and support a healthy-looking glow. However, their potency means they should always be used in moderation and with caution.
What Results to Expect
With regular use, this rice and clove gel may help your skin feel noticeably softer and appear brighter. You may observe a more even-toned complexion and a reduction in the appearance of dullness, leading to a radiant, more reflective ‘glass skin’ look. Individual results can vary, but many find that natural remedies help support a fresher, more vibrant skin appearance over time.

Safety Notes
- Patch Test First: Always perform a patch test on a small, inconspicuous area of your skin (e.g., behind the ear or on your inner forearm) 24 hours before applying the gel to your entire face to check for any irritation or allergic reaction, especially due to cloves.
- Use Gently: Apply the gel with clean hands and a light touch.
- Avoid Irritated or Broken Skin: Do not apply this gel to skin that is broken, irritated, sunburned, or has open wounds.
- Stop if Discomfort Occurs: If you experience any redness, itching, burning, or discomfort, discontinue use immediately and rinse your face thoroughly with cool water.
- Freshness and Storage: Since this is a homemade remedy without preservatives, it should be made fresh and stored in the refrigerator for no more than 3-4 days. Discard if you notice any change in smell or appearance.
- Eye Area: Be careful to avoid getting the gel directly into your eyes.
- Consult a Professional: If you have sensitive skin, known allergies, or specific skin conditions, consult with a dermatologist before trying new DIY remedies.
FAQ
Can I use brown rice instead of white rice?
Yes, you can use brown rice, but it might result in a slightly different texture for the gel. Brown rice is also richer in nutrients and can offer similar skin-supporting benefits.
How long does the gel last in the refrigerator?
Because it’s a fresh, homemade product without artificial preservatives, it’s best to use this gel within 3-4 days when stored properly in an airtight container in the refrigerator.
Can I add other ingredients to this gel?
While you can experiment, it’s best to start with the basic recipe to gauge how your skin reacts. Adding new ingredients could alter the potency or stability of the gel. Always research additional ingredients and perform a patch test.
Final Thoughts
Embracing natural ingredients like rice and cloves can be a wonderful way to support your skin’s natural radiance. This DIY gel offers a simple, accessible path to a visibly smoother and brighter complexion. Give it a try and see if it helps you achieve your own ‘glass skin’ goals. Share your experiences in the comments below!