Craving that satisfying crunch without the guilt? You’re in luck! Making healthy potato and sweet potato chips right in your own kitchen is far easier than you might imagine. Ditch the store-bought bags loaded with artificial ingredients and excess oil, and instead, embrace the simple joy of transforming humble vegetables into a crispy, flavorful snack for the whole family.
This guide will walk you through everything you need to know to bake perfectly crispy potato and sweet potato chips, using minimal ingredients and delivering maximum flavor. Get ready to impress your taste buds and boost your snack game!
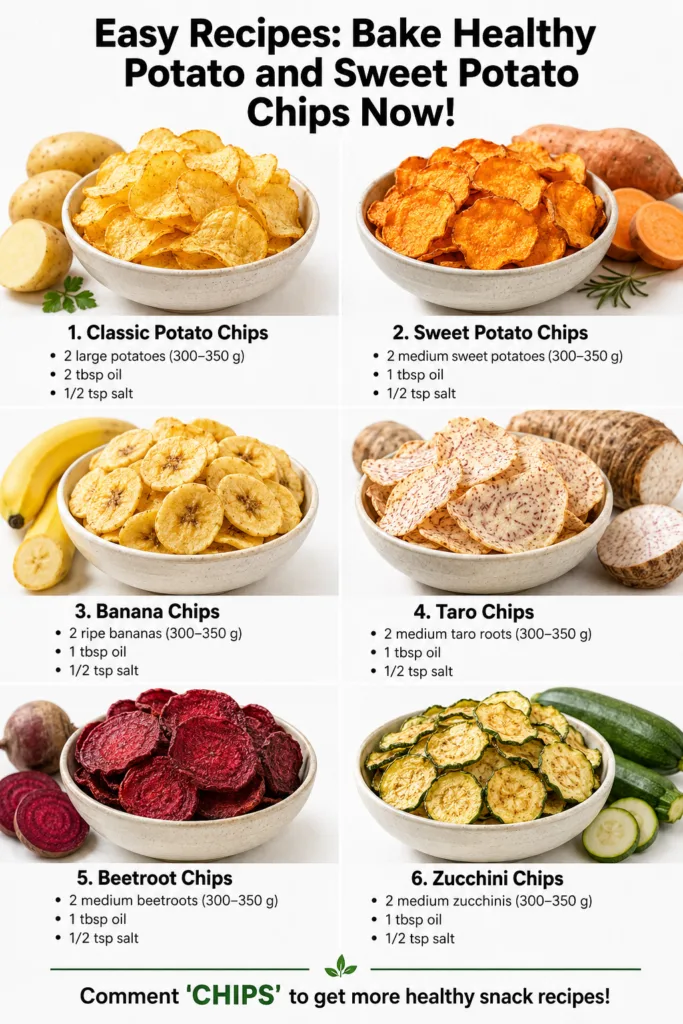
Why Make Your Own Healthy Chips?
Beyond the undeniable satisfaction of creating something delicious from scratch, baking your own chips offers several significant advantages:
- Healthier Ingredients: You control exactly what goes in. No questionable additives, excessive sodium, or unhealthy fats.
- Freshness and Flavor: Homemade chips boast a superior, natural flavor that store-bought versions often lack.
- Cost-Effective: Potatoes and sweet potatoes are inexpensive, making this a budget-friendly snack option.
- Customization: Experiment with different seasonings to perfectly match your preferences.
- Diet-Friendly: Baked chips are naturally lower in fat and calories compared to their fried counterparts, fitting well into many healthy eating plans.
The Secret to Perfectly Crispy Baked Chips
Achieving that coveted crunch isn’t rocket science, but it does involve a few key steps:
- Thin Slices are Essential: The thinner your potato or sweet potato slices, the crispier your chips will be. Use a mandoline slicer for uniform, paper-thin results. If using a knife, aim for slices no thicker than 1/16th of an inch.
- Rinse (for Potatoes): For regular potatoes, rinsing the sliced potatoes in cold water helps remove excess starch, which can prevent them from getting crispy.
- Dry Thoroughly: This is perhaps the most crucial step! Moisture is the enemy of crispiness. After rinsing (if applicable), spread the slices on a clean kitchen towel and pat them completely dry. You can even let them air dry for 10-15 minutes.
- Light Oil Coating: A very thin, even coating of oil is necessary for browning and crisping. Too much oil will result in soggy chips.
- Even Spacing: Arrange slices in a single layer on your baking sheet, ensuring they don’t overlap. Overcrowding will steam the chips instead of baking them to crisp perfection.
- Proper Temperature and Baking Time: A moderate oven temperature and careful monitoring are key. Baking times can vary based on slice thickness and oven calibration.
Recipe: Healthy Baked Potato Chips
These classic baked potato chips are simple, satisfying, and incredibly crispy.
Ingredients:
- 2 medium russet potatoes (or other starchy variety)
- 1 tablespoon olive oil (or avocado oil)
- 1/2 teaspoon fine sea salt (or to taste)
- Optional: 1/4 teaspoon garlic powder, paprika, or black pepper for seasoning
Instructions:
- Preheat Oven & Prep Potatoes: Preheat your oven to 375°F (190°C). Line two large baking sheets with parchment paper for easy cleanup and to prevent sticking. Wash and scrub the potatoes thoroughly. You can peel them or leave the skin on for extra fiber and rustic appeal.
- Slice Thinly: Using a mandoline slicer set to 1/16-inch thickness, carefully slice the potatoes into uniform rounds. If you don’t have a mandoline, use a very sharp knife to slice them as thinly and evenly as possible.
- Rinse and Dry: Place the potato slices in a large bowl of cold water for 10-15 minutes to remove excess starch. Drain the water and then spread the slices on clean kitchen towels. Pat them absolutely dry with additional towels. This step is critical for crispiness.
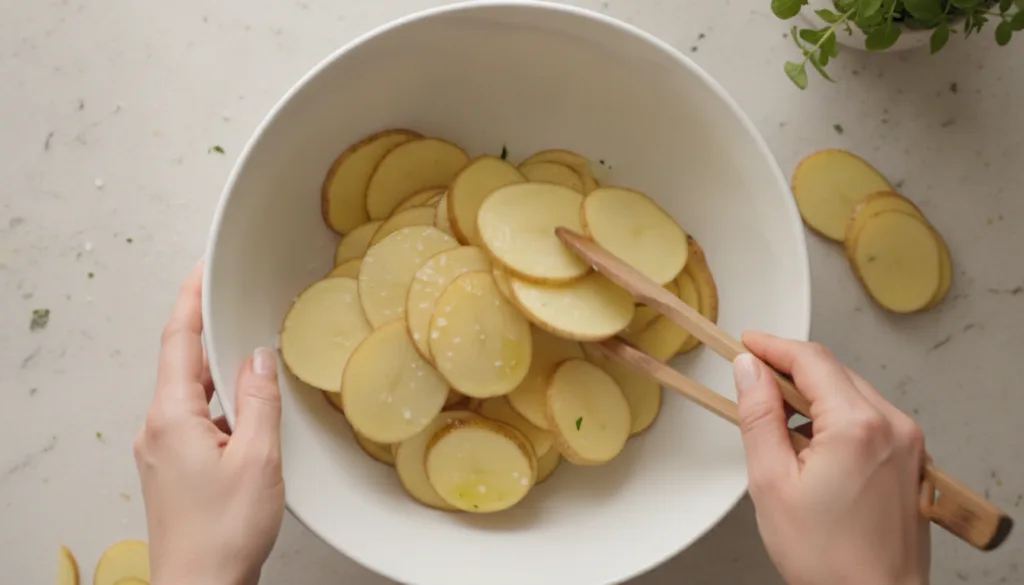
- Season: In a large bowl, drizzle the dried potato slices with olive oil. Toss gently to ensure every slice is lightly and evenly coated. Sprinkle with salt and any optional seasonings, tossing again.
- Arrange and Bake: Arrange the seasoned potato slices in a single layer on the prepared baking sheets, making sure they do not overlap. Bake for 15-25 minutes, or until golden brown and crispy. Halfway through baking (around 10-12 minutes), carefully flip the chips to ensure even browning.
- Cool: Remove from the oven and transfer the chips to a wire rack to cool completely. They will crisp up further as they cool.
- Serve: Enjoy immediately or store in an airtight container for up to 3-4 days.
Recipe: Healthy Baked Sweet Potato Chips
Naturally sweet and vibrant, these baked sweet potato chips offer a delightful contrast to traditional potato chips.
Ingredients:
- 2 medium sweet potatoes
- 1 tablespoon olive oil (or coconut oil)
- 1/2 teaspoon fine sea salt (or to taste)
- Optional: 1/4 teaspoon cinnamon, chili powder, or smoked paprika for seasoning
Instructions:
- Preheat Oven & Prep Sweet Potatoes: Preheat your oven to 375°F (190°C). Line two large baking sheets with parchment paper. Wash and scrub the sweet potatoes thoroughly. Peeling is optional; the skin adds nutrition and color.
- Slice Thinly: Using a mandoline slicer set to 1/16-inch thickness, carefully slice the sweet potatoes into uniform rounds. As with regular potatoes, thin, even slices are critical for crispiness.
- Dry Thoroughly: Unlike regular potatoes, sweet potatoes don’t need rinsing to remove starch. However, they still need to be very dry. Spread the slices on clean kitchen towels and pat them completely dry.
- Season: In a large bowl, drizzle the dried sweet potato slices with olive oil. Toss gently to ensure every slice is lightly and evenly coated. Sprinkle with salt and any optional seasonings (cinnamon for a sweet twist, chili powder for a savory kick), tossing again.
- Arrange and Bake: Arrange the seasoned sweet potato slices in a single layer on the prepared baking sheets, ensuring they do not overlap. Bake for 20-30 minutes, or until edges are slightly curled and crispy. Sweet potatoes can burn faster, so keep a close eye on them, especially towards the end. Flip once halfway through.
- Cool: Remove from the oven and transfer the chips to a wire rack to cool completely. They will continue to crisp up as they cool.
- Serve: Enjoy as a standalone snack or with your favorite dip. Store in an airtight container for up to 3-4 days.
Flavor Variations to Spark Your Creativity
These recipes are fantastic as a base, but don’t stop there! Elevate your homemade chips with these simple flavor enhancers:
- Spicy Kick: Add a pinch of cayenne pepper, chili powder, or a dash of hot sauce (before baking) for a fiery crunch.
- Herby Freshness: Toss with dried rosemary, thyme, or oregano. For a fresh touch, sprinkle finely chopped fresh parsley or chives after baking.
- Cheesy Delight: Nutritional yeast (for a dairy-free option) or finely grated Parmesan cheese can be added before baking.
- Smoky Flavor: Smoked paprika adds a wonderful depth and aroma.
- Sweet & Savory (Sweet Potatoes): A tiny sprinkle of brown sugar or maple syrup along with salt creates an irresistible balance.
Serving Suggestions for Your Guilt-Free Snack
Homemade chips are versatile! Here are a few ways to enjoy them:
- Classic Snack: Simply enjoy them on their own as a satisfying, healthy alternative to store-bought options.
- With Dips: Pair them with a healthy Greek yogurt dip, hummus, guacamole, or a fresh salsa.
- Soup Topper: Crumble a few chips over a bowl of creamy tomato soup or a hearty lentil soup for added texture.
- Salad Crunch: Break them into pieces and sprinkle over a salad instead of croutons for an unexpected, delicious crunch.
Frequently Asked Questions About Baking Chips
Q: Can I use an air fryer to make these chips?
A: Absolutely! An air fryer is excellent for making crispy chips. The process is similar: slice, dry, lightly oil, and season. Air fry in batches at around 350-375°F (175-190°C) for 10-20 minutes, shaking the basket frequently, until golden and crispy.
Q: What’s the best way to store homemade chips?
A: Store cooled chips in an airtight container at room temperature. For best crispness, enjoy them within 3-4 days. If they lose some crispness, you can briefly reheat them in a toaster oven or air fryer.
Q: My chips aren’t crispy enough. What went wrong?
A: The most common culprits are: slices weren’t thin enough, potatoes weren’t dried thoroughly, too much oil, or the baking sheets were overcrowded. Review the ‘Secret to Perfectly Crispy Baked Chips’ section and try again!
Q: Can I use other root vegetables for chips?
A: Yes! Carrots, parsnips, beets, and even zucchini can be made into delicious baked chips using similar methods. Adjust baking times as needed based on the vegetable’s moisture content and thickness.