Imagine adding a burst of fresh flavor and nutrition to your meals, grown right in your own kitchen, in just one week! Sounds incredible, right? Well, it’s absolutely possible with microgreens!
Microgreens are young vegetable greens harvested just after the first true leaves have developed. They are packed with nutrients, often containing higher levels of vitamins, minerals, and antioxidants than their mature counterparts. Plus, they’re surprisingly easy to grow, making them perfect for beginners or anyone with limited space.
At Garden – L. Quyên, we love empowering you to bring more green into your life. Today, we’re going to walk you through a simple, step-by-step guide to growing your own delicious microgreens in just seven days. Let’s get started!
What Exactly Are Microgreens?
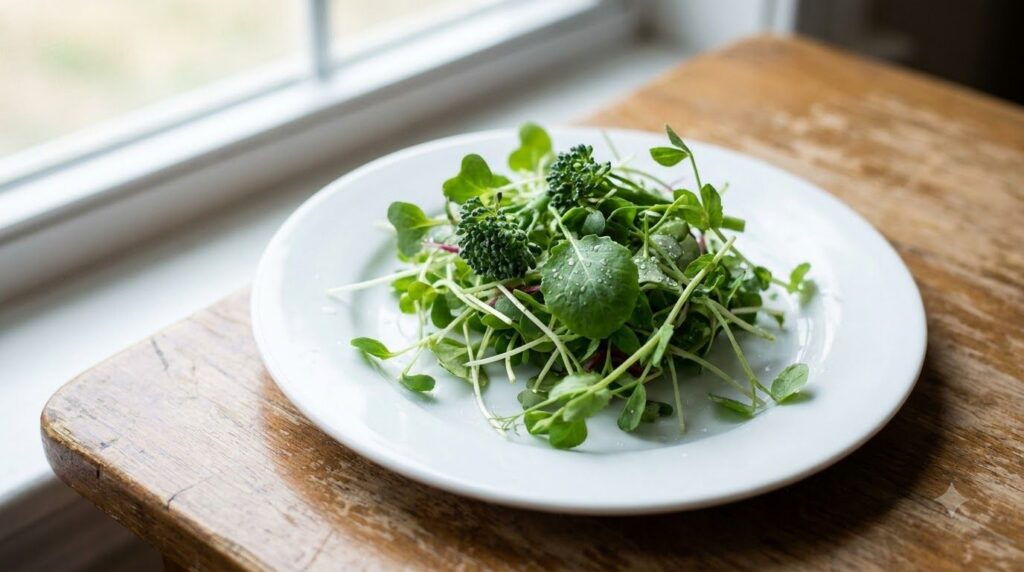
Microgreens are not sprouts, nor are they baby greens. Sprouts are germinated seeds, often eaten whole (seed, root, and shoot), while baby greens are older and larger than microgreens. Microgreens are harvested when they are between 1 to 3 inches tall, usually within 1-3 weeks after germination. They offer a concentrated flavor and a delicate texture that can elevate any dish.
Why Grow Microgreens at Home?
- Nutrient Powerhouses: Many studies show that microgreens can contain significantly higher levels of vitamins and carotenoids than mature plants.
- Freshness Guaranteed: Harvest them just before you eat them for maximum flavor and nutrition.
- Quick & Easy: No green thumb required! They grow fast and demand minimal space and care.
- Versatile in the Kitchen: Add them to salads, sandwiches, smoothies, omelets, or use them as a beautiful garnish.
- Cost-Effective: Growing your own is much cheaper than buying them at the store.
Getting Started: What You’ll Need
Before we dive into the daily plan, gather these essential items:
- Microgreen Seeds: Choose varieties specifically labeled for microgreens or organic, untreated seeds.
- Shallow Trays: Two trays per crop are ideal—one with drainage holes for growing and another solid tray to catch water or for bottom watering.
- Potting Mix: A fine-grained, sterile seed-starting mix or coconut coir works best.
- Spray Bottle: For gentle misting.
- Grow Light (Optional but Recommended): A simple fluorescent or LED shop light will do, especially if natural light is scarce.
- Scissors: For harvesting.
Your 7-Day Microgreen Growing Plan
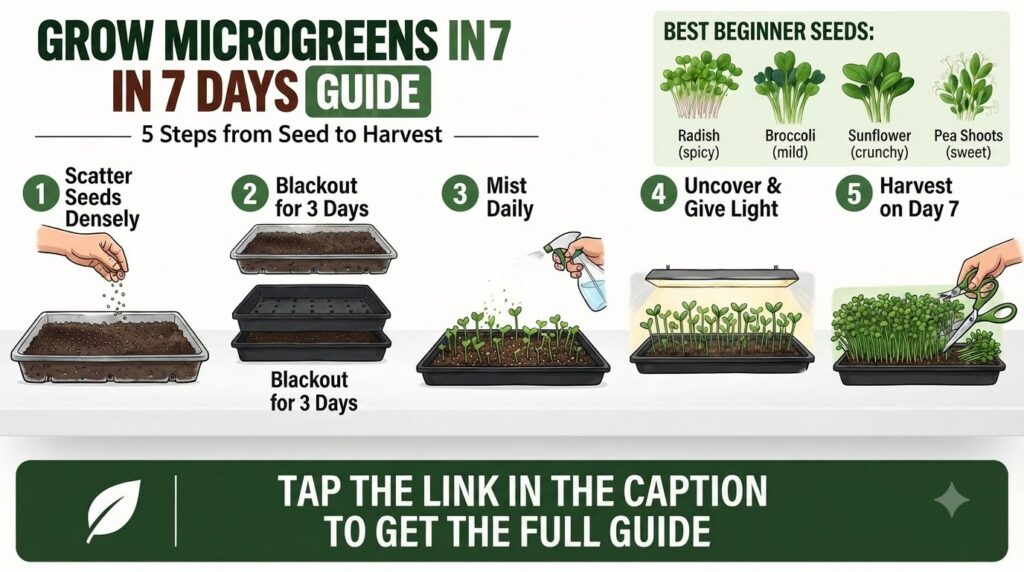
Day 1: Seed Preparation & Sowing
- Fill Trays: Fill your growing tray with 1-2 inches of potting mix, leveling it gently. Don’t compact it too much.
- Moisten Soil: Lightly mist the soil surface until it’s damp but not waterlogged.
- Scatter Seeds: Generously sprinkle your chosen microgreen seeds evenly across the soil surface. Don’t bury them—they need light to germinate for most varieties.
- Mist Again: Lightly mist the seeds to settle them into the soil.
- Blackout (Initial): Place a second, empty tray directly on top of the seeded tray, inverted, or cover with a dark cloth. This creates a ‘blackout’ period, encouraging seeds to push through the soil searching for light.
Day 2-4: The Blackout Period
During these days, your seeds are busy germinating in the dark. Continue to check the moisture level of the soil daily by lifting the top tray. If it feels dry, mist lightly. The top tray also helps press the seeds into the soil, encouraging strong root development.
Day 5: Uncovering & Light Exposure
- Uncover: By now, you should see tiny sprouts pushing up. Remove the top tray or dark cover.
- Provide Light: Place your tray under a grow light for 12-16 hours a day, or in a bright window with indirect sunlight. Direct, intense sunlight can be too strong for young microgreens initially. If using a grow light, keep it a few inches above the sprouts.
- Continue Misting: Lightly mist your microgreens daily to keep the soil moist.
Day 6-7: Daily Misting & Growth
Your microgreens will be growing rapidly now! Keep them under light and mist them daily. You’ll notice their first true leaves starting to emerge. Observe their progress; they’re getting ready for harvest.
Harvest Day: When & How to Harvest
Your microgreens are ready when they have developed their first set of true leaves (which appear after the initial cotyledons, or seed leaves). This is typically around day 7-14, depending on the variety.
- Prepare for Harvest: Make sure your microgreens are dry before harvesting to prevent spoilage.
- Cut: Use sharp scissors to cut the microgreens just above the soil line.
- Enjoy: Rinse them gently if desired, pat dry, and add them to your favorite dishes immediately!
Best Beginner Microgreen Seeds
For first-time growers, these varieties are fantastic because they germinate quickly and are relatively fuss-free:
- Radish: Fast-growing, with a peppery kick.
- Broccoli: Mild flavor, packed with nutrients.
- Sunflower: Nutty and crunchy, one of the most popular and robust.
- Pea Shoots: Sweet, tender, and easy to grow.
- Arugula: Spicy and flavorful.
Tips for Microgreen Success
- Don’t Overwater: Misting is generally better than heavy watering, which can lead to mold. The soil should be consistently moist, not soggy.
- Good Air Circulation: Ensure your growing area has good airflow to prevent fungal issues. A small fan can help.
- Sterile Medium: Using a sterile potting mix reduces the chance of pests and diseases.
- Cleanliness: Keep your trays and tools clean.
- Experiment! Once you get the hang of it, try different varieties to find your favorites.
Growing microgreens is a rewarding experience that connects you with your food and adds a fresh, healthy boost to your diet. It’s an easy win for any home gardener, regardless of experience!
Have you tried growing microgreens before? Share your favorite tips or varieties in the comments below! We’d love to hear from our Garden – L. Quyên community.