Are your tiled floors looking a little lackluster, marred by grime, soap scum, or everyday dirt? Whether it’s your bathroom, kitchen, or laundry room, tiled surfaces often accumulate stubborn residue that regular mopping just can’t tackle. This DIY guide will show you how to perform a deep clean using simple household ingredients and a good old-fashioned scrub, helping you restore your floors to their gleaming best without harsh chemicals.
This method is practical, cost-effective, and focuses on getting into the grout lines and textured surfaces where dirt loves to hide. It’s a satisfying way to refresh your home, giving tired tiles a new lease on life.
What You’ll Need
- Warm Water: Approximately 1 gallon (about 4 liters)
- Liquid Dish Soap: 1-2 tablespoons (a good quality, grease-cutting dish soap)
- Scrub Brush: A stiff-bristled scrub brush, preferably with a handle for leverage
- Bucket: For mixing your cleaning solution
- Mop or Clean Cloths/Towels: For rinsing and drying
- Rubber Gloves: To protect your hands
Why This DIY Can Be Useful
This DIY cleaning solution harnesses the power of common household ingredients. Warm water helps to loosen dirt and grime, while liquid dish soap acts as a powerful degreaser, breaking down oils, soap scum, and food residue. The physical scrubbing action of the brush is crucial for dislodging embedded dirt from textured tiles and especially from grout lines, where dirt tends to accumulate and stain. This combination is effective for routine deep cleaning without resorting to stronger, potentially abrasive, or fume-heavy commercial cleaners.
How to Make It
- Prepare Your Space: First, sweep or vacuum your tiled floor thoroughly to remove any loose dirt, dust, or debris. This prevents you from just pushing around mud later.
- Mix the Solution: In your bucket, pour approximately 1 gallon of warm water. Add 1-2 tablespoons of liquid dish soap.
- Stir Gently: Swirl the water gently to mix the soap. Avoid creating too many suds at this stage, as you’ll be applying it directly to the floor.
How to Use It
- Apply the Solution: Dip your scrub brush directly into the soapy water, or carefully pour a small amount of the solution onto a manageable section of your tiled floor. Aim to work in small areas, about 3×3 feet at a time, to prevent the solution from drying out.
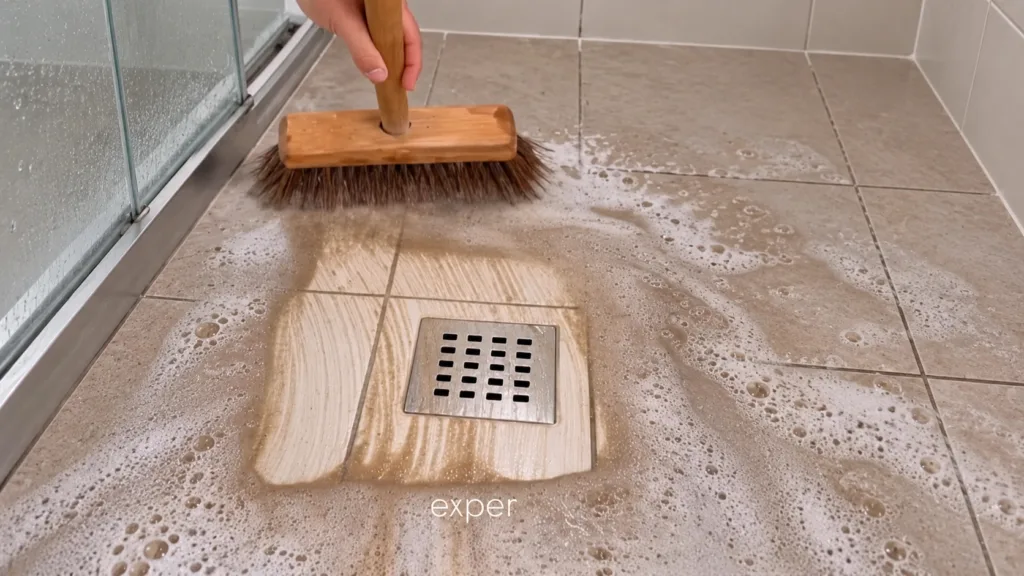
- Scrub Thoroughly: Using your scrub brush, apply firm, circular motions to the tiled surface and especially into the grout lines. You should see the dirt and grime lifting and mixing with the suds. For stubborn spots, let the solution sit for a few minutes before scrubbing again.
- Rinse Away: Once you’ve scrubbed a section, use a clean mop dipped in plain warm water, or clean cloths/towels, to wipe up the dirty suds. Rinse your mop or cloths frequently in a separate bucket of clean water until all the soapy residue and lifted dirt are removed.
- Dry the Floor: After rinsing, use dry, clean towels or allow the floor to air dry. Ensure good ventilation to speed up drying and prevent moisture buildup.
- Repeat: Continue this process, section by section, until your entire tiled floor is clean.
What to Expect
After following these steps, you can expect a noticeably cleaner and brighter tiled floor. The tiles themselves should regain their original luster, and the grout lines, which often get discolored, will appear significantly lighter and cleaner. While this method is highly effective for most dirt and grime, extremely deep-set stains or mold in grout might require a specialized grout cleaner or further treatment.
Helpful Tips
- Work in Sections: Always clean in small sections to keep the cleaning solution active and prevent it from drying on the floor before you can rinse it.
- Grout Brush: For exceptionally dirty grout, consider using a specialized grout brush with finer, stiffer bristles that can penetrate the narrow lines more effectively. An old toothbrush can also work in a pinch.
- Ventilation: Ensure good ventilation in the room while cleaning, especially if you’re in a confined space like a bathroom, to help with drying and air circulation.
- Change Water: Regularly change your rinse water. Using dirty rinse water will only spread grime around, making your cleaning less effective.
Important Notes / Safety
- Test in an Inconspicuous Area: Before applying the solution to your entire floor, always test it on a small, hidden area of your tiles and grout to ensure there are no adverse reactions or discoloration.
- Tile Type: This method is generally safe for ceramic, porcelain, and most glazed tiles. However, exercise caution with unsealed natural stone tiles (like marble, granite, or slate) as they can be porous and might react differently to soap. For natural stone, consult specific cleaning recommendations.
- Slippery Surfaces: Floors will be very slippery when wet with soapy water. Take extreme care to avoid slips and falls.
- Rinse Thoroughly: It’s crucial to rinse all soapy residue from the floor. Leftover soap can attract more dirt, making your floor appear dull and sticky over time.