Hey beautiful! Are you dreaming of that enviable ‘glass skin’ look – smooth, firm, and oh-so-radiant? We all want that healthy glow, especially as we navigate our busy lives. But who has time for complicated routines or endless products? What if I told you that you could achieve a firmer, more luminous complexion with just three simple ingredients you might already have at home?
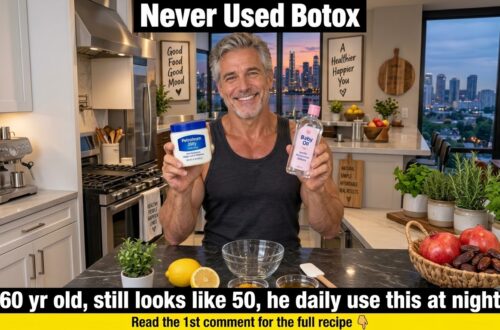
Get ready to meet your new skincare bestie: our easy-to-make 3-Ingredient Night Gel! This wonderful homemade remedy is quickly becoming a favorite for those seeking a smooth, dewy finish and a fresh, youthful glow. Just like our friend in the image, you’ll be smiling as you apply this refreshing gel, knowing you’re treating your skin to something truly special.

Why Go DIY for Your Night Skincare?
Choosing to make your own skincare products means you know exactly what goes onto your skin. No hidden chemicals, no confusing ingredients – just pure, natural goodness. This DIY night gel focuses on nourishing your skin while you sleep, making the most of potent natural ingredients to help you wake up with skin that feels refreshed and looks revitalized.
The Power Trio: Meet Your 3 Magic Ingredients
Each ingredient in this night gel plays a vital role in giving you that firm, glass skin effect:
1. Pure Aloe Vera Gel
-
The Soother & Hydrator: Aloe vera is a superstar for a reason! It’s incredibly soothing, perfect for calming any redness or irritation. But its real magic for glass skin lies in its hydrating properties. It delivers a burst of moisture without feeling heavy, helping your skin feel plump and soft.
-
Tip: Always opt for a high-quality, pure aloe vera gel with minimal additives to get the best benefits.
2. Vegetable Glycerin
-
The Moisture Magnet: Think of glycerin as your skin’s best friend for attracting and locking in moisture. It’s a natural humectant, meaning it draws water from the air into your skin, keeping it supple and dewy. This is key to achieving that smooth, plump ‘glass skin’ finish.
3. Rosehip Seed Oil
-
The Regenerator & Brightener: This golden oil is a true gem! Packed with vitamins (especially A and C) and essential fatty acids, rosehip seed oil is celebrated for its ability to support skin regeneration. It can help improve the appearance of fine lines, even out skin tone, and give your complexion a radiant boost. It’s like a gentle hug for your skin overnight!
Your Quick & Easy 3-Ingredient Night Gel Recipe
Ready to whip up your own bottle of glow? Here’s how!
Prep Time:
Only 5 minutes!
Yields:
Approximately 3 tablespoons (enough for about 1-2 weeks of nightly use)
Storage:
Store in an airtight container in the refrigerator for up to 2 weeks.
What You’ll Need:
- 2 tablespoons pure Aloe Vera Gel
- 1 teaspoon Vegetable Glycerin
- ½ teaspoon Rosehip Seed Oil
- A small, clean, airtight container (like a dark glass jar or pump bottle)
- A small bowl and a spoon for mixing
How to Make It:
-
Combine Ingredients: In your small, clean bowl, add the 2 tablespoons of pure Aloe Vera Gel.
-
Add Glycerin: Carefully measure and add 1 teaspoon of Vegetable Glycerin to the bowl.
-
Introduce Rosehip Oil: Add ½ teaspoon of Rosehip Seed Oil to the mixture.
-
Mix Thoroughly: Using your spoon, gently mix all the ingredients together. Stir until everything is well combined and you have a smooth, consistent gel. It might take a minute or two to achieve a uniform texture.
-
Transfer & Store: Carefully transfer your freshly made night gel into your clean, airtight container. Label it with the date you made it!
And just like that, you’ve created your very own firming and glowing night gel!
How to Incorporate Your DIY Night Gel into Your Routine
Using your homemade night gel is super simple:
-
Cleanse: Start with a clean face! Wash away the day’s impurities and makeup.
-
Tone (Optional): If you use a toner, apply it gently.
-
Apply the Gel: Take a small amount of your DIY night gel (about a pea-sized amount is usually enough) and gently massage it onto your face and neck. Use upward, circular motions until it’s absorbed. Focus on areas where you desire more firmness or radiance.
-
Sweet Dreams: Let the gel work its magic overnight! You’ll wake up to skin that feels softer, smoother, and visibly more radiant.
Extra Tips for the Best Results
-
Consistency is Key: Use this night gel every evening for consistent results. Natural remedies often take time to show their full potential.
-
Patch Test: Always do a small patch test on your inner arm before applying any new product to your entire face, especially if you have sensitive skin.
-
Freshness Matters: Since this is a natural product with no harsh preservatives, make small batches and store it in the fridge to keep it fresh and potent.
-
Listen to Your Skin: Pay attention to how your skin reacts. If you notice any irritation, discontinue use.
Embrace the journey to beautiful, healthy skin with this simple and effective DIY night gel. It’s a loving, gentle way to achieve that firm, glass skin look you’ve been dreaming of, all while giving your skin the natural care it deserves.
Tried this recipe? Share your glowing results with us in the comments below! We’d love to hear from you, beauty besties!