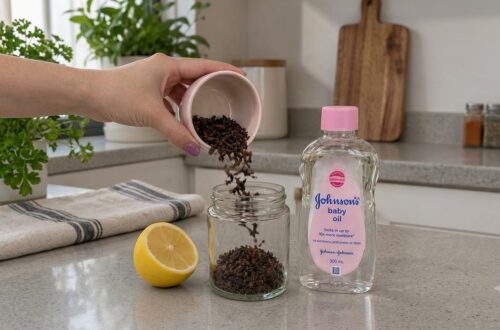
Discover how to create a simple, natural clove toner to help refresh your skin and support a brighter, more youthful appearance. This easy homemade recipe harnesses the natural properties of cloves for a simple addition to your daily beauty routine.

Quick Recipe
Prep time: 10 minutes (plus cooling)
Best for: Dull, aging-looking skin, uneven tone
Use type: Toner
Main ingredients:
- Whole cloves
- Distilled water
Ingredients
- 1 tablespoon whole cloves
- 1 cup distilled water
- Optional: A few drops of rose water for added fragrance (after straining)
How to Make It
- Simmer Cloves: In a small saucepan, combine the whole cloves and distilled water. Bring the mixture to a gentle simmer over medium heat.
- Steep: Once simmering, reduce the heat to low, cover the saucepan, and let it gently steep for about 5-7 minutes. This allows the beneficial compounds from the cloves to infuse into the water.
- Cool: Remove the saucepan from the heat and allow the mixture to cool completely to room temperature. This step is crucial for preserving the toner’s efficacy.
- Strain and Bottle: Once cooled, strain the liquid through a fine-mesh sieve or cheesecloth into a clean, airtight glass bottle. Discard the used cloves. If desired, add a few drops of rose water and shake gently to combine.
- Store: Cap the bottle tightly and store your DIY clove toner in the refrigerator to keep it fresh.

How to Use It
- Cleanse: Start with a clean face. Wash your face with your regular gentle cleanser and pat it dry.
- Apply: Pour a small amount of the chilled clove toner onto a cotton pad.
- Tone: Gently wipe the cotton pad over your entire face and neck, avoiding the eye area. Do not rinse off.
- Moisturize: Follow up with your favorite serum and moisturizer while your skin is still slightly damp to lock in hydration.
How Often to Use It
For best results, you can use this DIY clove toner once or twice daily, after cleansing. Observe how your skin responds and adjust frequency as needed.
Why These Ingredients Are Used
Cloves
Cloves are celebrated in natural remedies for their rich antioxidant properties. They are traditionally used to help cleanse and purify the skin, potentially supporting a clearer and more even-toned complexion. The natural compounds in cloves may also contribute to a refreshed and revitalized skin appearance, making them a popular choice in home beauty routines for those seeking a youthful glow.
Distilled Water
Distilled water serves as the ideal pure base for this toner. It is free from impurities, minerals, and contaminants that can be found in tap water, ensuring a clean and stable foundation for your homemade beauty product. This purity helps to highlight the benefits of the cloves without introducing any unwanted elements to your skin.
What Results to Expect
Regular use of this DIY clove toner may help your skin feel softer and appear smoother. It can support a brighter, more radiant complexion and may help reduce the appearance of dullness over time. While individual results vary, many find that incorporating natural toners like this helps promote a fresher, more revitalized look.

Safety Notes
- Patch Test First: Always perform a patch test on a small, inconspicuous area of your skin (like behind your ear or on your inner arm) at least 24 hours before applying the toner to your entire face to check for any adverse reactions.
- Use Gently: Apply the toner with light, gentle strokes. Avoid harsh rubbing, especially on delicate facial skin.
- Avoid Irritated or Broken Skin: Do not apply the toner to skin that is irritated, broken, sunburned, or has active breakouts.
- Stop If Discomfort Occurs: If you experience any redness, itching, burning, or discomfort, discontinue use immediately and rinse your skin thoroughly with cool water.
- Ingredient-Specific Cautions: While cloves are natural, their essential oils can be potent. Always use them in diluted form as a toner.
- Consult Your Doctor: If you are pregnant, breastfeeding, or have any underlying skin conditions or allergies, consult with a healthcare professional before trying any new home remedies.
FAQ
Is clove toner safe for all skin types?
While generally well-tolerated, clove can be potent. It’s especially important for individuals with sensitive skin to perform a patch test. If you have very reactive skin, you might want to dilute the toner further with rose water or plain distilled water.
How long can I store DIY clove toner?
Because it’s a natural, homemade product without preservatives, it has a limited shelf life. Store your clove toner in a clean, airtight bottle in the refrigerator for up to 1-2 weeks. If you notice any changes in smell, color, or consistency, discard it.
Can I use ground cloves instead of whole cloves?
It’s generally recommended to use whole cloves for infusion. Ground cloves can create a cloudy toner and may leave behind fine particles, making it less pleasant to use. Whole cloves provide a cleaner infusion.
Final Thoughts
Adding a DIY clove toner to your beauty routine offers a simple, natural way to support skin that looks and feels refreshed. Remember to always listen to your skin and enjoy the process of nurturing your complexion with accessible home remedies. Share your experience with us in the comments!