Hey beauty besties! Are you dreaming of that fresh, dewy glow but tired of complicated routines and pricey products? We totally get it! The secret to truly radiant skin often lies in the simplest ingredients, straight from nature’s pantry. Today, we’re diving into the wonderful world of DIY face toners – your new secret weapon for clear, refreshed, and glowing skin!
Face toners are like that refreshing sip of water for your skin after cleansing. They help balance pH, tighten pores, remove any lingering impurities, and prep your skin to absorb your serums and moisturizers even better. And guess what? You don’t need fancy store-bought versions to reap these benefits. Making your own toners at home is not just affordable; it lets you customize them with powerful natural ingredients perfect for your unique skin needs.
Why Go DIY with Your Face Toner?
Choosing to whip up your own toners comes with a basket full of benefits:
- Pure & Natural: You control every ingredient, ensuring no harsh chemicals, synthetic fragrances, or preservatives touch your precious skin.
- Budget-Friendly: Many effective ingredients are already in your kitchen, saving you a ton of money compared to high-end toners.
- Customizable: Tailor your toner to target specific concerns, whether it’s acne, dryness, dullness, or oily skin.
- Empowering: There’s something truly satisfying about creating your own beauty remedies!
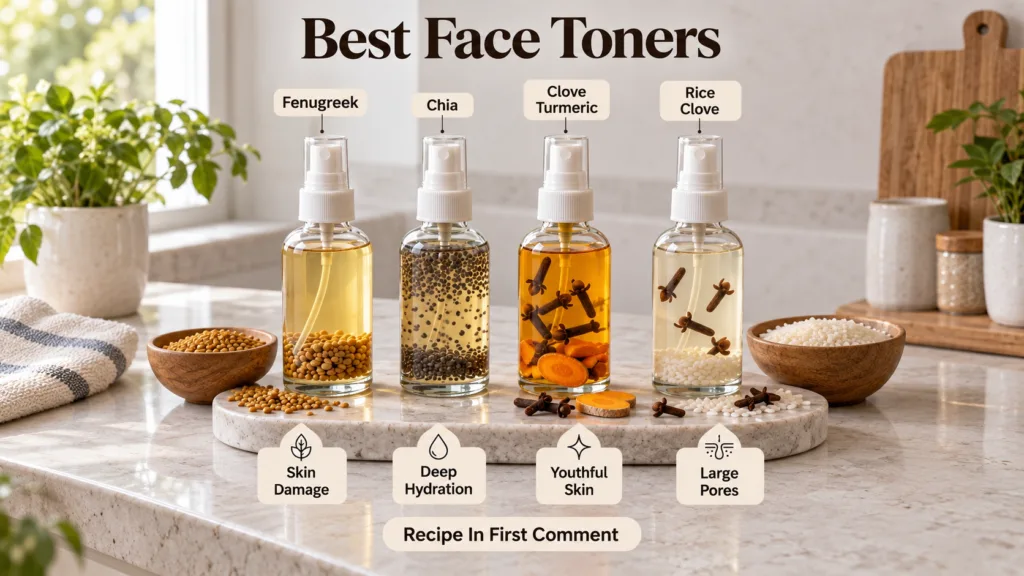
Your Natural Elixir Recipes: Best DIY Face Toners
Ready to transform your skincare routine? Let’s make some magic with these easy, effective DIY toner recipes inspired by nature’s finest!
1. Fenugreek Seed Toner for Clear, Refreshed Skin
Fenugreek seeds are a skincare superstar, packed with anti-inflammatory and antiseptic properties. They’re amazing for soothing irritated skin, reducing acne, and promoting an even skin tone. This toner is a game-changer for those dealing with breakouts or looking for a refreshing boost.
Benefits:
- Fights acne and blemishes
- Reduces inflammation and redness
- Promotes clear and smooth skin
- Rich in antioxidants
How to Make:
- Soak 1 tablespoon of fenugreek seeds in 1 cup of filtered water overnight (or for at least 4-6 hours).
- The next morning, strain the water into a clean spray bottle.
- Your fenugreek toner is ready!
2. Rice Water Toner for Brightening & Softening
The ancient secret of glowing skin, rice water is celebrated for its ability to brighten the complexion, minimize pores, and leave skin feeling incredibly soft and smooth. It’s rich in vitamins, minerals, and amino acids.
Benefits:
- Brightens skin tone
- Minimizes appearance of pores
- Softens and smooths skin texture
- Provides anti-aging benefits
How to Make:
- Rinse ½ cup of uncooked rice (white or brown) once to remove impurities.
- Place the rinsed rice in a bowl and add 1-1.5 cups of filtered water.
- Soak for 30 minutes to 1 hour, gently swishing the rice around. You’ll notice the water becoming cloudy.
- Strain the rice water into a clean spray bottle.
3. Turmeric & Clove Toner for an Antioxidant Glow
Turmeric is a potent anti-inflammatory and antioxidant powerhouse known for its skin-brightening abilities. Cloves add an extra boost of antiseptic power, making this toner fantastic for combating dullness and promoting a healthy, vibrant glow.
Benefits:
- Enhances skin radiance
- Offers strong antioxidant protection
- Reduces dark spots and hyperpigmentation
- Has antiseptic properties
How to Make:
- In a small pot, bring 1 cup of filtered water to a boil.
- Add a pinch of turmeric powder (or a few thin slices of fresh turmeric root) and 2-3 whole cloves.
- Simmer for 5-7 minutes, then remove from heat and let it cool completely.
- Strain the cooled liquid into a clean spray bottle.
4. Chia Seed Toner for Hydration & Plumpness
Chia seeds aren’t just for smoothies! When soaked, they release a gel-like substance rich in omega-3 fatty acids and antioxidants, perfect for deeply hydrating and plumping your skin. This toner is ideal for dry, dehydrated, or mature skin types.
Benefits:
- Deeply hydrates and moisturizes
- Plumps up the skin, reducing fine lines
- Rich in omega-3 fatty acids
- Soothes and nourishes dry skin
How to Make:
- Soak 1 teaspoon of chia seeds in ½ cup of filtered water for at least 2-3 hours, or until a gel forms.
- Strain the gel-like liquid through a fine-mesh sieve or cheesecloth into a clean spray bottle. (You might need to press gently to extract the liquid.)
How to Use Your DIY Toners for Best Results
Using your homemade toners is super simple:
- Cleanse: Start with a clean face.
- Apply: Close your eyes and spritz the toner directly onto your face, or apply it with a cotton pad.
- Pat: Gently pat your skin to help the toner absorb.
- Follow Up: Immediately apply your favorite serum and moisturizer while your skin is still slightly damp to lock in moisture.
Important Tips for Your DIY Toner Journey
- Patch Test: Always do a patch test on a small area of your skin (like behind your ear or on your inner arm) before applying a new toner to your entire face.
- Storage: Store your DIY toners in a clean, airtight spray bottle in the refrigerator. This helps prolong their freshness and provides an extra refreshing feel!
- Shelf Life: Since these are natural and preservative-free, they generally last about 5-7 days in the fridge. Make small batches frequently.
- Consistency is Key: For best results, incorporate your chosen toner into your morning and evening skincare routine consistently.
Embrace Your Natural Glow!
Creating your own natural face toners is a beautiful way to connect with your skin and provide it with the gentle, effective care it deserves. Say goodbye to complicated ingredients and hello to the power of nature! Which DIY toner are you excited to try first?
Share your favorite natural beauty hacks in the comments below, and let’s inspire each other on our journey to healthy, glowing skin!