There’s nothing quite like the satisfaction of harvesting your own bounty from the garden. But what happens after the last vegetable is picked? For many crops, the journey from garden to table isn’t complete until a crucial step called ‘curing’ has taken place. Curing is the secret to extending the life of your harvest, allowing you to enjoy your homegrown goodness for months, or even a year, after picking!
Whether you’re a seasoned gardener or just starting out, understanding how to properly cure your crops can dramatically reduce waste and ensure a steady supply of fresh, nutritious food. Let’s dive into the world of curing and learn how to transform your fresh harvest into long-lasting provisions.
What Exactly is Curing?
Curing is a post-harvest process that prepares certain crops for long-term storage. It typically involves allowing the crop to dry and toughen its outer skin or develop a protective layer, which helps prevent spoilage, disease, and moisture loss. Think of it as hardening them up for the long haul.
Why is Curing So Important?
- Extends Storage Life: This is the primary benefit. Cured crops can last significantly longer than uncured ones.
- Improves Flavor: For some crops, like sweet potatoes, curing converts starches to sugars, enhancing their sweetness and flavor.
- Heals Wounds: Curing allows minor cuts and abrasions received during harvest to heal, forming a protective callus that prevents rot and pest entry.
- Reduces Moisture Loss: The toughened skin or outer layer acts as a barrier, slowing down dehydration.
- Prevents Disease: By drying the outer layer and healing wounds, curing creates an environment less hospitable to bacteria and fungi that cause spoilage.
General Principles for Successful Curing
While specific conditions vary by crop, a few general rules apply to most curing processes:
- Good Airflow: Circulation is key to preventing moisture buildup and fungal growth.
- Appropriate Temperature: Each crop has an ideal temperature range for curing. Too cold or too hot can hinder the process.
- Correct Humidity: Some crops need high humidity to heal, while others need drier conditions to toughen.
- Avoid Direct Sunlight: For most curing, bright, direct sunlight can actually cause sunburn or rapid drying that isn’t beneficial. Indirect light or shade is usually preferred.
Curing Guide for Your Home Harvest
Let’s look at some common garden vegetables and their specific curing requirements.
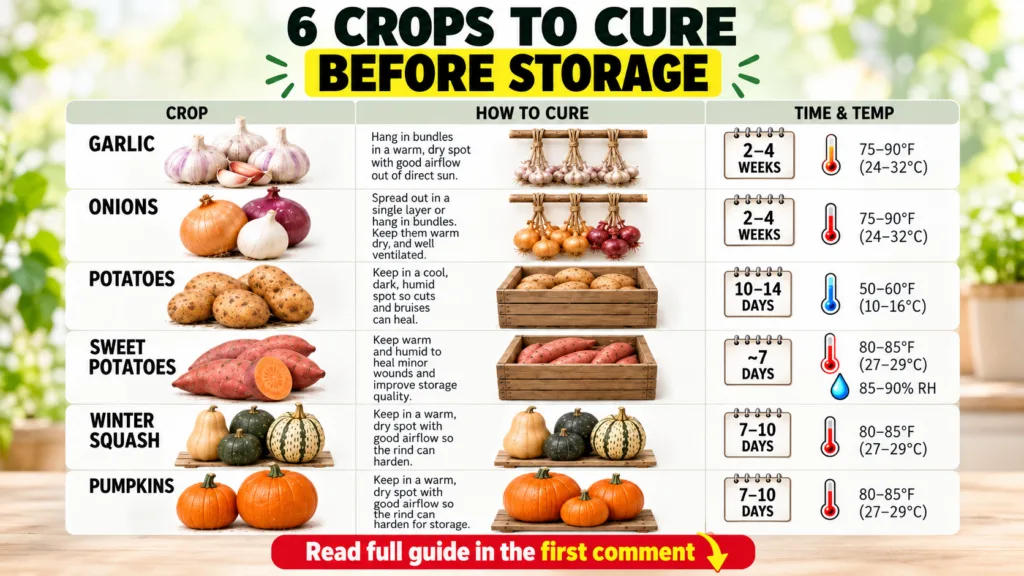
1. Garlic
After harvesting your garlic, leave the dirt on the bulbs. Hang them in bundles or spread them out in a single layer in a warm, dry, and well-ventilated area. A shed, garage, or even a shaded porch works well.
- Temperature: 60-80°F (15-27°C)
- Humidity: 60-70%
- Time: 2-4 weeks
You’ll know garlic is cured when the outer wrappers are dry and papery, and the neck is tight and firm.
2. Onions
Like garlic, onions should be harvested when their tops start to yellow and fall over. Leave the bulbs with their tops attached. Spread them in a single layer on screens or racks in a warm, dry, well-ventilated location, out of direct sun.
- Temperature: 70-80°F (21-27°C)
- Humidity: 60-70%
- Time: 2-4 weeks
Cured onions will have dry, papery skins and a tight, shriveled neck.
3. Potatoes
Once you’ve dug up your potatoes, handle them gently to avoid bruising. Don’t wash them! Just brush off excess soil. Place them in a dark, humid environment for curing.
- Temperature: 50-60°F (10-15°C)
- Humidity: 85-95%
- Time: 1-2 weeks
Curing heals any minor skin damage and thickens the skin, improving storage life and flavor.
4. Sweet Potatoes
Sweet potatoes require a very specific curing process to convert their starches into sugars and heal their delicate skins. Harvest them before the first frost, handling them carefully.
- Temperature: 80-85°F (27-29°C)
- Humidity: 85-90%
- Time: 5-10 days
After curing, they need to be stored at a cooler temperature (around 55°F or 13°C) for several weeks to further develop flavor.
5. Winter Squash and Pumpkins
Harvest these gourds when they are fully mature and their rinds are hard. Leave a few inches of stem attached if possible. Cure them in a warm, sunny spot for a short period to harden their skins.
- Temperature: 70-80°F (21-27°C)
- Humidity: 60-70%
- Time: 7-14 days
Curing these will enhance their flavor and dramatically extend their storage life, often for several months.
Storing Your Cured Crops
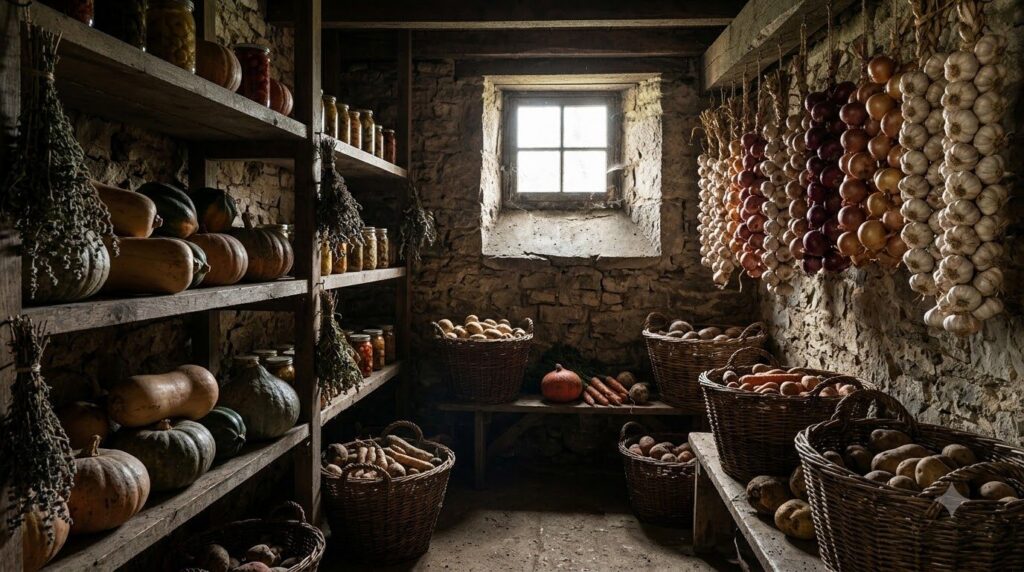
Once your crops are perfectly cured, the next step is proper storage. Most cured vegetables prefer a cool, dark, and well-ventilated location. Basements, root cellars, or unheated spare rooms are ideal. Always keep an eye on your stored produce and remove any that show signs of spoilage to prevent it from spreading.
Conclusion
Curing is a simple yet powerful technique that every home gardener should master. It’s an investment of a little time after harvest that pays off with months of delicious, homegrown produce, reducing waste and extending the joy of your gardening efforts. So, this season, don’t just harvest your crops – cure them, and enjoy the fruits (and vegetables) of your labor for much, much longer!