Are you looking for an easy, sustainable, and budget-friendly way to boost your garden’s health? Look no further! Today, we’re diving into the wonderful world of DIY vinegar fertilizer. It’s a fantastic organic solution that can help your plants thrive, all while using common household items and garden scraps.
Why Choose DIY Vinegar Fertilizer?
In the quest for a lush and vibrant garden, many of us reach for commercial fertilizers. However, these often come with a hefty price tag and sometimes contain chemicals that aren’t ideal for organic gardening. Making your own vinegar fertilizer offers several compelling benefits:
- Cost-Effective: You’ll be using kitchen scraps and items you likely already have, saving you money.
- Organic and Natural: Free from synthetic chemicals, this fertilizer supports a truly organic gardening approach.
- Soil Health: Vinegar can help adjust soil pH, making nutrients more accessible to plants, especially in alkaline soils.
- Nutrient Boost: As the organic materials decompose, they release essential nutrients that your plants crave.
- Sustainable Gardening: It’s an excellent way to reduce waste by repurposing kitchen and garden refuse.
Understanding How Vinegar Fertilizer Works
At its core, vinegar is acetic acid. When diluted and applied to the garden, it can gently lower the soil’s pH, which is beneficial for acid-loving plants and helps unlock nutrients that might be bound up in alkaline soil. The fermentation process of organic materials with vinegar also extracts and concentrates beneficial compounds and nutrients, turning them into a readily available plant food.
Your Step-by-Step Guide to Making Vinegar Fertilizer
Ready to get started? This process is simpler than you might think!
What You’ll Need:
- A large, clean glass jar or container with a lid (e.g., a gallon jar)
- Kitchen scraps: fruit peels (especially citrus), vegetable scraps, coffee grounds, eggshells (crushed), banana peels, spent tea leaves. Avoid oily or greasy foods.
- Garden waste: fresh leaves, grass clippings, non-woody plant trimmings.
- White vinegar (distilled white vinegar is ideal, but apple cider vinegar works too)
- Water (optional, for dilution during fermentation)
The Process:
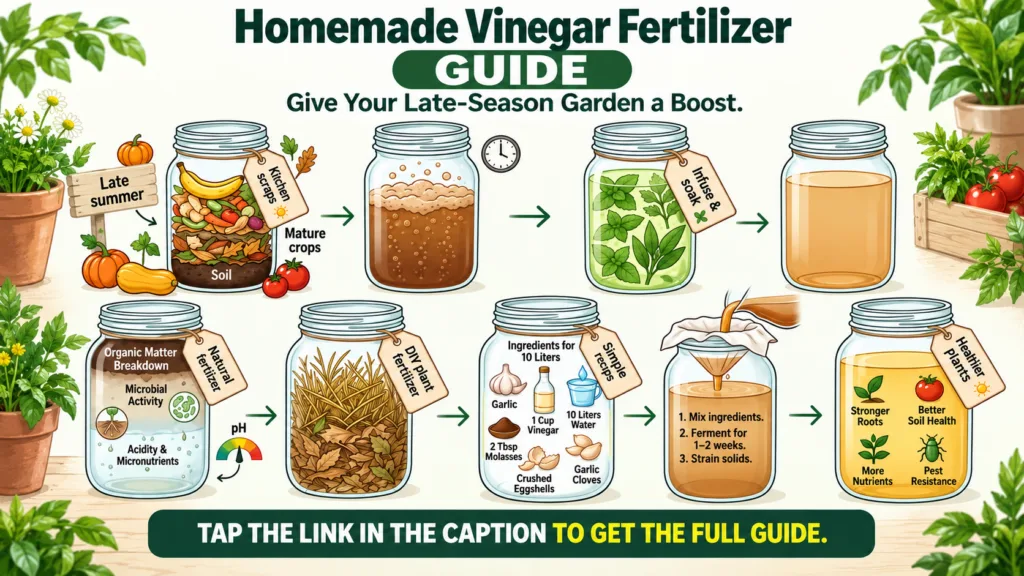
- Gather Your Scraps: Collect a variety of organic materials. Chop larger pieces into smaller ones to speed up decomposition.
- Fill Your Jar: Loosely fill your glass jar about 2/3 full with your chopped kitchen and garden scraps.
- Add Vinegar: Pour white vinegar over the scraps until they are completely submerged. You can add a little water if needed to ensure all scraps are covered, but aim for a high vinegar-to-water ratio.
- Seal and Store: Cover the jar loosely with a lid. A tight seal can cause pressure buildup from fermentation gases. Store it in a cool, dark place, away from direct sunlight.
- Initial Fermentation: For the first week, stir the mixture gently every day or two. This helps ensure even fermentation and prevents mold. You might see some bubbling, which is a good sign!
- Longer Fermentation: After the initial week, you can reduce stirring to once or twice a week. Let the mixture ferment for 2-4 weeks, or even longer for a more potent solution (up to 2 months). The longer it ferments, the more nutrients are extracted.
- Strain the Liquid: Once fermentation is complete, strain the liquid through a fine-mesh sieve or cheesecloth into another clean container. Squeeze out as much liquid as possible from the solid scraps.
- Compost the Solids: The remaining solids can be added to your compost pile, enriching it further.
- Store Your Concentrate: Your liquid vinegar fertilizer concentrate is now ready! Store it in a sealed container in a cool, dark place. It can last for several months.
How to Use Your Homemade Vinegar Fertilizer
It’s crucial to dilute your concentrate before applying it to your plants to avoid acidity shock. Always test on a small area first if you’re unsure.
General Dilution Ratios:
- For established plants (general feeding): Mix 1 part vinegar concentrate with 10 parts water.
- For seedlings or sensitive plants: Mix 1 part vinegar concentrate with 20 parts water.
- For foliar spray (to deter pests or provide quick nutrient boost): Mix 1 part vinegar concentrate with 15-20 parts water. Avoid spraying directly on flowers or during the hottest part of the day.
Application Methods:
- Soil Drench: Pour the diluted solution around the base of your plants, allowing it to soak into the soil.
- Foliar Spray: Use a spray bottle to lightly mist the leaves of your plants. This can also help deter some common garden pests.
Frequency:
Apply your diluted vinegar fertilizer every 2-4 weeks during the growing season. Observe your plants’ reaction and adjust the frequency as needed. Too much can be detrimental, so start sparingly.
Tips for Success and Things to Keep in Mind
- Observe Your Plants: Pay attention to how your plants respond. If you notice any yellowing or stress, dilute the solution further or reduce frequency.
- Soil Testing: If you know your soil pH is already acidic, use vinegar fertilizer sparingly or consider options that won’t further lower the pH.
- Not a Cure-All: While beneficial, this fertilizer complements good soil practices, proper watering, and adequate sunlight.
- Avoid Fresh Herbs: While most kitchen scraps are fine, avoid using large quantities of fresh herbs in your mix, as some can have strong properties.
Embracing DIY vinegar fertilizer is a rewarding step towards a more sustainable and vibrant garden. It’s a testament to the power of natural solutions and the joy of nurturing your plants with your own hands. Give it a try, and watch your garden flourish naturally!