Chia seeds are tiny powerhouses, packed with fiber, omega-3 fatty acids, and essential nutrients. They’re a favorite addition to smoothies, yogurts, and the ever-popular overnight oats. However, anyone who’s tried preparing them knows the frustration: those stubborn chia seeds clump together, creating an unappetizing, gummy blob instead of a smooth, evenly hydrated mixture.
If you’ve ever wondered why your chia seeds clump, you’re not alone. It’s a common issue that can undermine the texture and enjoyment of your healthy creations. The good news is, understanding the science behind this phenomenon and learning a simple technique can transform your chia seed preparation from clumpy to perfectly smooth every single time. Let’s dive into why chia seeds clump and, more importantly, how you can prevent it.
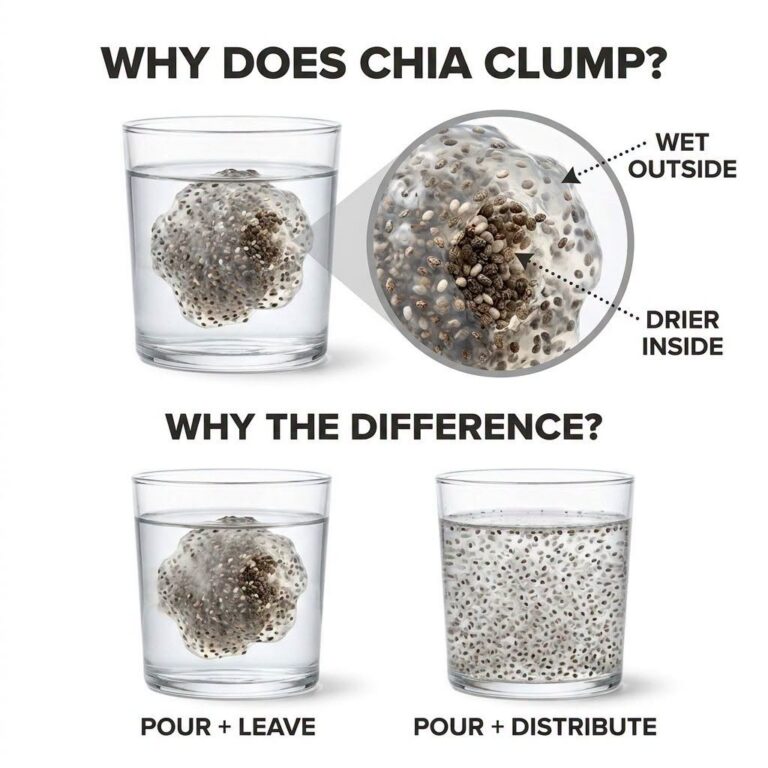 Understanding the difference between pouring and distributing chia seeds is key to preventing clumps.
The Mystery Solved: Why Do Chia Seeds Clump?
The secret to chia seeds’ incredible nutritional profile and versatility lies in their unique ability to absorb liquid and form a gelatinous coating. This coating is known as mucilage, and it’s what gives chia puddings their characteristic texture. However, this same property is responsible for clumping when not managed correctly.
When you simply pour chia seeds into liquid and leave them, the seeds on the outside of the cluster immediately begin to absorb water and form their gel coating. This outer layer then acts as a barrier, preventing the liquid from reaching the seeds in the center of the clump. The result? You get a ‘wet outside’ with a ‘drier inside,’ creating a solid, unappetizing lump that is difficult to break apart and doesn’t hydrate evenly.
This uneven hydration not only affects the texture but can also impact how your body accesses the nutrients within the seeds. Proper hydration ensures that all seeds swell and release their beneficial components effectively.
The Simple Secret to Perfectly Hydrated Chia Seeds
The difference between a clumpy mess and a perfectly smooth, evenly hydrated batch of chia seeds comes down to one crucial step: distribution. The infographic clearly illustrates the contrast between the ‘Pour + Leave’ method and the ‘Pour + Distribute’ method.
The “Pour + Leave” Problem: What Not to Do
Imagine dropping a spoonful of dry chia seeds into a glass of almond milk and walking away. Within minutes, you’ll likely return to find a large, congealed mass. This happens because the seeds bond together almost instantly as they start to absorb liquid, forming an impenetrable barrier around the inner seeds. This method virtually guarantees clumping and an undesirable texture.
The “Pour + Distribute” Solution: Your Guide to Smooth Chia
The key to preventing chia seeds from clumping is to ensure each tiny seed has an equal opportunity to absorb liquid individually before they have a chance to stick together. This is achieved through active distribution or stirring. Here’s how to do it effectively:
- Add Chia Seeds to Liquid: Start by pouring your liquid (water, milk, juice, etc.) into a bowl or jar first.
- Sprinkle, Don’t Dump: Add your chia seeds gradually, sprinkling them over the surface of the liquid. Avoid dumping a large amount in one spot.
- Stir Immediately and Vigorously: As soon as the chia seeds are introduced, begin stirring. Use a whisk or a fork to stir continuously for at least 30-60 seconds. This initial stirring is critical to separate the seeds and coat each one individually with liquid.
- Wait and Stir Again: Let the mixture sit for 5-10 minutes, then give it another vigorous stir. This second stir helps to break up any potential small clumps that might have started to form and ensures an even gel forms around each seed.
- Chill and Enjoy: Once thoroughly mixed and showing signs of gelling evenly, you can cover your mixture and refrigerate it for at least 2 hours, or ideally, overnight, to allow full hydration.
Beyond the Basics: Tips for Perfect Chia Every Time
While the ‘Pour + Distribute’ method is fundamental, a few extra tips can elevate your chia seed preparation and integration into various meals:
- Ratio Matters: A good starting ratio for chia pudding is typically 1/4 cup chia seeds to 1 cup of liquid. Adjust to your desired consistency.
- Warm Liquids (Carefully): Using slightly warm (not hot) liquid can sometimes speed up the gelling process, but ensure you stir immediately to prevent rapid clumping.
- Blend for Smoothness: For an ultra-smooth consistency in smoothies or puddings, you can blend your hydrated chia seeds with other ingredients once they have fully gelled.
- Meal Prep Perfection: Prepare a larger batch of perfectly hydrated chia seeds at the beginning of the week. Store it in an airtight container in the fridge, and use it as a base for quick breakfasts or snacks throughout the week.
- Flavor Infusion: Add flavorings like vanilla extract, cocoa powder, cinnamon, or a sweetener like maple syrup or honey during the initial stirring phase to ensure even distribution.
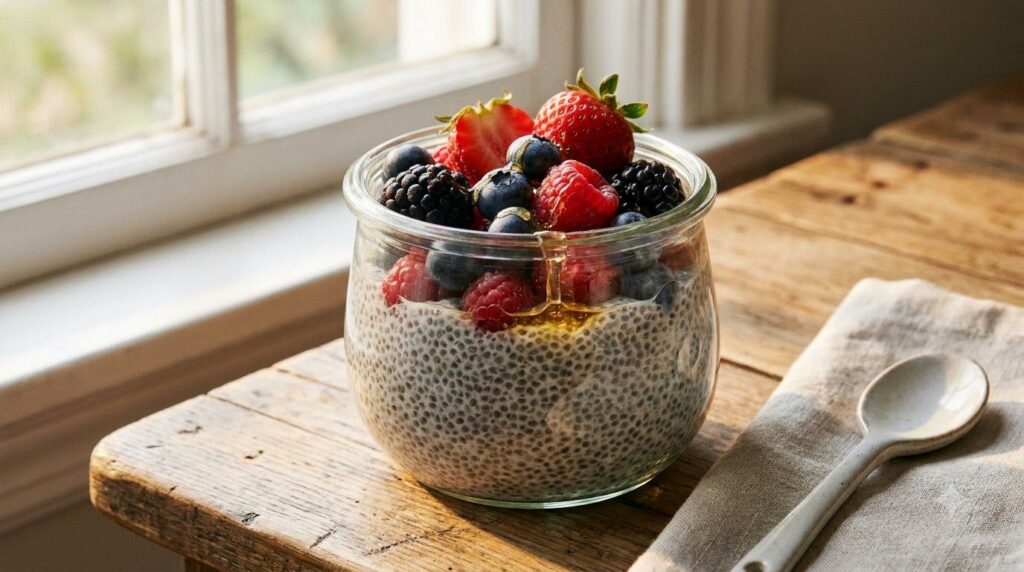 With proper preparation, your chia seeds will be evenly hydrated and ready to enjoy in various delicious ways.
Delicious Ways to Incorporate Perfectly Prepared Chia Seeds
Once you’ve mastered the art of perfectly hydrated chia seeds, a world of culinary possibilities opens up! These versatile seeds can be a nourishing addition to your breakfast, snacks, and even desserts. Here are a few simple recipes to get you started, leveraging your perfectly non-clumpy chia:
1. Classic Vanilla Chia Seed Pudding
A creamy, satisfying breakfast or snack that’s simple to prepare ahead of time.
- Servings: 1
- Prep time: 5 minutes
- Chill time: 2 hours (or overnight)
Ingredients:
- 2 tablespoons chia seeds
- 1/2 cup dairy or non-dairy milk (almond, oat, coconut work well)
- 1/2 teaspoon maple syrup or honey (optional, adjust to taste)
- 1/4 teaspoon vanilla extract (optional)
Instructions:
- In a jar or small bowl, combine milk, sweetener (if using), and vanilla extract. Stir well.
- Add the chia seeds, sprinkling them over the surface, and stir vigorously for 1 minute, ensuring no clumps form.
- Let the mixture sit for 5 minutes, then stir again thoroughly.
- Cover the jar and refrigerate for at least 2 hours, or ideally overnight, until the pudding has thickened to your desired consistency.
- Top with fresh fruit, nuts, or a sprinkle of granola before serving.
2. Quick & Easy Overnight Oats with Chia
Combine the goodness of oats and chia for a fiber-rich, grab-and-go breakfast.
- Servings: 1
- Prep time: 5 minutes
- Chill time: Overnight
Ingredients:
- 1/2 cup rolled oats
- 1 tablespoon chia seeds
- 1 cup dairy or non-dairy milk
- 1/2 teaspoon sweetener (maple syrup, honey, or stevia) (optional)
- Pinch of cinnamon (optional)
Instructions:
- In a jar or container with a lid, combine rolled oats, chia seeds, milk, sweetener (if using), and cinnamon (if using).
- Stir everything thoroughly until well combined, making sure there are no dry pockets or clumps of chia seeds.
- Cover and refrigerate overnight.
- In the morning, give it a good stir. If it’s too thick, add a splash more milk.
- Customize with your favorite toppings like fresh berries, sliced banana, a dollop of yogurt, or a swirl of nut butter.
3. Vibrant Berry Chia Smoothie
Boost your morning smoothie with the nutritional power and thickening properties of chia.
- Servings: 1
- Prep time: 5 minutes
Ingredients:
- 1 cup frozen mixed berries
- 1/2 ripe banana (fresh or frozen)
- 1 tablespoon chia seeds
- 1 cup dairy or non-dairy milk
- 1/2 cup plain Greek yogurt (optional, for extra creaminess and protein)
- Sweetener to taste (e.g., a date, a splash of maple syrup) (optional)
Instructions:
- Place all ingredients into a high-speed blender.
- Blend until the mixture is completely smooth and creamy. If you prefer a thinner consistency, add a little more milk.
- Taste and adjust sweetness if desired.
- Pour into a glass and enjoy immediately as a refreshing and nutrient-packed meal or snack.
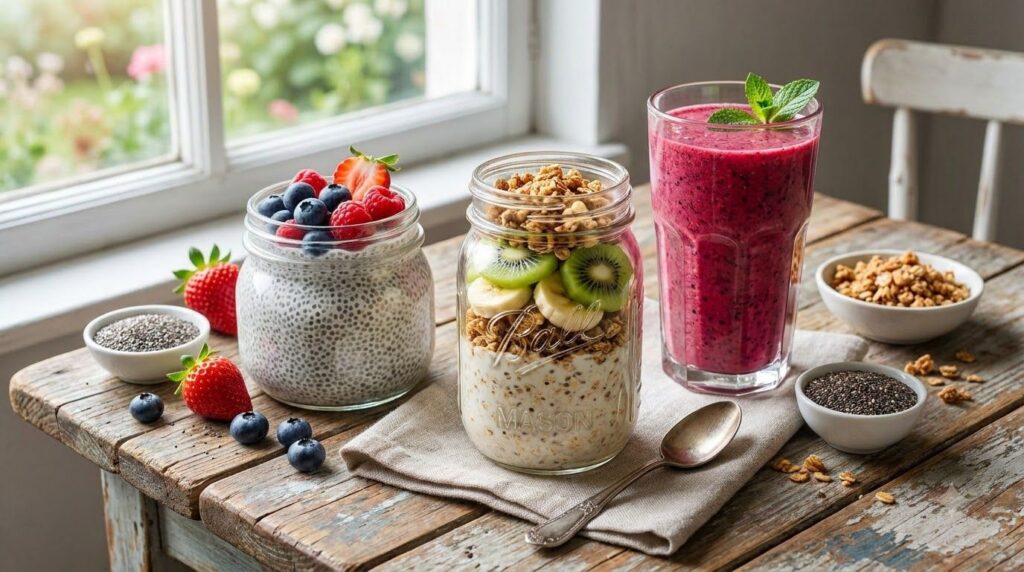 Explore the many delicious ways to enjoy your perfectly prepared chia seeds, from puddings to smoothies and overnight oats.
Frequently Asked Questions About Chia Seeds
Can I eat dry chia seeds?
While you can technically consume dry chia seeds, it’s generally recommended to soak them. Dry chia seeds absorb a significant amount of water in your digestive system, which, without adequate fluid intake, can lead to discomfort, bloating, or even constipation for some individuals. Soaking them before consumption ensures they expand and release their mucilage before entering your body, aiding digestion and nutrient absorption.
How long do soaked chia seeds last?
Properly prepared and refrigerated chia seeds can last for about 5-7 days in an airtight container. This makes them an excellent option for healthy meal prep, allowing you to enjoy fresh chia pudding, parfaits, or smoothie bases throughout the week.
What are the benefits of properly prepared chia seeds?
When chia seeds are properly hydrated, they become easier to digest, and their full nutritional benefits are more accessible. They contribute to a feeling of fullness, support digestive health due to their high fiber content, and provide omega-3 fatty acids that are beneficial for heart and brain health. An evenly gelled consistency also improves the overall eating experience, making these nutritious seeds a more enjoyable addition to your diet.
Final Thoughts
Clumping chia seeds don’t have to be a recurring problem in your kitchen. By understanding the simple science behind their gelling properties and adopting the ‘Pour + Distribute’ method, you can ensure your chia seeds hydrate perfectly every time. This small adjustment in preparation makes a big difference in texture, enjoyment, and the overall nutritional availability of these incredible superfoods. Embrace the stir, and enjoy perfectly smooth chia in all your favorite recipes!
Medical Disclaimer
The information provided in this article is for general informational purposes only and does not constitute medical advice. Always consult with a qualified healthcare professional before making any decisions about your diet, health, or medical care.