Unlock Endless Greens: Regrow from Kitchen Scraps!
Imagine having a constant supply of fresh vegetables and herbs, right from your kitchen! What if we told you that many of the delicious greens you enjoy can be easily regrown from the scraps you’d normally discard? It’s not just a fun experiment; it’s a fantastic way to embrace sustainable living, reduce waste, and bring more fresh produce into your home. Get ready to transform your kitchen into a thriving mini-garden!
Why Regrow Kitchen Scraps?
Diving into the world of regrowing kitchen scraps offers a bounty of benefits, making it a favorite among home gardeners and eco-conscious individuals alike. Here’s why you should give it a try:
- Reduce Waste: Turn food scraps destined for the compost bin into fresh produce, contributing to a more sustainable, zero-waste lifestyle.
- Save Money: Who doesn’t love free food? Extend the life of your groceries and cut down on your produce bill.
- Freshness at Your Fingertips: Enjoy hyper-local, organically grown greens whenever you need them, without a trip to the store.
- Educational & Fun: It’s a wonderful project for all ages, offering a fascinating peek into how plants grow and a sense of accomplishment.
- Boost Your Garden Skills: Gain confidence and knowledge that can be applied to other gardening endeavors.
Essential Scraps to Start Your Regrowing Journey
Many common kitchen items can sprout new life. Let’s explore some of the easiest and most rewarding scraps to regrow.
Green Onions: The Easiest Start
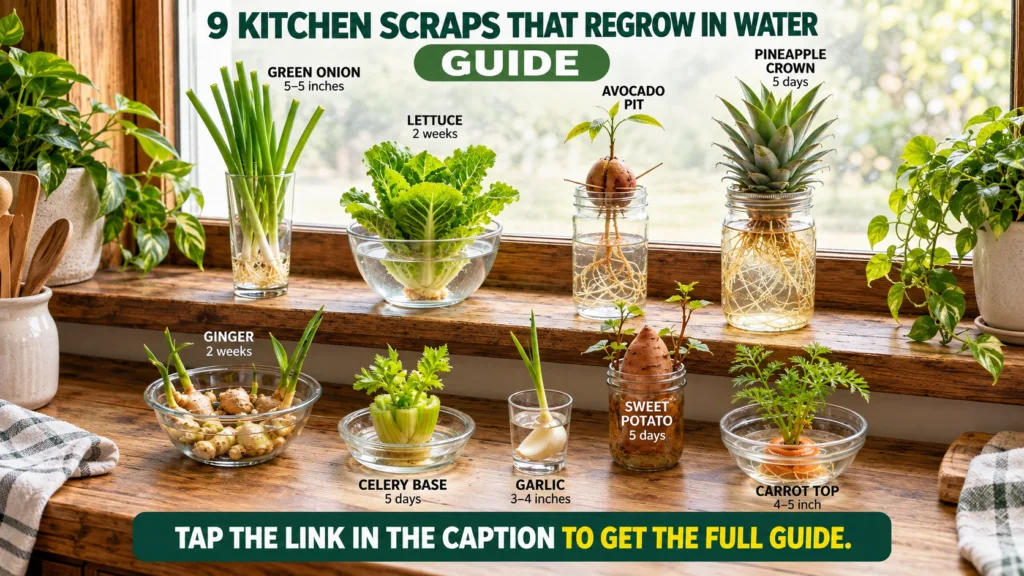
Green onions are arguably the easiest vegetable to regrow, making them perfect for beginners. You’ll have fresh shoots in just a few days!
- How-To: Save the white ends of green onions (about 1 inch) with the roots still attached. Place them root-side down in a small glass or jar with just enough water to cover the roots.
- Care: Place the glass on a sunny windowsill. Change the water every day or two to prevent mold.
- Harvest: New green shoots will emerge quickly. Snip off what you need, and they’ll keep regrowing! Once they’ve regrown a few times, you can transplant them into soil for even bigger yields.
Lettuce & Celery: Leafy Delights
These salad staples can give you multiple harvests from their bases.
- How-To: For romaine lettuce or celery, cut off the bottom base (about 1-2 inches) from the stalk. Place the base in a shallow bowl or dish with about half an inch of water.
- Care: Position in a sunny spot. Replenish the water daily. You’ll notice new leaves or stalks beginning to sprout from the center.
- Harvest: Once a good amount of new growth has appeared (usually 1-2 weeks), you can either harvest the outer leaves/stalks or transplant the entire plant into soil to allow it to fully develop.
Root Vegetables: Carrots, Beets, and Radishes
While you won’t get a full new root vegetable, you can easily grow nutritious greens from their tops!
- How-To: Cut about an inch off the top of a carrot, beet, or radish. Place the top, cut side down, in a shallow dish with a small amount of water.
- Care: Keep the dish in a sunny location and change the water regularly.
- Harvest: Green leafy tops will emerge. These are edible and can be used in salads, stir-fries, or pesto.
Ginger & Garlic: Flavorful Foundations
These culinary powerhouses can also be coaxed into new growth.
- Ginger: Look for a piece of ginger with visible ‘eyes’ or buds. Plant it shallowly in moist soil, with the buds facing up. Keep the soil consistently damp. It will sprout green shoots and eventually grow more ginger root, though it takes patience.
- Garlic: Place a single garlic clove root-end down in a small amount of water or directly into shallow potting soil. It will quickly sprout green shoots, which are delicious and milder than garlic cloves, perfect for garnishes.
Sweet Potatoes: A Sprouting Spectacle
Regrowing sweet potatoes is a bit different; you’re aiming for “slips” (sprouts) that can then be planted.
- How-To: Pierce a sweet potato with toothpicks and suspend it over a glass of water, with about half of the potato submerged.
- Care: Place in a warm, sunny spot. Change the water frequently. In a few weeks, you’ll see roots forming in the water and green shoots (slips) sprouting from the top.
- Harvest: Once the slips are about 4-6 inches long, gently twist them off the potato. Place the slips in water to develop their own roots, then plant them in soil.
General Tips for Success
To ensure your regrowing efforts are successful, keep these simple tips in mind:
- Fresh Scraps: Always start with fresh, healthy scraps for the best results.
- Clean Water: Change the water daily or every other day to prevent bacterial growth and keep your plants healthy.
- Sunny Spot: Most plants need plenty of light. A bright windowsill is usually ideal.
- Patience is Key: While some scraps sprout quickly, others take time. Don’t get discouraged if you don’t see immediate results.
- Transition to Soil: While many scraps start in water, most will thrive and produce more if eventually transplanted into potting soil.
Join the Zero-Waste Gardening Movement
Regrowing kitchen scraps is an incredibly rewarding and simple way to connect with your food, reduce your environmental footprint, and add a touch of green to your home. It’s a testament to the resilience of nature and a reminder that good things can come from unexpected places.
So, next time you’re about to toss those veggie ends, pause! You might just be throwing away the start of your next delicious meal. Happy regrowing!