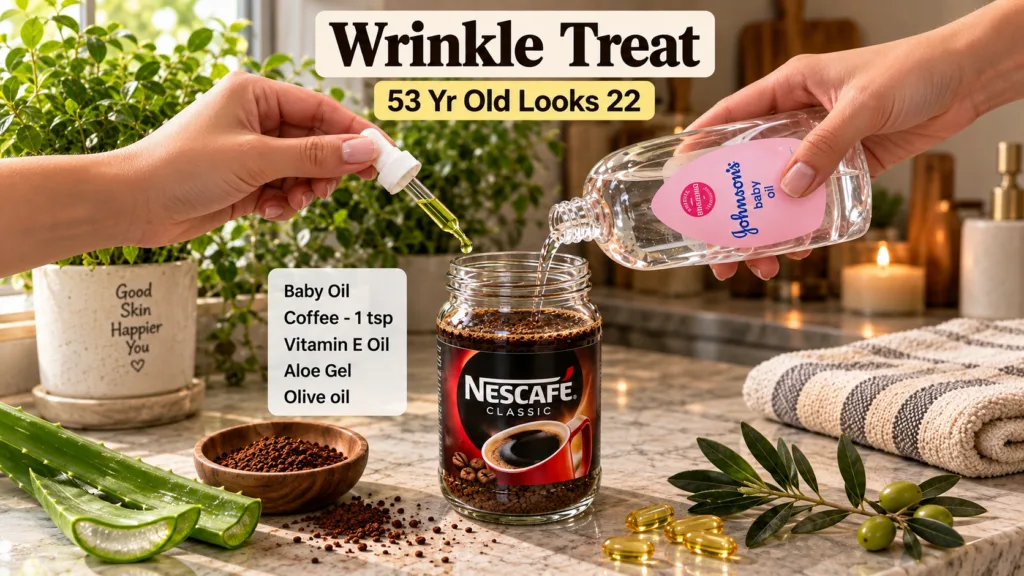
Who knew your morning coffee could also be your secret weapon for youthful, glowing skin? ✨ We often enjoy a cup of coffee to kickstart our day, but the magic of coffee isn’t just for waking up! It’s also an incredible ingredient for your skin, packed with benefits that can help you achieve that radiant, fresh look you’ve been dreaming of. This amazing DIY coffee mask, blended with everyday ingredients like baby oil and natural extracts, is your new go-to for tackling those pesky wrinkles and dullness right at home!
It’s super simple to make, feels incredible, and brings a spa-like experience to your bathroom. Get ready to reveal a fresher, more vibrant you without breaking the bank. Let’s dive into how you can create this powerful concoction and give your skin the treat it deserves!
The Power of Coffee for Your Skin
Coffee isn’t just a delicious beverage; it’s a skincare superstar! Rich in antioxidants, particularly polyphenols, coffee helps protect your skin from free radical damage, which can lead to premature aging. The caffeine in coffee is also a fantastic stimulant for blood circulation, which can reduce puffiness and give your skin a more toned appearance. Plus, coffee grounds make for an excellent natural exfoliant, gently sloughing away dead skin cells to reveal smoother, brighter skin underneath.
The Secret Blend: Why These Ingredients Work Wonders
Our DIY coffee mask isn’t just about coffee; it’s the synergistic blend of natural extracts and oils that truly makes it a youth-boosting marvel. Each ingredient plays a crucial role:
1. Nescafe Classic Coffee Grounds
- Exfoliation: Gently removes dead skin cells, promoting cell turnover for a fresh glow.
- Antioxidant Boost: Fights free radicals, reducing signs of aging like fine lines and wrinkles.
- Circulation: Caffeine stimulates blood flow, which can reduce puffiness and tighten the skin.
2. Johnson’s Baby Oil
- Moisture Lock: Baby oil is fantastic for sealing in moisture, leaving your skin incredibly soft and supple.
- Gentle Carrier: Its mild nature makes it a perfect base for sensitive skin, ensuring the mask is nourishing without being harsh.
3. Aloe Vera Gel (from stalks)
- Soothing & Healing: Known for its incredible anti-inflammatory properties, aloe vera calms irritated skin, reduces redness, and aids in healing.
- Hydration: Provides deep hydration without feeling greasy, making your skin plump and dewy.
4. Vitamin E Capsules
- Anti-Aging Powerhouse: Vitamin E is a potent antioxidant that helps repair damaged skin cells and reduce the appearance of scars and dark spots.
- Skin Nourishment: It deeply moisturizes and strengthens the skin’s barrier, improving elasticity and giving a youthful bounce.
Your DIY Youthful Skin Coffee Mask Recipe
Ready to whip up this magic potion? Here’s what you’ll need and how to make it:
Ingredients:
- 2 tablespoons of Nescafe Classic coffee grounds (finely ground)
- 1 tablespoon of Johnson’s Baby Oil
- 1 tablespoon of fresh Aloe Vera gel (extracted directly from a stalk for best results)
- Contents of 1 Vitamin E capsule (prick and squeeze out the oil)
- Optional: A few drops of olive oil for extra hydration
Instructions:
- Mix the Dry: In a small, clean bowl, combine the Nescafe Classic coffee grounds.
- Add Liquids: Pour in the Johnson’s Baby Oil, fresh aloe vera gel, and the oil from the Vitamin E capsule. If using, add the olive oil now.
- Stir Well: Mix all the ingredients thoroughly until you achieve a smooth, consistent paste. The consistency should be spreadable but not too runny. Add a tiny bit more coffee grounds if it’s too liquid, or a few drops of baby oil if it’s too thick.
- Prepare Your Skin: Before applying the mask, make sure your face is clean and dry. Use a gentle cleanser to remove any makeup or impurities.
How to Apply for Best Results
Application is key to maximizing the benefits of your DIY mask:
- Apply Evenly: Using your fingertips or a soft brush, apply a generous layer of the mask evenly across your face, avoiding the delicate eye area and lips.
- Gentle Massage: Once applied, gently massage the mask into your skin in circular motions for about 1-2 minutes. This helps with exfoliation and stimulates blood flow.
- Relax and Wait: Leave the mask on for 15-20 minutes. This is your time to relax! Put on some calming music, read a book, or simply enjoy the peace.
- Rinse Off: After the waiting period, gently rinse off the mask with lukewarm water. Use circular motions as you rinse to get a final exfoliating scrub.
- Pat Dry & Moisturize: Pat your face dry with a clean, soft towel and follow up with your favorite moisturizer to lock in all that goodness.
Frequency and Tips for Ongoing Radiance
For best results, incorporate this DIY coffee mask into your routine 1-2 times a week. Consistency is key when it comes to natural skincare remedies!
- Patch Test: Always perform a patch test on a small area of your skin (like behind your ear or on your wrist) before applying the mask to your entire face, especially if you have sensitive skin.
- Fresh Ingredients: Use fresh aloe vera gel whenever possible for maximum potency.
- Storage: Since this mask uses fresh ingredients, it’s best to prepare a fresh batch each time. If you have any leftover, store it in an airtight container in the refrigerator for no more than 1-2 days.
- Sun Protection: After exfoliating, your skin may be more sensitive to the sun. Always follow up with a broad-spectrum SPF during the day.
Get Ready to Glow!
This DIY coffee mask isn’t just a beauty treatment; it’s a self-care ritual that nourishes your skin and your soul. With the powerful blend of coffee, baby oil, aloe vera, and vitamin E, you’re giving your skin the ultimate boost it needs to look youthful, clear, and absolutely radiant. You’ll be amazed at how simple and effective this home remedy is!
Will you give it a try? We bet you’ll love the results! Let us know in the comments below if you’re excited to try this, and share your experience with our Beauty Tips Daily community! Happy masking!