Tired of the same old game nights? Imagine hosting a trivia challenge tailored exactly to your friends’ interests, full of inside jokes, or focused on a niche topic you all love. Creating your own quiz cards is a simple and rewarding way to bring personalized fun and engaging entertainment right into your living room. It’s an incredibly affordable and creative alternative to store-bought games, allowing for endless themes and customization.
What You’ll Need
- Cardstock or thick paper (you can choose various colors if desired)
- Pens or markers
- Ruler (optional, for neat cuts)
- Scissors or a paper cutter
- Index card box or small container (optional, for storage)
- Internet access or reference books (for question research)
Why This DIY Can Be Useful
Crafting your own quiz cards offers unparalleled flexibility. You’re not limited by mass-produced themes; you can dive into obscure movie trivia, local history, pop culture deep dives, or even questions about your own friend group’s experiences. This personal touch makes the game far more engaging and memorable. It’s also incredibly cost-effective, using materials you likely already have at home, and can be a fun activity in itself, preparing for the main event.
How to Make It
-
Choose Your Theme
Start by picking a theme that excites you and your potential players. Ideas include: classic Hollywood, 90s music, world geography, culinary delights, or even a ‘how well do you know us?’ quiz about your friends.
-
Research Your Questions
Once you have a theme, start compiling questions. Aim for a mix of difficulty levels to keep everyone engaged. For each question, make sure you have a definitive answer. Online search engines, encyclopedias, and trivia books are excellent resources.
-
Prepare Your Cards
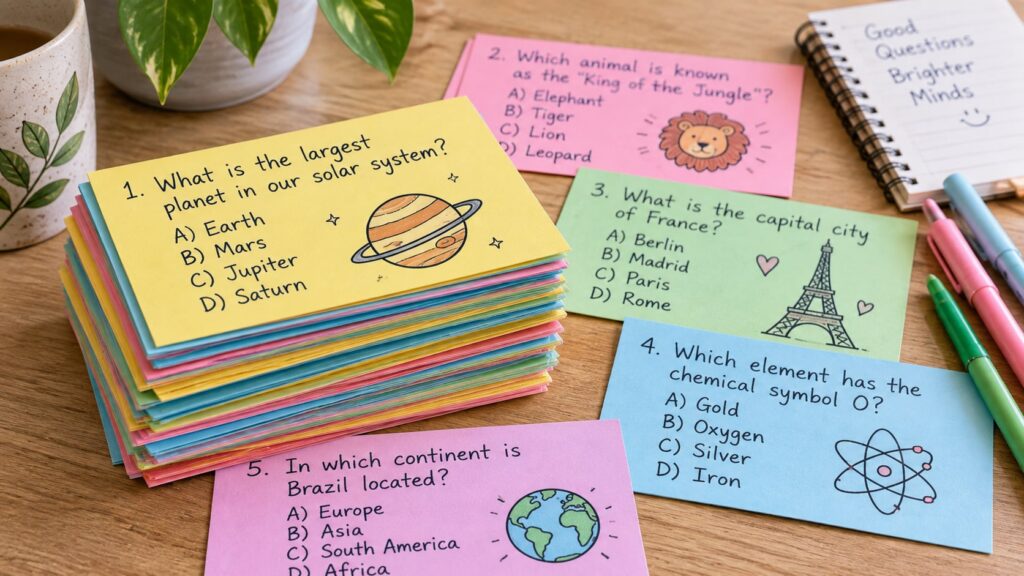
Take your cardstock or thick paper. Using a ruler and pencil, mark out card-sized sections. Standard index card size (3×5 inches) works well, but you can make them larger or smaller depending on how much information you need to write. Cut out your cards neatly using scissors or a paper cutter.
-
Write Questions and Answers
On one side of each card, write your question clearly. On the back, write the correct answer. You might also include a category title or point value on the question side if you’re planning for multiple rounds or scoring systems.
-
(Optional) Decorate
Add a personal flair! Decorate your cards with relevant drawings, colors, or stickers to match your theme. This step adds to the homemade charm and makes the game visually appealing.
How to Use It
Once your quiz cards are ready, it’s time to play!
- Organize into Rounds: Separate your cards into categories or difficulty levels for structured play.
- Set the Rules: Decide on how many points each question is worth, if there will be bonus questions, or if teams can steal answers.
- Gather Players: Whether it’s a small group or larger teams, ensure everyone knows the rules before you start.
- Designate a Quizmaster: One person will read the questions and verify answers. They should have a good poker face!
- Award Points: Keep a running tally of scores. You can even have small, fun prizes for the winners.
What to Expect
Expect a night filled with laughter, friendly competition, and engaging conversation. Your DIY quiz cards won’t be perfectly uniform like store-bought ones, but their handmade charm and personalized content will make them far more special. People will appreciate the effort you put in, and the unique questions will spark genuine fun and maybe even some new discoveries!
Helpful Tips
- Variety is Key: Include different question types: multiple choice, true/false, fill-in-the-blank, and open-ended.
- Difficulty Levels: Mix easy questions to build confidence with harder ones to challenge players.
- Theme Consistency: Keep your questions firmly within your chosen theme to maintain focus.
- Time Limits: For faster-paced games, introduce a time limit for answering each question.
- Team Play: Divide players into teams to encourage collaboration and discussion.
Important Notes / Safety
When using scissors or a paper cutter, always exercise caution to avoid cuts. If involving children in the crafting process, ensure they are supervised, especially with cutting tools. Keep small cards or paper scraps away from very young children or pets to prevent choking hazards. Otherwise, this is a very safe and enjoyable DIY activity!