There’s nothing quite like the satisfaction of pulling a plump, fragrant garlic bulb from your own garden soil. Homegrown garlic offers a depth of flavor and a freshness that store-bought varieties can rarely match. If you’ve been nurturing your garlic plants for months, the harvest season is a moment to celebrate! But knowing exactly when and how to harvest, and more importantly, how to cure and store your garlic, is crucial for enjoying your bounty all year long.
Join us as we dive into the essential tips for harvesting and curing your homegrown garlic, ensuring your efforts result in a delicious, long-lasting supply.
When to Harvest Your Homegrown Garlic
Timing is everything when it comes to harvesting garlic. Pulling it too early can result in smaller bulbs and thinner skins, while harvesting too late might lead to cloves separating and a shorter storage life. Here’s what to look for:
- Yellowing Leaves: The most reliable indicator is when the lower third to half of the plant’s leaves have turned yellow or brown and started to dry out. The upper leaves should still be green.
- Number of Green Leaves: Aim for about 4-6 green leaves remaining on the plant. Each green leaf typically corresponds to a protective wrapper around the bulb. The more wrappers, the better the storage quality.
- Scapes: If you’re growing hardneck varieties, they will produce flower stalks called scapes. While many gardeners remove scapes to encourage larger bulb growth, if you leave them on, wait until they start to straighten out before harvesting.
Typically, garlic is ready for harvest in late spring or early summer, about 8-9 months after fall planting, or 4-5 months after spring planting.
How to Harvest Garlic Without Damaging It
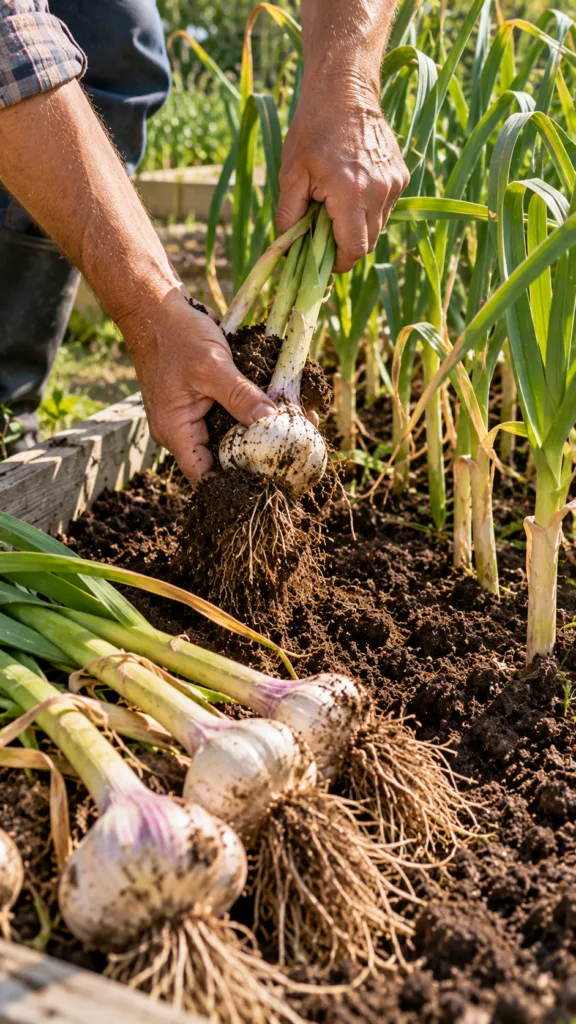
Once you’ve determined your garlic is ready, careful harvesting is key to preventing damage that can lead to rot during storage.
- Loosen the Soil: Gently use a garden fork or spade to loosen the soil around the garlic bulb. Insert the tool several inches away from the plant to avoid puncturing the bulb.
- Gently Lift: Once the soil is loose, carefully pull the garlic plant by the base of its stalk. Avoid pulling forcefully on the leaves, as they can detach from the bulb.
- Shake Off Excess Soil: Gently tap or brush off any large clumps of soil from the roots. Do not wash the bulbs, as moisture can encourage rot.
- Inspect: Check each bulb for any signs of disease, pests, or physical damage. Set aside any damaged bulbs for immediate use, as they won’t store well.
The Art of Curing Your Garlic
Curing is a critical step that dries out the outer layers of the garlic, concentrates its flavors, and prepares it for long-term storage. Think of it as hardening the bulb for its journey to your kitchen!
Why Cure Garlic?
- Longer Storage: Properly cured garlic can last for many months, sometimes up to a year.
- Enhanced Flavor: The curing process helps to intensify garlic’s pungent flavor.
- Protective Wrappers: It allows the outer layers to dry and tighten, forming a protective barrier around the cloves.
How to Cure Garlic
Find a location that is:
- Warm: Around 75-85°F (24-29°C) is ideal.
- Dry: Good air circulation is essential to prevent mold.
- Shady: Direct sunlight can cook the garlic and reduce its storage life.
Hang the garlic in bundles of 4-6 plants, or spread them in a single layer on screens or racks. Keep the stalks and roots attached during this process. Allow them to cure for 3-4 weeks, or until the wrappers are dry and papery, the neck is constricted, and the roots are brittle.
Storing Your Homegrown Garlic for Longevity
After curing, your garlic is ready for its long slumber! Proper storage ensures you can enjoy your harvest well into the next year.
- Trim: Once cured, trim the roots to about 1/4 to 1/2 inch and cut the stalks to about an inch above the bulb. For softneck varieties, you can braid the stalks for decorative and practical storage.
- Ideal Conditions: Store your garlic in a cool (50-60°F / 10-15°C), dark, and dry place with good air circulation. A mesh bag, an open basket, or even old nylon stockings work well.
- Avoid Refrigeration: Do not store garlic in the refrigerator, as it can encourage sprouting and diminish flavor.
Why Grow Your Own Garlic?
Beyond the simple joy of gardening, growing your own garlic comes with a host of benefits:
- Superior Flavor: Freshly harvested garlic tastes incredibly vibrant and rich.
- Organic Control: You know exactly what goes into your soil and onto your plants, ensuring truly organic produce.
- Cost-Effective: A small initial investment in planting stock can yield a significant harvest.
- A Sense of Accomplishment: There’s immense satisfaction in cooking with ingredients you’ve grown yourself.
Harvesting and curing garlic might seem like a detailed process, but it’s incredibly rewarding. With these tips, you’re well on your way to enjoying your very own homegrown garlic throughout the year. Happy gardening!