Most gardeners chase vibrant growth and abundant harvests with an arsenal of expensive fertilizers and amendments. But what if the secret to a truly thriving garden, rich in nutrients and bursting with life, isn’t found in a bag from the store, but in your kitchen waste bin? This simple, ingenious method of burying kitchen scraps in a bucket can transform your soil, nourish your plants, and significantly reduce household waste.
What It Is: Sub-Surface Composting
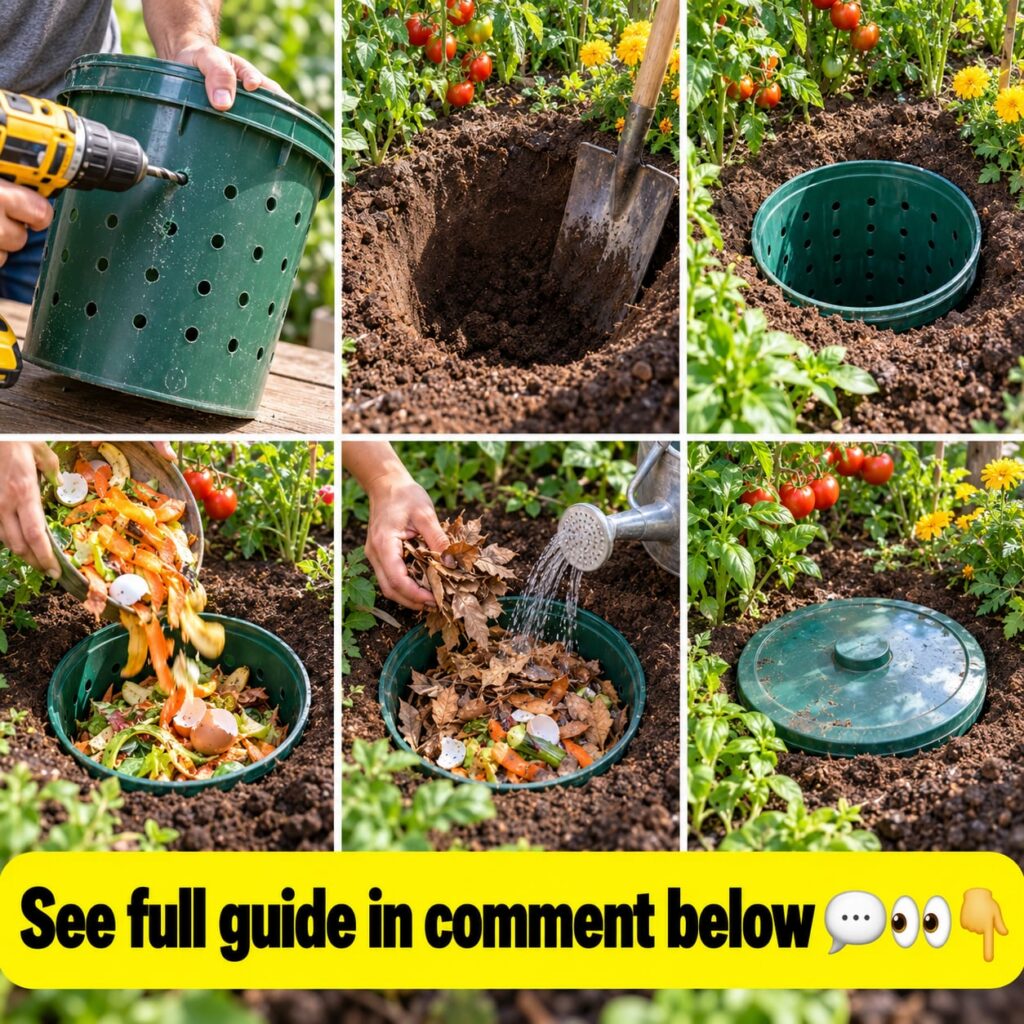
The ‘bury scraps in a bucket’ method is essentially a form of sub-surface composting, where organic kitchen waste is placed in a perforated bucket and buried directly in your garden soil. This allows nature’s decomposers – worms, microbes, and beneficial fungi – to break down the material right where your plants can benefit most. Unlike traditional open composting, this method minimizes odors, deters pests, and delivers a slow, steady release of nutrients directly to plant roots, leading to healthier soil structure and more vigorous growth.
Ingredients: Your Kitchen Scraps
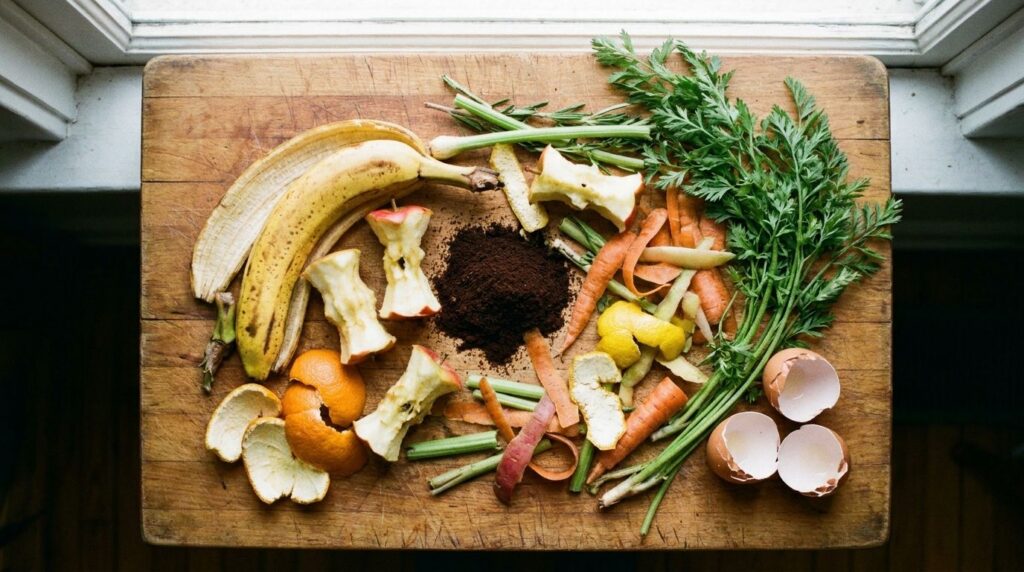
The beauty of this method lies in its simplicity. Your ‘ingredients’ are everyday kitchen discards that would otherwise end up in the landfill. Focus on nitrogen-rich “greens” and carbon-rich “browns” (though in a bucket, the distinction is less rigid than a traditional compost pile).
- Vegetable and Fruit Peels: Carrot tops, potato skins, apple cores, banana peels, citrus rinds (in moderation).
- Coffee Grounds and Tea Bags: Excellent sources of nitrogen.
- Eggshells: Crushed for calcium.
- Stale Bread/Grains: Small amounts.
- Spent Flowers/Leaves: Small, non-diseased plant material.
Approximate Quantities
There’s no precise “measurement” like in a recipe, but a good rule of thumb is to fill your bucket about 2/3 full with scraps before burying it. For a standard 5-gallon bucket, this might be 5-10 pounds of mixed scraps over several days or weeks of collection. The key is consistency and variety.
The Formula: A Simple Bucket System
The formula for this garden hack is remarkably straightforward:
- A sturdy plastic bucket (e.g., a 5-gallon painter’s bucket).
- A drill for creating drainage and access holes.
- Your accumulated kitchen scraps.
- A garden shovel.
Step-by-Step Method
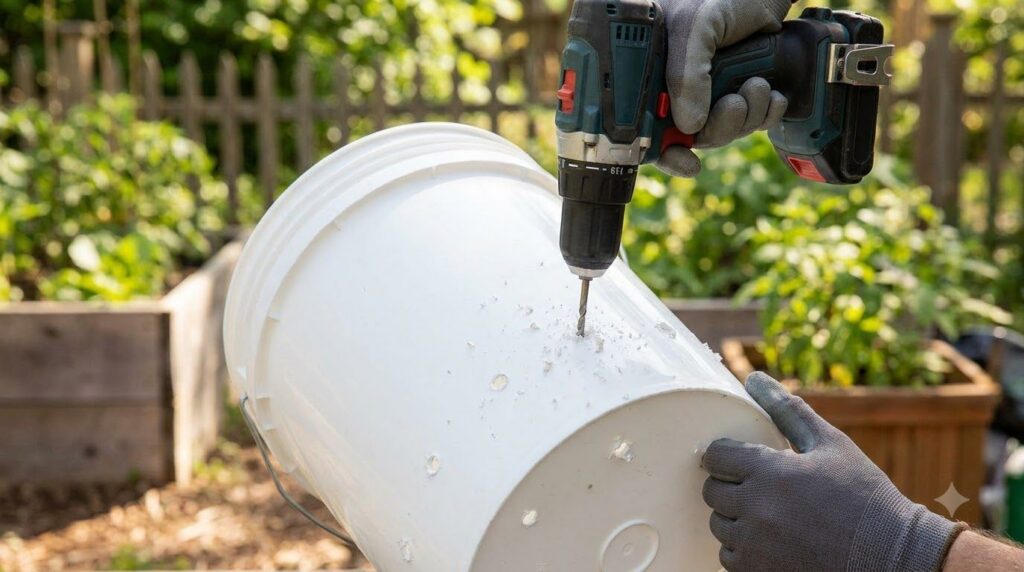
- Prepare Your Bucket: Using a drill with a 1/2 inch to 1-inch bit, drill numerous holes (10-15 per side) around the sides and bottom of your bucket. These holes are vital for drainage, aeration, and allowing worms and microbes to enter and exit.
- Choose Your Location: Select a spot in your garden where you want to improve soil health, ideally near plants that are heavy feeders or in a new bed you’re preparing. Ensure it’s not directly under the root zone of existing, very young plants that might be overwhelmed initially.
- Dig the Hole: Dig a hole slightly wider and deeper than your bucket. You want the rim of the bucket to be just below or flush with the soil surface. This prevents odors and keeps pests out.
- Place the Bucket: Put the perforated bucket into the hole.
- Fill with Scraps: Begin adding your kitchen scraps to the bucket. Chop larger pieces into smaller ones (1-2 inches) to speed up decomposition.
- Cover the Bucket: Once the bucket is about 2/3 full, place the lid on it and cover the entire bucket with the soil you dug out earlier. The lid helps contain odors and prevents curious animals from digging.
- Let Nature Work: Over the next several weeks to months, the scraps will decompose, releasing nutrients into the surrounding soil.
Quick Tip: Keep a small container with a lid on your kitchen counter to collect scraps daily. This makes the process much more convenient and reduces trips to the garden.
How to Use It
Once buried, the bucket works passively. The nutrients from the decomposing scraps will leach into the soil, becoming available to the roots of nearby plants. You don’t “use” the compost in the traditional sense of digging it out and spreading it. Instead, the plants surrounding the buried bucket will draw on the enriched soil. It’s particularly effective for vegetable gardens, fruit trees, and perennial beds.
How Often to Use It
A single bucket of scraps can take anywhere from 1 to 4 months to fully decompose, depending on the type of scraps, moisture, and soil temperature. You can run multiple buckets simultaneously in different parts of your garden, or rotate locations. Once a bucket is mostly decomposed (you’ll notice the scraps have significantly reduced in volume and become dark, earthy material), you can either:
- Refill it with new scraps.
- Move the bucket to a new location, leaving the decomposed material behind.
- Remove the bucket, allowing the decomposed material to fully integrate, and fill a new bucket in a different spot.
For continuous soil enrichment, consider burying a new bucket every 2-3 months, cycling through different garden zones.
How to Choose Ingredients (Good vs. Bad Scraps)
Not all kitchen scraps are created equal for this method. Stick to plant-based materials to avoid attracting pests and creating odors.
| Good Scraps (Use Freely) | Scraps to Avoid (or Use Sparingly) |
|---|---|
| Fruit & Vegetable Peels | Meat, Bones, Fish |
| Coffee Grounds & Filters | Dairy Products (Cheese, Yogurt, Milk) |
| Tea Bags (staple-free) | Oils, Greases, Fatty Foods |
| Eggshells (crushed) | Pet Waste (excrement) |
| Stale Bread/Pasta (small amounts) | Chemically Treated Materials |
| Non-diseased Plant Clippings | Heavily Processed Foods |
Storage
Once buried, the bucket itself acts as its own “storage.” However, managing your collected scraps before they go into the bucket is key. Keep a smaller, lidded container on your kitchen counter or in your freezer. Freezing scraps can slow down decomposition and prevent odors until you’re ready to add them to the buried bucket.
Practical Tips for Success
- Chop Small: The smaller your scraps, the faster they will decompose.
- Layer It: While not strictly necessary in a buried bucket, occasionally layering your scraps with a handful of soil or dry leaves can introduce more microbes and balance the carbon/nitrogen ratio.
- Moisture is Key: Ensure the soil around the bucket stays adequately moist to support microbial activity. If your climate is very dry, you might need to water around the bucket periodically.
- Mark Your Spot: Place a small marker (like a stick or a rock) near your buried bucket so you don’t accidentally dig it up or forget where it is.
Common Mistakes to Avoid
- Using the Wrong Scraps: Adding meat, dairy, or oily foods will attract pests (rodents, raccoons) and create foul odors. Stick to plant-based materials.
- Not Drilling Enough Holes: Insufficient holes will lead to anaerobic decomposition, causing bad smells and slower breakdown. More holes are better.
- Burying Too Shallow: If the bucket rim is above ground, it can attract pests and allow odors to escape. Ensure it’s buried flush or slightly below the surface.
- Overfilling: While you want a good amount of scraps, don’t pack them in so tightly that air can’t circulate or worms can’t move through.
- Ignoring Your Soil: This method works best in healthy soil with existing microbial life. If your soil is very poor, it might take longer to get started.
Cautions / Who Should Avoid It
This method is generally safe and beneficial for most gardens. However:
- Pest Concerns: While the lid and burial help, if you have persistent issues with rodents or other digging animals, you might need to reinforce the area or reconsider the method.
- Disease Transmission: Avoid adding diseased plant material to your bucket, as this could potentially spread pathogens in your garden.
- Allergies: If you have severe allergies to molds or fungi, wear gloves when handling scraps.
Quick Summary: Your Garden’s New Secret Weapon
- Best Preparation: Perforated 5-gallon bucket, buried flush with soil.
- Best Use-Case: Enriching garden beds, feeding heavy-feeding plants, reducing kitchen waste.
- Storage: Scraps collected in a lidded kitchen container or frozen; buried bucket is self-contained.
- When to Use: Continuously, replacing or refilling buckets every 2-4 months.
- What to Avoid: Meat, dairy, oils, diseased plants, insufficient holes, shallow burial.
You may also like: See the full guide on easy vermicomposting for faster results
Frequently Asked Questions
- Can I use fresh or dried scraps? Both are fine! Fresh scraps are most common, but dried leaves or small amounts of dried food waste can also be added.
- How long does it take for the scraps to decompose? Typically 1 to 4 months, depending on the type of scraps, moisture, temperature, and microbial activity in your soil.
- Can I use any plastic bucket? Yes, as long as it’s sturdy and you can drill holes in it. Food-grade buckets are ideal but not strictly necessary since the material won’t directly contact edible plants.
- Will this attract pests? If done correctly (using the right scraps, proper burial depth, and a lid), it should not attract pests. Avoiding meat, dairy, and oils is crucial.
- Do I need to add worms? No, native worms and microbes in your soil will find their way into the bucket through the holes and begin the decomposition process naturally.
- What if I don’t have a lid for my bucket? A lid is highly recommended to deter pests and contain odors. You can use a heavy rock or a piece of wood as a temporary alternative, but a fitted lid is best.
- Can I use this method in raised beds or containers? Yes, it works well in large raised beds. For smaller containers, it might take up too much space, so adjust bucket size accordingly.
- What’s the ideal depth to bury the bucket? Bury it so the rim is flush with or slightly below the soil surface. This provides adequate soil cover and prevents direct access for animals.
Continue with: Learn how to make nutrient-rich homemade compost tea
Conclusion
Transforming your kitchen scraps into a potent garden booster is one of the most rewarding and sustainable practices a gardener can adopt. By simply burying a bucket of organic waste, you’re not just reducing landfill burden; you’re actively building healthier soil, fostering a vibrant ecosystem beneath the surface, and ensuring your plants receive a consistent, gentle supply of essential nutrients. It’s an effortlessly effective way to turn everyday waste into garden gold, proving that sometimes, the best solutions are the simplest ones.
Related remedy: Explore natural pest control solutions for your garden
