Hey gorgeous! Ever wished you could press rewind on those pesky fine lines and welcome back that youthful glow? Well, what if we told you the secret might be hiding in your spice cabinet? Yes, we’re talking about humble cloves! This little powerhouse spice isn’t just for cooking; it’s a natural wonder for your skin, packed with properties that can help you achieve that radiant, smooth complexion you’ve been dreaming of.
Today, your beauty bestie is here to share a fantastic DIY recipe for a Clove Wrinkle Eraser Serum. It’s affordable, easy to make, and harnesses the natural magic of ingredients like cloves, rose water, green tea, and aloe vera to give your skin a beautiful boost.
Ready to discover your ageless glow? Let’s dive in!
Why Cloves Are Your Skin’s New Best Friend
You might know cloves for their distinct aroma and flavor, but for your skin, they’re a true hero. Here’s why:
- Rich in Eugenol: Cloves are naturally rich in eugenol, a compound known for its powerful antioxidant and soothing properties. Antioxidants are crucial for fighting off free radicals, which are major culprits behind premature aging and dull skin.
- Anti-Aging Power: Eugenol helps to protect skin cells, potentially reducing the appearance of fine lines and wrinkles over time. It supports the skin’s natural elasticity and firmness.
- Anti-Inflammatory: The soothing properties of cloves can help calm irritated skin, reducing redness and promoting a more even skin tone.
- Boosts Circulation: Improved blood circulation can bring more nutrients to the skin’s surface, contributing to a healthy, vibrant glow.
Introducing Your DIY Clove Wrinkle Eraser Serum
This lightweight, everyday serum is designed to help your skin look smoother, more resilient, and deeply hydrated. It focuses on three pillars of youthful-looking skin: hydration, antioxidants, and barrier care – all without harsh actives, strong acids, or complicated steps. Get ready to nourish your skin the natural way!
Ingredients You’ll Need (Makes ~60 ml)
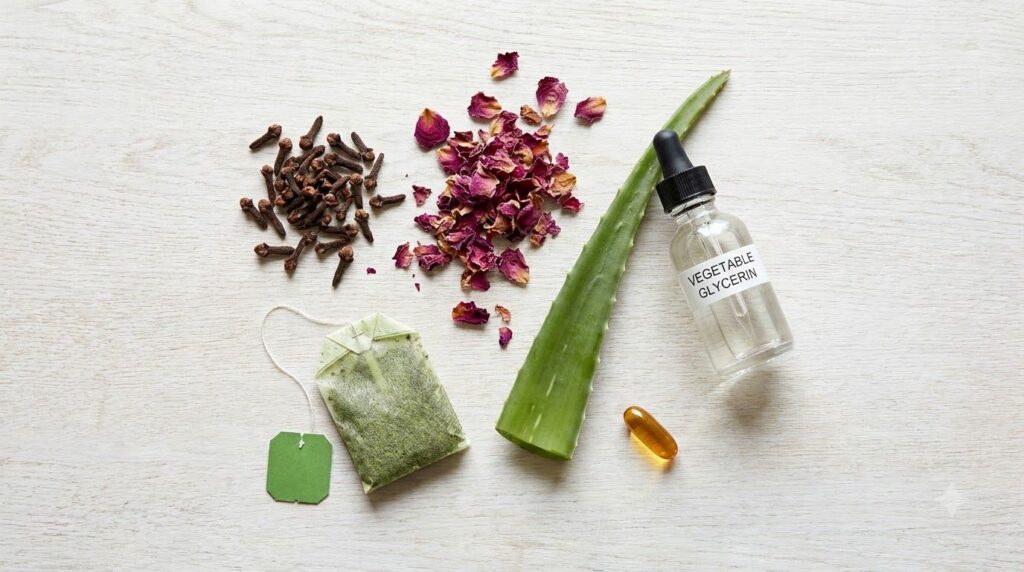
- Whole Cloves: 6 to 8 (The star ingredient, packed with eugenol and antioxidants!)
- Rose Water: 100 ml (Acts as the infusion base, known for its soothing and toning properties.)
- Green Tea: 1 tea bag or 1 tsp loose leaves (A polyphenol-rich antioxidant powerhouse to protect your skin.)
- Pure Aloe Vera Gel: 2 tbsp (~30 g) (A fantastic humectant that deeply hydrates and soothes.)
- Vegetable Glycerin: 1 tsp (5 ml) (Another excellent humectant that draws moisture into the skin, keeping it plump.)
- Vitamin E (Tocopherol) Capsule: 1 capsule (~0.5 ml) (A potent antioxidant that helps protect and repair skin cells.)
- Optional (Advanced): Clove Bud Essential Oil: Very low dose (see safety note in “Instructions” below). (For an extra boost, but use with extreme caution and proper dilution.)
Step-by-Step Guide: How to Make Your Serum
Follow these simple steps to whip up your very own wrinkle-erasing elixir:
- Make Clove-Rose Infusion: Gently warm 100 ml of rose water in a small saucepan until it’s steaming, but don’t let it boil. Add the 6–8 whole cloves, cover the saucepan, and let it steep for 15–20 minutes. This allows the beneficial compounds from the cloves to infuse into the rose water. Once steeped, strain the liquid to remove the cloves and let the infusion cool completely.
- Brew Green Tea Concentrate: While the clove-rose infusion cools, steep 1 tea bag (or 1 tsp loose green tea leaves) in about 50 ml of hot water for 5 minutes. This creates a concentrated green tea brew. Strain and let it cool completely.
- Combine the Liquids: In a clean bowl or measuring cup, combine the cooled clove-rose infusion and the cooled green tea concentrate.
- Add Hydrating Boosters: Stir in 2 tbsp of pure aloe vera gel and 1 tsp of vegetable glycerin. Mix well until everything is thoroughly combined and smooth.
- Incorporate Vitamin E: Pierce one vitamin E capsule and squeeze its contents (~0.5 ml) into the mixture. Vitamin E acts as an antioxidant and helps to preserve the serum.
- Optional Essential Oil (Use with Caution): If you choose to use clove bud essential oil, add just 1-2 drops to the mixture. Essential oils are potent, so a very low dose is crucial. Perform a patch test before full application.
- Final Mix and Storage: Stir all ingredients together one last time until everything is fully integrated. Transfer your beautiful new serum into a clean, airtight bottle with a dropper or pump. Store it in a cool, dark place, or even in the refrigerator, to extend its shelf life. It should last for about 1-2 weeks.
How to Use Your Clove Serum for Best Results
- Cleanse First: Always apply the serum to freshly cleansed and toned skin.
- Gentle Application: Dispense 2-3 drops onto your fingertips. Gently pat and press the serum onto your face, neck, and décolletage.
- Massage In: Use gentle, upward motions to massage the serum into your skin until fully absorbed.
- Follow Up: Once the serum has absorbed, follow with your favorite moisturizer to lock in all the goodness.
- Frequency: Use daily, both morning and night, for optimal results.
Important Notes and Safety Tips
- Patch Test is Key: Before applying any new DIY product to your entire face, always perform a patch test on a small, inconspicuous area of your skin (like behind your ear or on your inner arm) to check for any allergic reactions or sensitivities.
- Freshness Matters: Since this serum is made with natural ingredients and no harsh preservatives, it’s best to make small batches and use them fresh. Store in the refrigerator to maximize shelf life.
- Listen to Your Skin: If you experience any irritation, redness, or discomfort, discontinue use immediately.
Embrace the power of nature and give your skin the love it deserves with this incredible DIY Clove Wrinkle Eraser Serum. You’ll be amazed at how simple, affordable, and effective natural remedies can be in your journey to beautiful, radiant, and youthful-looking skin!
Give it a try and let us know how your skin transforms in the comments below. We can’t wait to hear your success stories!