Few things are as frustrating as a toilet that just won’t cooperate. You flush, expect the soothing sound of refilling water, and instead, you’re met with silence or a trickle, leaving your toilet bowl stubbornly empty or with very little water. It’s an inconvenience that disrupts daily life and can quickly turn into a headache, especially in a busy household.
You might be asking yourself, “Is this going to require a costly plumber’s visit?” or “Can I even begin to figure out what’s wrong?” The good news is that many common issues leading to a toilet not refilling properly have simple, temporary fixes you can tackle yourself. This guide is for anyone who’s ever faced the dreaded non-refilling toilet and wished for a quick, effective workaround.
We’ll walk you through a straightforward, beginner-friendly method to diagnose and temporarily resolve this common toilet problem. By the end of this article, you’ll feel more confident about understanding your toilet’s inner workings and have a reliable trick up your sleeve to keep things running smoothly until a permanent solution can be found. Let’s dive in and get that toilet refilling!
Why You’ll Love This Guide
- Easy to Follow: Simple, clear steps designed for beginners.
- Uses Common Sense & Basic Tools: No specialized equipment needed.
- Budget-Friendly: Avoids immediate costly plumber call-outs.
- Quick Solution: Provides a temporary fix in minutes.
- Empowering: Helps you understand a common household issue.
- Practical: Keeps your toilet operational when you need it most.
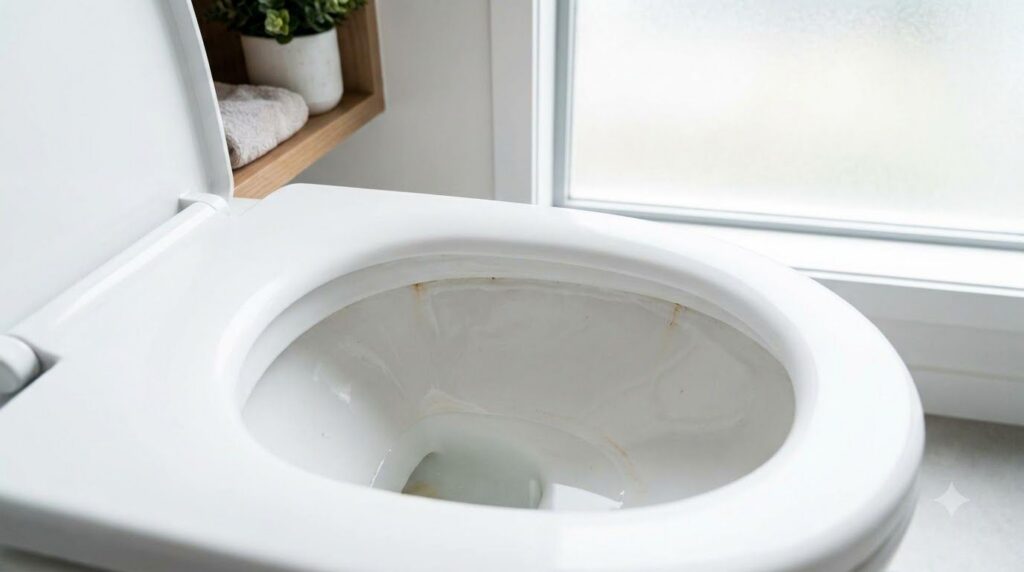 Tired of a toilet that won’t refill? Learn a quick fix here!
Materials & Tools Needed
For this temporary fix, you won’t need much beyond a few common household items and a dash of curiosity!
- Rubber Gloves: For hygiene, always a good idea when dealing with toilet water.
- Small Flashlight (Optional): Useful for peering into darker areas of the tank.
- Old Towel or Rags: To catch any drips or spills.
Step-by-Step Instructions: The Quick Fix for a Non-Refilling Toilet
This method focuses on troubleshooting the fill valve and float mechanism, which are often the culprits when a toilet isn’t refilling.
Step 1: Turn Off the Water Supply (Estimated Time: 1 minute)
Before you do anything inside the toilet tank, you must turn off the water supply. Look behind or near the base of the toilet for a small chrome or plastic valve. Turn it clockwise until the water stops flowing into the tank. This prevents accidental overflows and allows you to work safely.
Step 2: Remove the Tank Lid (Estimated Time: 30 seconds)
Carefully lift the ceramic lid off the toilet tank and place it gently on a padded surface, like a towel on the floor. Ceramic lids are heavy and fragile!
Step 3: Identify the Fill Valve and Float Mechanism (Estimated Time: 1-2 minutes)
Inside the tank, you’ll see several components. The fill valve is the tall, slender tower (often plastic) on one side, usually connected to the water supply line at the bottom. Attached to or near the fill valve is the float mechanism, which can be a cup that slides up and down the fill valve shaft or a ball on a rod.
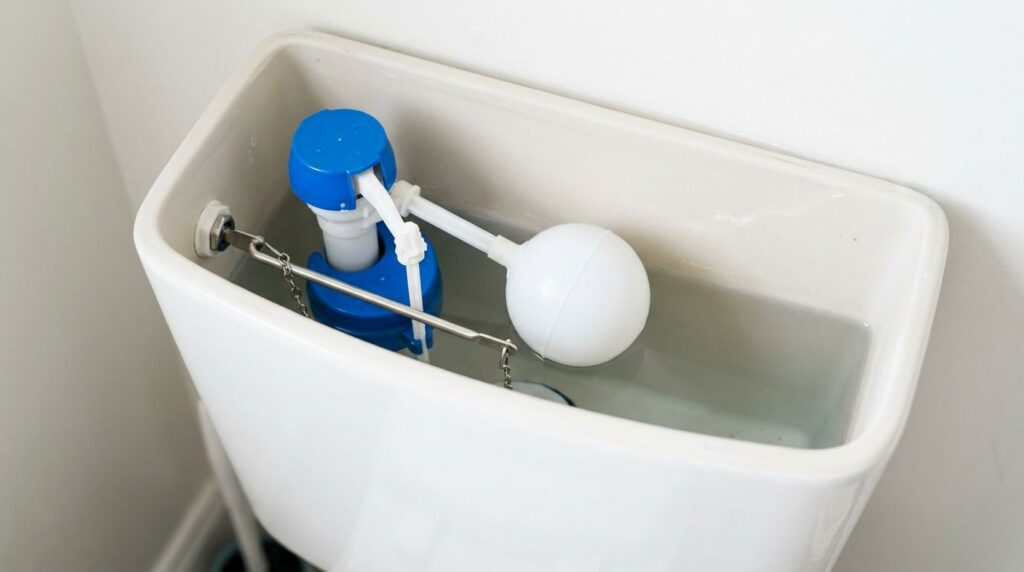 Familiarize yourself with the fill valve and float inside your toilet tank.
Step 4: Check for Obstructions and Free Movement (Estimated Time: 2-3 minutes)
This is where the magic happens. Many times, the float mechanism gets stuck or snagged, preventing it from dropping down and signaling the fill valve to open. With your gloved hand:
- For a Float Cup: Gently slide the float cup up and down the fill valve shaft. Ensure it moves freely without resistance. Look for anything that might be blocking its path, like a misplaced chain, sediment, or a kinked refill tube.
- For a Float Ball: Gently lift and lower the float ball. Check the rod connecting it to the fill valve for any bends or obstructions.
If you find an obstruction, carefully remove or reposition it. The goal is to ensure the float can move completely freely from its lowest point (when the tank is empty) to its highest point (when the tank is full).
Step 5: Inspect the Refill Tube (Estimated Time: 1 minute)
There’s a small, flexible refill tube that typically connects the top of the fill valve to the overflow pipe (the wider pipe in the center of the tank). Ensure this tube is securely attached and pointed into the overflow pipe, not above it or detached. A displaced refill tube can sometimes cause slow or no refilling.
Step 6: Turn Water Supply Back On and Test (Estimated Time: 1 minute)
Once you’ve ensured the float mechanism is free and the refill tube is in place, slowly turn the water supply valve (from Step 1) counter-clockwise to open it. Listen and watch the tank. The water should begin refilling the tank. The float should rise with the water and eventually shut off the fill valve when the tank is full.
If the toilet still doesn’t refill, gently jiggle the float mechanism again while the water is on. Sometimes a slight nudge is all it needs to get going. This temporary fix often resolves the issue, getting your toilet back in working order for the time being.
Expert Tips
- Know When to Call a Pro: This is a temporary fix. If the problem persists or returns quickly, or if you hear strange noises, a continuous running sound, or see leaks, it’s time to call a qualified plumber.
- Don’t Force Anything: Toilet parts are mostly plastic and can break easily. Be gentle when checking and adjusting components.
- Regular Inspection: Every few months, lift your tank lid and give a quick visual inspection. Look for anything out of place or signs of wear.
- Cleanliness Matters: Sediment and hard water buildup can cause parts to stick. Occasionally, gently wipe down accessible parts of the fill valve and float mechanism.
- Understand Your Toilet Model: While most toilets have similar mechanisms, there are variations. A quick search for your toilet’s make and model online can provide diagrams if you’re unsure.
- Safety First: Always turn off the water supply before reaching into the tank.
Variations: Other Quick Checks
- Check the Flapper Chain: If your toilet is running continuously rather than not refilling, the flapper (the rubber stopper at the bottom of the tank) might not be sealing. Ensure its chain isn’t too tight or tangled, preventing it from closing completely.
- Water Level Adjustment: Some fill valves have an adjustment screw or clip to change the water level in the tank. If your water level is consistently too low, you might be able to adjust this slightly.
- External Valve Check: Ensure the main water shut-off valve to your house isn’t partially closed, affecting overall water pressure to fixtures.
Storage Instructions
Since this is a troubleshooting guide for an immediate fix, there are no ‘storage instructions’ for the solution itself. However, for any spare toilet parts you might acquire:
- Keep Parts Dry: Store spare flappers, fill valve components, or other plumbing parts in a dry, cool place away from direct sunlight to prevent degradation of rubber or plastic.
- Original Packaging: If possible, keep parts in their original packaging for easy identification and protection.
Safety Notes
- Hygiene: Always wear rubber gloves when working inside the toilet tank, as the water, while clean, may contain bacteria.
- Water Shut-Off: Never work on the internal mechanisms of your toilet without first turning off the water supply.
- Fragile Parts: Toilet tanks and lids are ceramic and heavy. Handle them with care to avoid breakage and injury.
- No Chemicals: Avoid pouring harsh chemical cleaners into the toilet tank, as they can damage rubber and plastic components over time, leading to more leaks and issues.
- Children and Pets: Keep children and pets away from open toilet tanks and any removed parts to prevent accidents.
Frequently Asked Questions
How long does this temporary fix usually last?
It varies! If the issue was just a minor snag or obstruction, it could last for weeks or even months. However, if a part is truly worn out or broken, the problem will likely return, indicating a need for a replacement part or professional help.
Can I prevent this from happening again?
Regular, gentle inspection of your toilet’s tank components can help. Look for signs of wear on the flapper or issues with the float mechanism. Avoiding harsh chemical cleaners in the tank can also prolong the life of rubber seals.
What if my toilet is constantly running, not just failing to refill?
A constantly running toilet often indicates a leaky flapper or an improperly set fill valve. Check the flapper for wear or adjust the chain to ensure it seals properly. Our guide on ‘Fixing a Running Toilet’ can provide more detailed steps.
Is it safe to keep using the toilet if it needs this fix often?
While the temporary fix allows continued use, if the problem becomes frequent, it’s a sign that a component is failing. Prolonged ignored issues can lead to water waste or, worse, leaks that cause floor damage. It’s best to address the root cause.
Can I use this guide for any type of toilet?
Most standard gravity-flush toilets have similar internal mechanisms (fill valve, float, flapper). This guide applies to the most common types. However, some newer low-flow or pressure-assisted toilets may have different designs, requiring specific instructions.
Should I drain the tank before making these checks?
It’s not strictly necessary for this particular temporary fix, as you’re primarily checking for obstructions and movement. However, if you plan on replacing parts, draining the tank by flushing and then turning off the water supply is essential.
Conclusion
Dealing with a toilet that won’t refill can be a real nuisance, but as you’ve seen, it doesn’t always require an immediate call to a plumber. With a little patience and this simple troubleshooting guide, you can often identify and resolve the issue temporarily yourself. This quick fix can save you time, money, and a lot of frustration, keeping your household running smoothly until a more permanent solution can be arranged.
So, the next time your toilet plays coy, remember these steps. You’ve got this! Empower yourself with practical knowledge and keep your home operating efficiently. Happy fixing!