Ah, childhood! It’s a beautiful, chaotic journey filled with laughter, learning, and, let’s be honest, a fair share of messes. From the moment tiny hands discover the joy of drawing outside the lines to the adventurous spirit that brings mud from the backyard directly to your living room walls, our homes often become canvases for these precious, albeit sometimes messy, memories. While we cherish every milestone, the thought of scrubbing away these ‘unexpected wall art moments’ can feel overwhelming, turning what should be a fleeting moment of annoyance into a daunting chore.
Many parents and homeowners face the same dilemma: how do you keep your home looking clean and tidy without resorting to harsh chemicals or spending hours scrubbing away every smudge? The fear of damaging paint, the concern for children and pets being exposed to strong cleaning agents, and the sheer time commitment can all add to the stress. You want solutions that are effective, safe, and, most importantly, easy to integrate into your busy life.
This comprehensive guide is crafted especially for busy parents, guardians, and anyone who wants to maintain a clean home without the fuss. If you’ve ever stared at a crayon masterpiece on your freshly painted wall or a muddy handprint that suddenly appeared, wondering where to even begin, then this guide is for you. We understand that life with little ones is unpredictable, and your cleaning routine needs to be just as flexible and forgiving.
In this article, you’ll discover simple, natural, and highly effective DIY cleaning solutions that tackle common childhood messes on your walls. We’ll walk you through step-by-step instructions for dealing with everything from crayon and marker marks to muddy smudges and food stains. You’ll learn how to use everyday household ingredients to restore your walls, save money on commercial cleaners, and create a safer, cleaner environment for your family. Get ready to embrace the sweet mess of childhood, knowing cleanup is always within reach!
Why You’ll Love This Guide
- Easy to Prepare: Most solutions use ingredients you already have in your pantry.
- Uses Common Ingredients: No need for special trips to specialty stores.
- Budget-Friendly: Save money by making your own effective cleaning solutions.
- Beginner-Friendly: Simple, clear instructions make it easy for anyone to follow.
- Eco-Friendly: Reduce your reliance on harsh, chemical-laden commercial cleaners.
- Safe for Your Home: Gentle on most wall surfaces when used correctly.
- Great for Everyday Use: Quick fixes for those inevitable daily mishaps.
- Peace of Mind: Enjoy parenting without constant worry over wall messes.
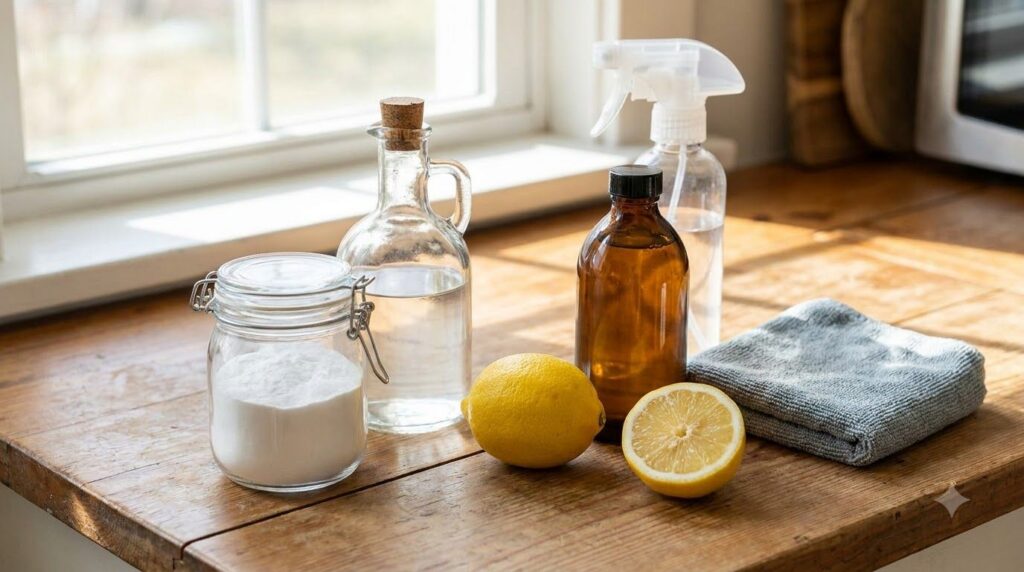 Gather your simple ingredients to create powerful homemade cleaning solutions for your walls.
Ingredients / Materials
Our DIY cleaning solutions rely on readily available, gentle ingredients. Here’s what you’ll need:
- Baking Soda: A mild abrasive and deodorizer, excellent for crayon marks and light scuffs.
- White Vinegar: An acidic cleaner that helps cut through grease, grime, and some stains.
- Liquid Dish Soap: A gentle degreaser, perfect for general dirt and food stains. Choose an eco-friendly option if possible.
- Warm Water: Essential for diluting solutions and rinsing.
- Optional: Lemon Juice: A natural brightener and freshener, can be added to vinegar solutions for an extra boost and scent.
- Optional: Rubbing Alcohol (Isopropyl Alcohol): For tougher ink stains like marker, use with caution and test first.
Equipment Needed
You likely have most of these items already, making this an even easier project!
- Microfiber Cloths: Soft, absorbent, and effective for cleaning and drying without scratching.
- Soft Sponges: For gentle scrubbing, avoid abrasive scrubbers that can damage paint.
- Small Mixing Bowls: For creating pastes and mixing solutions.
- Spray Bottle: Ideal for applying liquid solutions evenly.
- Bucket: For clean rinse water.
- Funnel (Optional): Helpful for pouring liquids into a spray bottle without spills.
Step-by-Step Instructions: Tackling Common Wall Messes
Before you begin, always perform a patch test on an inconspicuous area of your wall (like behind a picture or furniture) to ensure the solution won’t damage or discolor your paint. Wait a few minutes to see if there’s any adverse reaction. Always work from the bottom up to avoid streaks on larger areas.
For Crayon Marks: The Baking Soda Power
- Prepare Your Paste (1 Minute): In a small bowl, mix 2-3 tablespoons of baking soda with just enough warm water to form a thick paste. It should resemble toothpaste.
- Apply Gently (1-2 Minutes): Dab a small amount of the baking soda paste onto a damp microfiber cloth or a soft sponge. Gently rub the crayon mark in small, circular motions. The mild abrasive nature of baking soda helps lift the wax.
- Observe and Repeat (As Needed): You should see the crayon beginning to transfer to your cloth. If the mark is stubborn, reapply the paste and continue rubbing gently. Avoid excessive pressure, which could damage the paint.
- Wipe Clean (1 Minute): Once the crayon is gone, dampen a clean microfiber cloth with plain water and wipe away any baking soda residue.
- Dry the Area (30 Seconds): Use a dry, clean microfiber cloth to gently pat the area dry.
For Muddy Handprints & General Grime: The Vinegar & Soap Mix
- Mix Your Solution (2 Minutes): In a spray bottle, combine 1 cup of warm water, 1/4 cup of white vinegar, and 1 teaspoon of liquid dish soap. Shake gently to mix.
- Lightly Spray (1 Minute): Lightly mist the muddy handprints or soiled areas on the wall. Do not oversaturate, as too much moisture can damage drywall or paint.
- Gently Wipe (2-3 Minutes): Using a clean, damp microfiber cloth or soft sponge, gently wipe the soiled area. For stubborn spots, let the solution sit for about 30 seconds before wiping.
- Rinse and Dry (2 Minutes): Dampen a fresh, clean microfiber cloth with plain water (from your bucket) and wipe the area again to remove any soap and vinegar residue. Finish by drying with a separate dry cloth to prevent water spots.
For Pen, Pencil, or Light Marker Marks: Rubbing Alcohol Spot Treatment
- Test First (5 Minutes): This is crucial! Apply a tiny amount of rubbing alcohol to a cotton swab and dab it on an inconspicuous area of your wall. Wait a few minutes to ensure it doesn’t remove the paint.
- Apply to Mark (1 Minute): Once tested, lightly dab rubbing alcohol directly onto the pen or marker mark using a clean cotton swab or the corner of a clean cloth.
- Blot, Don’t Rub (1-2 Minutes): Instead of rubbing, gently blot the mark. You should see the ink transferring to the cotton swab. Use a fresh part of the swab for each blot to avoid spreading the ink.
- Wipe and Dry (1 Minute): Once the mark is gone, use a clean, damp cloth to wipe the area, then dry with a clean, dry cloth. This method is best for small, localized marks.
Expert Tips
- Always Test First: This cannot be emphasized enough. Different paint types (flat, eggshell, satin) and finishes react differently to cleaning agents.
- Work Gently: Aggressive scrubbing can remove paint, especially on matte or flat finishes. Let the cleaning solution do most of the work.
- Use the Right Cloth: Microfiber cloths are your best friends for wall cleaning. They’re gentle, absorbent, and effective.
- Don’t Oversaturate: Excess water can seep into drywall, causing damage, swelling, or mold. Always wring out cloths well and use sprays sparingly.
- Address Stains Promptly: The sooner you tackle a mark, the easier it will be to remove. Dried-on stains are always more challenging.
- Ventilate Your Space: Even with natural cleaners, it’s a good idea to open windows for fresh air, especially when using vinegar or alcohol.
- Prevention is Key: Consider washable paint in high-traffic areas or where kids play. Provide designated art zones with plenty of paper.
- For Stubborn Stains: If a mark persists, consider a melamine foam eraser (like a ‘magic eraser’), but use it with extreme caution and a very light touch, as it can be abrasive and remove paint if rubbed too hard. Always test first!
- Consider Paint Finish: Glossier paints (satin, semi-gloss) are generally more durable and easier to clean than flat or matte paints.
Variations
- Scented Solution: Add 5-10 drops of your favorite essential oil (like lemon, lavender, or tea tree) to the vinegar and soap solution for a pleasant scent and added natural antibacterial properties.
- Lemon & Salt Paste for Scuffs: For light scuffs that aren’t crayon, a paste of lemon juice and a tiny pinch of salt (very fine salt) can sometimes work. Use with extreme care and test extensively, as salt is abrasive.
- Stronger Degreaser: For greasy fingerprints around light switches, slightly increase the dish soap concentration in the vinegar and soap mix (e.g., 2 teaspoons instead of 1).
- Fragrance-Free Version: Simply omit any essential oils for a completely scent-neutral cleaning solution.
Storage Instructions
For best results, especially with the baking soda paste, it’s recommended to make these solutions fresh as needed. This ensures maximum efficacy and prevents any degradation of the ingredients.
- Baking Soda Paste: Should be made fresh right before use. It will dry out and lose effectiveness if stored.
- Vinegar & Soap Solution: Can be stored in a labeled spray bottle for up to 1-2 weeks in a cool, dark place. Over time, the efficacy might slightly decrease, so fresh is always best.
- Lemon Juice Solutions: Should be used immediately as lemon juice loses its potency and can become sticky when stored.
Safety Notes
While these DIY solutions use common household ingredients, it’s important to prioritize safety:
- Surface Compatibility: Always, always perform a patch test on an inconspicuous area. Some older paints, wallpapers, or specialty finishes may react differently.
- Children and Pets Safety: While these ingredients are less toxic than commercial cleaners, keep all cleaning solutions and ingredients out of reach of children and pets. Do not allow them to ingest or play with the cleaning mixtures.
- Proper Ventilation: Ensure good airflow in the room, especially when using vinegar or rubbing alcohol, as the fumes can be strong for some people.
- Avoid Mixing Chemicals: Never mix these DIY solutions with commercial cleaning products, especially those containing bleach. Mixing can create hazardous fumes. Stick to the ingredients listed here.
- Read Labels: If using any store-bought ingredients like dish soap, always read their labels for any specific safety warnings.
Frequently Asked Questions
How long does the cleaning solution last?
The baking soda paste should be made fresh for each use. The vinegar and soap solution can be stored in a spray bottle for up to two weeks, though using it fresh is always recommended for optimal performance.
Can I prepare it in advance for bigger jobs?
For larger areas, you can mix a bigger batch of the vinegar and soap solution. However, avoid making too much in advance, as its effectiveness may diminish over time. Prepare the baking soda paste just before you need it.
Can I swap an ingredient, like using apple cider vinegar instead of white vinegar?
While apple cider vinegar has cleaning properties, white vinegar is preferred for cleaning due to its higher acidity and lack of color, which prevents potential staining. Stick to white vinegar for best results on walls.
Does it work on all paint types?
These methods are generally safe for most latex and oil-based paints, especially those with satin or semi-gloss finishes. However, flat or matte paints are more delicate and may show water marks or scuff more easily. Always perform a patch test in an inconspicuous area first.
Is it safe for wallpaper?
These solutions are generally not recommended for wallpaper, as moisture and scrubbing can cause wallpaper to peel, bubble, or tear. For wallpaper, gently blot with a barely damp cloth, or consult the wallpaper manufacturer’s cleaning instructions.
What about permanent marker?
Permanent marker is very challenging. Rubbing alcohol might lessen the mark, but often it requires painting over. Always test alcohol very carefully in an inconspicuous area first.
How can I prevent future messes?
Designate specific art areas for children, use washable crayons or markers, apply protective clear coatings to walls in high-traffic areas, or opt for washable paint (like eggshell or satin finishes) in children’s rooms.
Will these solutions leave streaks?
To avoid streaks, ensure you’re not oversaturating the wall, wiping away all residue with a clean, damp cloth, and then immediately drying the area with a separate, dry cloth.
Can I use a ‘magic eraser’ instead?
Melamine foam erasers can be effective, but they are abrasive and can remove paint or change the sheen, especially on flat or matte finishes. If you use one, do so with extreme caution, a very light touch, and always test it in an inconspicuous area first.
Conclusion
Embracing the beautiful chaos of childhood means accepting that messes are a part of the adventure. But with these simple, effective, and natural DIY cleaning solutions, you can breathe a little easier knowing that those unexpected wall art moments don’t have to be a source of stress. You now have the tools and knowledge to tackle common childhood messes on your walls, from crayon masterpieces to muddy handprints, with confidence and ease.
By using common household ingredients, you’re not only saving money and reducing your environmental footprint, but you’re also creating a safer, healthier home environment for your loved ones. So go ahead, let your little artists express themselves, knowing that restoring your walls to their pristine condition is just a few gentle steps away. Happy cleaning, and even happier parenting!