You might pride yourself on a sparkling clean kitchen, but there’s one sneaky spot that often gets overlooked: your refrigerator door gasket. This rubber seal, critical for keeping your fridge energy-efficient and your food fresh, can harbor surprising amounts of grime, dirt, and even mold. If you’ve never paid much attention to it, now’s the time to discover the hidden truth and give it a thorough clean. This simple DIY method can help restore your gasket to its former glory, improving hygiene and potentially the lifespan of your appliance.
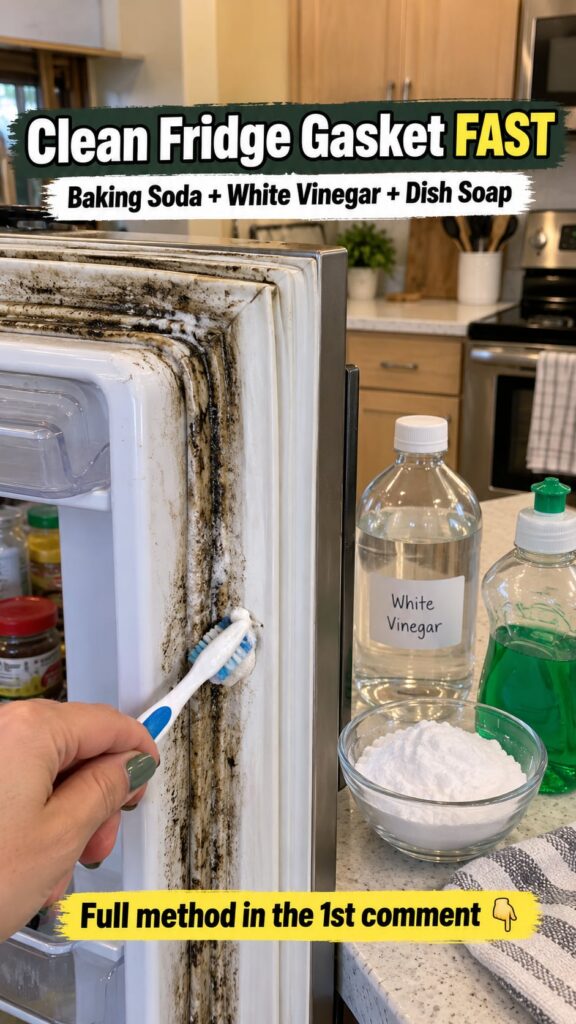
What You’ll Need
Ingredients / Materials:
- 1/2 cup white vinegar
- 1/4 cup baking soda
- A few drops of dish soap
- Warm water
Tools:
- Small bowl or container for mixing
- Old toothbrush or small, soft-bristled scrub brush
- Several clean cloths or sponges
- Optional: Spray bottle for vinegar solution
Why This DIY Can Be Useful
The refrigerator gasket creates an airtight seal that keeps cold air in and warm air out. When dirt, food particles, or mold accumulate, this seal can be compromised, leading to your fridge working harder, increasing energy consumption, and even allowing bacteria and mold to grow in close proximity to your food.
- White vinegar acts as a natural disinfectant and helps break down grime and mold. Its acidic nature can also combat odors.
- Baking soda is a gentle abrasive that helps scrub away stubborn dirt without scratching the rubber. It also absorbs odors.
- Dish soap is excellent at cutting through grease and food residue, making it easier to wipe away tough stains.
How to Make It
- In a small bowl, combine the 1/4 cup of baking soda with a few drops of dish soap.
- Gradually add small amounts of warm water, stirring until you form a thick, spreadable paste. The consistency should be similar to toothpaste.
- If you prefer, you can also dilute the 1/2 cup of white vinegar with an equal amount of warm water in a spray bottle for easy application later.
How to Use It
- Unplug your refrigerator: For safety and to prevent accidental temperature changes, it’s best to unplug the appliance before you begin.
- Prepare the area: Open the refrigerator door wide to easily access the entire gasket.
- Apply the paste: Take your baking soda and dish soap paste and apply a generous amount directly onto the dirty or moldy areas of the gasket. Use your fingers or a cloth to spread it evenly.
- Scrub gently: Use the old toothbrush or small scrub brush to gently work the paste into the grooves and crevices of the rubber seal. Pay extra attention to areas with visible mold or heavy grime. The bristles will help dislodge embedded dirt.
- Let it sit: Allow the paste to sit on the gasket for about 10-15 minutes. This gives the ingredients time to break down the grime and loosen the mold.
- Wipe clean: After waiting, use a clean, damp cloth or sponge to thoroughly wipe away the paste and dislodged dirt. You may need to rinse and wring out your cloth multiple times.
- Disinfect (optional but recommended): If you noticed mold, lightly spray the gasket with your diluted white vinegar solution (or wipe it on with a cloth). Let it sit for 5 minutes.
- Final rinse: Use a fresh, clean cloth dampened with plain water to thoroughly wipe down the gasket, removing any lingering vinegar or cleaning residue. It’s important to rinse well to avoid drying out the rubber.
- Dry thoroughly: Use a dry cloth to completely dry the gasket. Moisture can encourage future mold growth.
- Plug it back in: Once the gasket is completely dry, you can plug your refrigerator back in.
What to Expect
With this method, you can expect a significantly cleaner and more hygienic refrigerator gasket. Most dirt, food residue, and surface mold should be removed, leaving the rubber seal looking much brighter and feeling smoother. For very old or deeply stained gaskets, some discoloration might remain, but the active mold and grime will be gone.
Helpful Tips
- Regular maintenance: Make cleaning your refrigerator gasket part of your routine kitchen cleaning, perhaps once a month, to prevent heavy build-up. A quick wipe-down with warm, soapy water is often enough for maintenance.
- Check for tears: While cleaning, inspect the gasket for any tears, cracks, or hardened areas. Damaged gaskets won’t seal properly and should be replaced to maintain fridge efficiency.
- Use warm water: Warm water helps soften the rubber and makes it easier to clean.
Important Notes / Safety
- Ventilation: Ensure good ventilation in your kitchen, especially if you are using vinegar, as its fumes can be strong.
- Patch test: If you are concerned about your specific refrigerator’s rubber, test the cleaning paste on an inconspicuous area first.
- Thorough rinsing: Always rinse off all cleaning solutions completely. Residue can attract more dirt or potentially degrade the rubber over time.
- Avoid harsh chemicals: Do not use abrasive cleaners, bleach (unless specifically recommended by the manufacturer and used with extreme caution), or stiff brushes that could damage the gasket material.
- Don’t force the gasket: Be gentle while cleaning to avoid stretching or tearing the rubber seal.