Sparkle Restore: The Ultimate DIY Floor Cleaner for Tough Grime
Are your floors losing their luster? From everyday foot traffic to unexpected spills, our floors take a beating. Muddy footprints, sticky residue, and dull surfaces are common enemies in every home. While store-bought cleaners can be effective, they often come with a hefty price tag and sometimes harsh chemicals. What if you could achieve sparkling clean floors with a simple, budget-friendly mix using everyday household items?
Get ready to restore the sparkle! We’re about to reveal a powerful homemade floor cleaner that makes even the toughest floor grime disappear. This solution is perfect for tackling dirt, grease, and those stubborn scuff marks, leaving your floors gleaming.
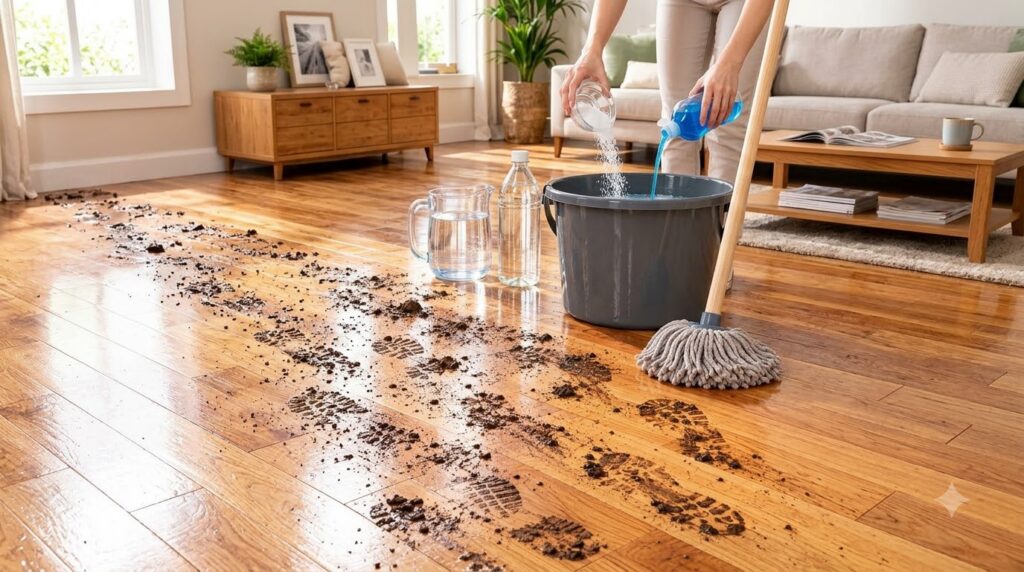
The Problem: Stubborn Floor Grime & Dull Surfaces
Whether you have hardwood, laminate, tile, or linoleum, maintaining a clean floor can feel like a never-ending battle. Dirt gets tracked in, spills happen, and over time, a dull film can build up, hiding the natural beauty of your flooring. Standard mops and water sometimes aren’t enough to cut through the grease and grime effectively. That’s where a little DIY magic comes in!
Unlock the Shine: Your DIY Floor Cleaner Recipe
This simple combination of common kitchen and laundry staples creates a powerful cleaning agent that tackles dirt, degreases, and deodorizes. Here’s what you’ll need:
Ingredients You’ll Need:
- 1 gallon (approx. 4 liters) warm water: The base for your cleaning solution.
- 1/4 cup table salt: A mild abrasive and natural deodorizer.
- 1/4 cup blue liquid dish soap: A powerful degreaser and surfactant that lifts dirt.
- 1/2 cup white distilled vinegar: An acidic powerhouse that cuts through grime, disinfects, and leaves a streak-free shine.
The Science Behind the Sparkle (Why it Works):
- Dish Soap: The surfactants in dish soap break down oil and grease, allowing them to mix with water and be easily wiped away. Its emulsifying properties are key to lifting stubborn dirt.
- Vinegar: As an acid, white vinegar effectively dissolves mineral deposits, hard water stains, and helps to sanitize surfaces. It also acts as a natural deodorizer, neutralizing unpleasant smells rather than just masking them. Plus, it helps prevent streaks!
- Salt: While not the primary cleaner, salt acts as a mild abrasive to help scrub away stuck-on grime without scratching surfaces. It also contributes to the deodorizing effect.
- Warm Water: Helps dissolve the salt and activate the cleaning power of the soap and vinegar, making the solution more effective at breaking down dirt.
Step-by-Step Mixing Instructions:
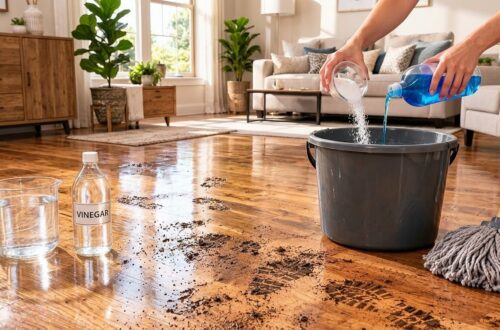
- Fill a standard bucket with 1 gallon of warm (not hot) water.
- Add 1/4 cup of table salt to the warm water and stir until it largely dissolves.
- Pour in 1/4 cup of blue liquid dish soap. Stir gently to avoid creating excessive suds.
- Finally, add 1/2 cup of white distilled vinegar. Stir once more to combine all ingredients.
Your powerful homemade floor cleaner is now ready to use!
How to Apply Your Homemade Floor Cleaner
Preparation:
Before you begin wet-cleaning, always sweep or vacuum your floors thoroughly to remove loose dirt, dust, and debris. This prevents you from just pushing around dirt and potentially scratching your floors.
Application Method:
- For Mopping: Dip your mop into the solution, wring it out well so it’s damp, not dripping wet. Mop your floor in sections, rinsing the mop frequently in clean water (or a separate bucket of clean water) before dipping it back into your cleaning solution.
- For Spot Cleaning/Hand Cleaning: For tougher spots or smaller areas, dampen a clean cloth or sponge with the solution and scrub directly.
Rinse & Finish:
For a truly streak-free finish, especially on shiny surfaces, consider a quick rinse. After mopping with the solution, go over the floor again with a mop dampened only with clean, plain water. This removes any lingering residue. Allow your floors to air dry completely, or use a clean, dry microfiber cloth to buff them to a shine.
Tips for Different Floor Types & Safety Notes
Important Considerations:
- Patch Test: Always test this or any new cleaning solution on an inconspicuous spot of your flooring first to ensure it doesn’t cause discoloration or damage.
- Hardwood & Laminate: While vinegar is generally safe, avoid oversaturating hardwood or laminate floors as excessive moisture can cause warping or damage. Ensure your mop is only damp.
- Tile & Linoleum: This solution is excellent for these durable surfaces.
- Sealed Stone/Marble: Exercise caution. Vinegar is acidic and can etch natural stone surfaces. It’s best to avoid vinegar on unsealed stone or marble.
Safety First:
- Always ensure adequate ventilation when cleaning.
- Keep cleaning solutions out of reach of children and pets.
- While these ingredients are common, avoid ingesting the cleaning solution.
With this simple, cost-effective, and powerful DIY floor cleaner, you can say goodbye to stubborn grime and hello to brilliantly clean, sparkling floors. Give it a try and transform your home’s appearance!