Are you dreaming of a thriving garden filled with lush plants, vibrant flowers, and bountiful vegetables, but dread the thought of digging up your entire yard? What if we told you there’s a simple, sustainable, and incredibly effective way to create highly fertile garden beds with minimal effort? Get ready to unlock your garden’s true potential with this amazing no-dig method using everyday materials: cardboard and dry leaves!
This technique, often called “Lasagna Gardening” or “No-Dig Gardening,” is a favorite among organic gardeners and DIY enthusiasts alike. It’s perfect for anyone looking to improve their soil, suppress weeds, and create a rich, healthy environment for their plants without breaking their back.
What is Lasagna Gardening?
Lasagna gardening is a method of building up garden beds in layers, much like a lasagna. Instead of tilling the soil, you stack organic materials like cardboard, leaves, compost, and kitchen scraps directly on top of the ground. Over time, these layers break down, creating nutrient-rich, well-drained soil that your plants will adore. It’s a fantastic way to transform even poor soil into a gardener’s paradise.
Why Use Cardboard and Dry Leaves?
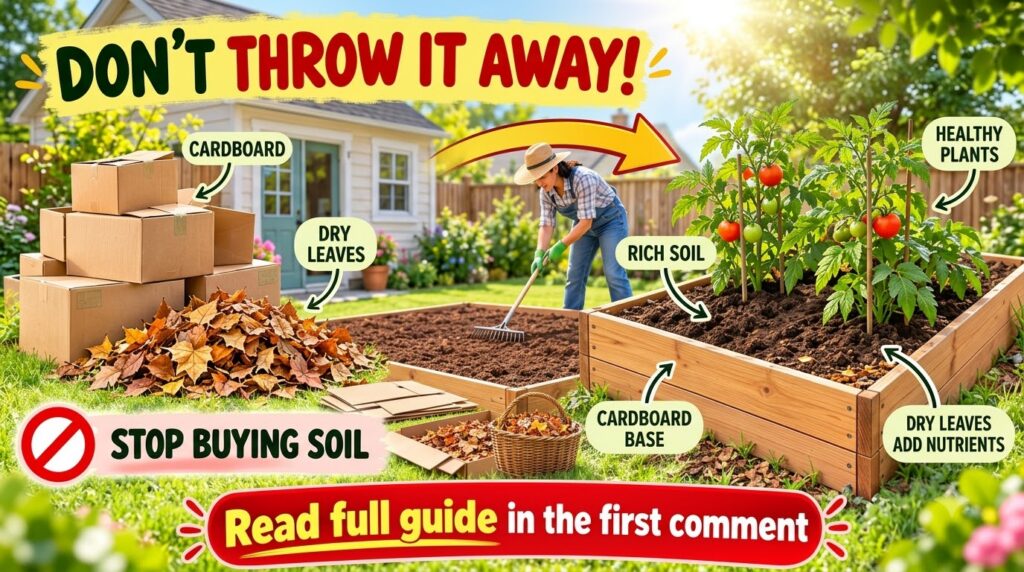
These humble materials are powerhouses in the garden. Here’s why they’re perfect for your no-dig beds:
- Weed Suppression: Cardboard acts as a fantastic barrier, smothering existing weeds and preventing new ones from sprouting. It’s a chemical-free weed control solution!
- Adds Organic Matter: Both cardboard and dry leaves are rich in carbon, which is essential for healthy soil structure and microbial life. As they decompose, they enrich your soil naturally.
- Improves Soil Structure: The decomposition process creates a fluffy, well-aerated soil that retains moisture beautifully while allowing excess water to drain away, preventing root rot.
- Attracts Beneficial Organisms: Worms and other beneficial microorganisms love to feast on these decaying materials, turning them into nutrient-rich humus for your plants.
- Sustainable & Cost-Effective: You’re recycling materials that might otherwise go to waste, saving money on expensive soil amendments and reducing landfill waste.
Your Step-by-Step Guide to Creating a Fertile No-Dig Bed
Materials You’ll Need:
- Cardboard (plain, non-glossy, with tape and labels removed)
- Dry leaves (from your yard or neighbors!)
- Compost or aged manure (optional, but highly recommended)
- Kitchen scraps (fruit and vegetable peels, coffee grounds, eggshells)
- Grass clippings (chemical-free)
- Finished compost or topsoil for the top layer
- Water source
The Process:
- Choose Your Spot: Select a sunny location in your garden that receives at least 6-8 hours of direct sunlight per day, depending on what you plan to grow. Mark out the area for your new garden bed.
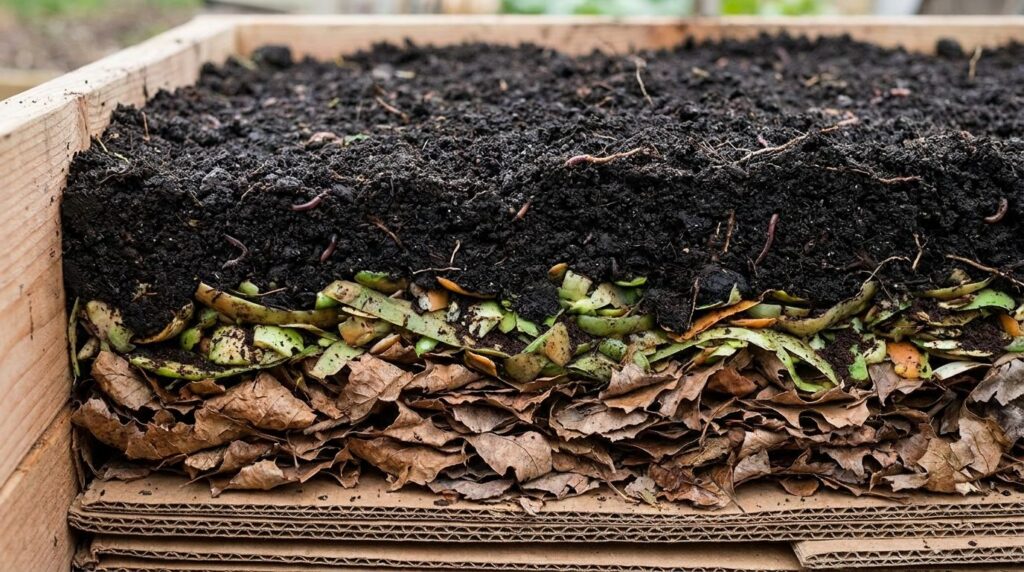
- Prepare the Base: If you have tenacious weeds or grass, you can mow them down first. There’s no need to remove them! Just lay down a thick layer of cardboard directly over the ground, overlapping the edges significantly to prevent weeds from sneaking through.
- Wet the Cardboard: Thoroughly soak the cardboard with water. This helps it start breaking down and creates a moist environment for the layers to follow.
- Add Your “Brown” Layers: Next, add a thick layer (6-12 inches) of dry leaves. This is your primary carbon source. You can also add shredded newspaper or wood chips if you have them. Wet this layer thoroughly.
- Layer in “Green” Materials: Now, add a layer (2-4 inches) of nitrogen-rich materials. This could include kitchen scraps, fresh grass clippings, or a layer of aged manure. Wet this layer as well.
- Repeat & Build Up: Continue alternating layers of “brown” (carbon-rich like leaves) and “green” (nitrogen-rich like kitchen scraps/grass clippings), wetting each layer as you go. Aim for a total bed height of at least 18-24 inches, as it will settle over time.
- Top with Soil/Compost: For your final layer, add 4-6 inches of finished compost or high-quality topsoil. This is where you will plant your seeds or seedlings immediately.
- Plant & Water: You can plant directly into the top layer of soil/compost right away! Water your newly planted bed well.
Tips for Success:
- Patience is Key: While you can plant immediately, the bed will become even more fertile and established over a few weeks or months as the lower layers break down.
- Keep it Moist: Especially in the initial weeks, ensure the layers stay consistently moist to encourage decomposition.
- Avoid Treated Materials: Only use organic, untreated materials. Steer clear of glossy cardboard, treated wood, or grass clippings from lawns treated with herbicides.
- Vary Your Greens: A diverse mix of “green” materials will provide a broader spectrum of nutrients.
- Don’t Be Afraid to Experiment: Adjust the ratios and types of materials based on what you have available and what works best for your garden.
Embrace the simplicity and sustainability of creating fertile garden beds with cardboard and dry leaves. This no-dig method will not only save you time and effort but also transform your garden into a vibrant, productive ecosystem. Say goodbye to weeds and hello to healthy, happy plants!
Happy gardening!