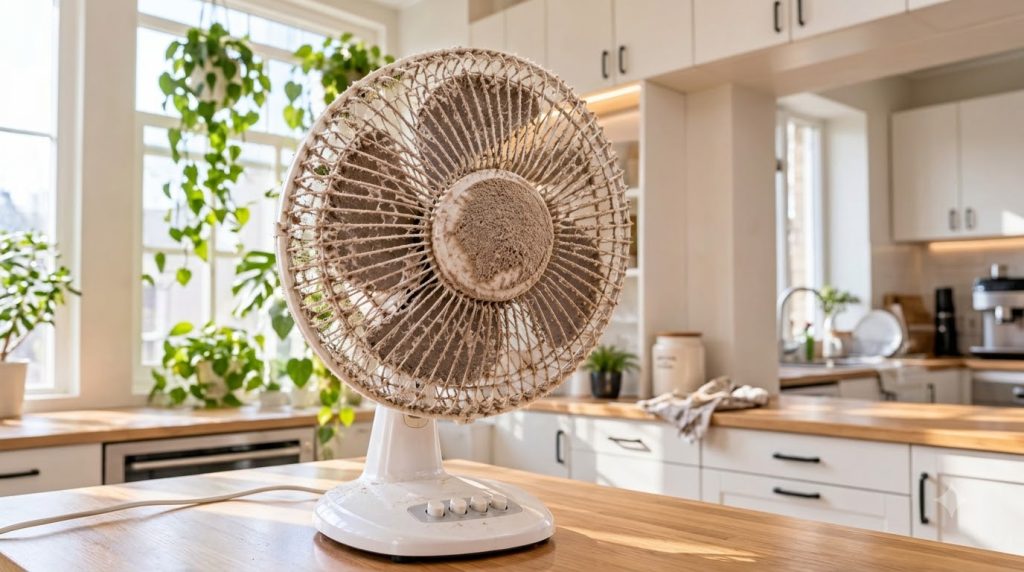
After a long, hot summer, or even just a period of being stored away, your trusty electric fan often emerges looking a little worse for wear. That protective grille and those spinning blades, while keeping you cool, are also silently collecting dust, pet dander, and allergens from the air. Before you tuck it away for winter or bring it out for another season, giving it a good clean isn’t just about aesthetics; it’s about efficiency, air quality, and extending the life of your appliance.
Many people delay cleaning their fans, often intimidated by the prospect of disassembly or worrying they might damage the motor. You might think a quick wipe-down is enough, but hidden dust can significantly reduce its cooling power and even circulate stale, dusty air back into your home. The good news? It’s far easier than you think to get your fan sparkling clean and running like new again!
This comprehensive guide is for anyone who owns an electric fan – whether it’s a desk fan, a standing fan, or a tower fan – and wants to breathe easier and enjoy optimal performance. If you’ve ever felt overwhelmed by fan maintenance or simply want a clear, step-by-step approach, you’ve come to the right place. We’ll break down the process into simple, manageable steps, using common household items, so you can tackle this chore with confidence.
By the end of this guide, you’ll not only have a spotless fan but also the knowledge and tips to keep it clean throughout its lifespan. Say goodbye to dusty breezes and hello to truly fresh, cool air!
Why You’ll Love This Guide
- Easy to Follow: Clear, step-by-step instructions make cleaning a breeze, even for beginners.
- Uses Common Household Items: No need for special, expensive cleaning products.
- Budget-Friendly: Save money on professional cleaning or replacement parts.
- Improves Air Quality: Remove dust, allergens, and pet dander from your circulating air.
- Boosts Fan Efficiency: A clean fan moves air more effectively, keeping you cooler.
- Extends Appliance Lifespan: Regular maintenance helps your fan last longer.
- Eco-Friendly: Opt for natural cleaning solutions where possible.
- Promotes a Healthier Home: Reduce airborne irritants for a cleaner living environment.
Materials & Household Ingredients
Gathering your supplies beforehand will make the cleaning process smooth and efficient. Most of these items you likely already have around the house.
- Mild Dish Soap: About 1-2 tablespoons. A gentle degreaser that effectively breaks down grime.
- Warm Water: Enough to fill a basin or sink. Essential for washing disassembled parts.
- White Vinegar (Optional): 1/4 cup. Great for stubborn grime or for a natural disinfectant boost.
- All-Purpose Cleaner (Optional): For exterior surfaces if preferred over soap and water.
- Microfiber Cloths: 2-3 clean cloths. Excellent for wiping down surfaces without scratching.
- Old Toothbrush or Small Brush: For getting into tight spots and scrubbing stubborn dust.
- Cotton Swabs: Ideal for cleaning crevices and small gaps.
- Vacuum Cleaner with Brush Attachment: Essential for removing loose, dry dust.
- Screwdriver Set (Phillips and Flathead): Necessary for disassembling most fan models.
- Small Bowl or Basin: For mixing soapy water.
- Old Towels or Newspaper: To protect your work surface from water and dust.
Equipment Needed
- Work Surface: A flat, stable area like a kitchen counter or table.
- Gloves (Optional): To protect your hands from dust and cleaning solutions.
Step-by-Step Instructions: Deep Cleaning Your Electric Fan
Ready to give your fan the spa treatment it deserves? Follow these steps for a thorough clean.
Step 1: Unplug and Disassemble Your Fan
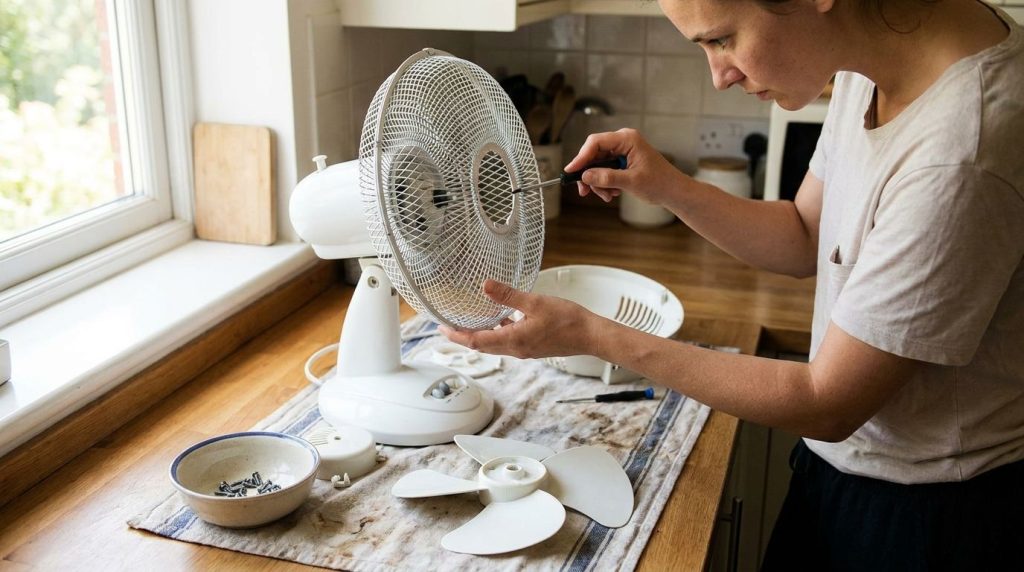
What to do: The very first and most crucial step is to ensure your fan is completely unplugged from the power outlet. Once unplugged, begin disassembling the fan. Most fans have a front grille that either clips on, twists off, or is secured with screws. Carefully remove this. Next, you’ll usually find a retaining nut or cap holding the fan blades in place. Unscrew this (often it’s reverse threaded, so turn clockwise to loosen), then gently pull the fan blades off the motor shaft. Finally, remove the rear grille, which might also be screwed on or clipped.
Why it matters: Unplugging prevents accidental activation and electric shock, ensuring your safety. Disassembling allows you to reach all the dust-collecting surfaces – the grilles and blades – for a truly deep clean that simply wiping down the exterior cannot achieve.
Helpful tips: Take pictures with your phone as you disassemble each part. This will be invaluable for remembering how to put it back together later. Place all screws and small parts in a small, clearly visible bowl so they don’t get lost.
Expected result: Your fan should be broken down into its main components: front grille, fan blades, rear grille, and the motor housing assembly.
Estimated time: 5-10 minutes.
Step 2: Vacuum Loose Dust from Grilles and Blades
What to do: Before introducing water, use your vacuum cleaner with a brush attachment to suck up as much loose dust and debris as possible from the front grille, rear grille, and fan blades. Hold the parts over a trash can or newspaper to catch any falling dust.
Why it matters: Removing the bulk of the dry dust first prevents it from turning into muddy sludge when you wash the parts with water. This makes the washing step much more effective and less messy.
Helpful tips: For very thick layers of dust, you might want to tap the grilles gently against a hard surface (like the inside of a trash can) to dislodge large clumps before vacuuming.
Expected result: The grilles and blades should be largely free of visible, loose dust, though a fine layer of grime might remain.
Estimated time: 3-5 minutes.
Step 3: Wash Grilles and Blades
What to do: Fill a basin or sink with warm water and add 1-2 tablespoons of mild dish soap. If desired, add 1/4 cup of white vinegar for extra cleaning power and to help cut through grease or mold. Submerge the fan grilles and blades in the soapy water. Let them soak for 5-10 minutes to loosen stubborn grime. Then, use an old toothbrush, small brush, or microfiber cloth to scrub every surface, paying close attention to the nooks and crannies of the grilles and the edges of the blades. Rinse thoroughly under clean running water until all soap residue is gone.
Why it matters: Soaking helps lift and dissolve caked-on dust and sticky residue. Manual scrubbing ensures that every speck of dirt is removed, leaving your parts truly clean. Rinsing prevents soap scum build-up, which can attract new dust.
Helpful tips: For very intricate grilles, the toothbrush is your best friend. For larger surfaces like the fan blades, a microfiber cloth works wonders. If you have particularly stubborn spots, a paste made of baking soda and a little water can be gently applied and scrubbed.
Expected result: The grilles and blades should be completely clean, shiny, and free of any dust or soap residue.
Estimated time: 10-20 minutes (including soaking time).
Step 4: Clean the Motor Housing and Base
What to do: The motor housing, which contains the electrical components, should *never* be submerged in water. Instead, dampen a clean microfiber cloth with a small amount of warm water (you can add a drop of dish soap to the water, but wring the cloth out very well until it’s barely damp). Carefully wipe down the exterior of the motor housing, the control panel, and the base of the fan. Use cotton swabs to clean any tight crevices or buttons. If there’s dust inside the motor vents, use your vacuum’s brush attachment or a can of compressed air to gently blow it out, being careful not to push dust further in.
Why it matters: Keeping the motor housing clean prevents dust from being drawn into the motor, which can lead to overheating and damage. It also ensures the controls are free of sticky residue.
Helpful tips: Always err on the side of caution when cleaning electrical components. A slightly damp cloth is key – never wet or dripping. Avoid spraying cleaners directly onto the motor housing.
Expected result: The exterior of the motor housing and base should be clean and free of dust and grime.
Estimated time: 5-10 minutes.
Step 5: Thoroughly Dry All Parts
What to do: This is a critical step. Use a clean, dry microfiber cloth to thoroughly dry all the washed fan grilles and blades. Ensure there is absolutely no moisture remaining on any part. For best results, allow them to air dry completely for several hours, or even overnight, before reassembling. You can place them on clean towels in a well-ventilated area.
Why it matters: Any residual moisture, especially on metal components, can lead to rust. More importantly, water on electrical parts (even if they weren’t directly washed) can cause short circuits or electrical hazards when the fan is plugged back in. Complete dryness is essential for safety.
Helpful tips: If you’re in a hurry, a hairdryer on a cool setting can speed up the drying process for non-electrical parts, but air drying is always safest. Check all crevices for hidden water droplets.
Expected result: All fan components should be bone dry and ready for reassembly.
Estimated time: 5-10 minutes for towel drying, plus several hours for air drying.
Step 6: Reassemble Your Fan
What to do: Once all parts are completely dry, carefully reassemble your fan by reversing the disassembly steps. Start with the rear grille, then place the fan blades back onto the motor shaft (making sure they are securely in place), fasten the retaining nut/cap, and finally, attach the front grille. Refer to the pictures you took during disassembly if needed.
Why it matters: Correct reassembly ensures the fan operates safely and effectively. Loose parts can cause vibrations, noise, or even become hazards.
Helpful tips: Don’t overtighten screws, but make sure everything feels secure. Give the blades a gentle spin with your hand to ensure they rotate freely without obstruction before plugging it in.
Expected result: Your fan should look and feel brand new, fully assembled and ready for use.
Estimated time: 5-10 minutes.
Step 7: Test Your Clean Fan
What to do: Plug your freshly cleaned and reassembled fan back into the power outlet. Turn it on and check that all settings (speeds, oscillation, timers) work correctly. Listen for any unusual noises or wobbling.
Why it matters: A final test confirms that your cleaning efforts were successful and that the fan is functioning safely and optimally.
Helpful tips: Enjoy the feeling of fresh, clean air circulating! Take a moment to appreciate your hard work.
Expected result: A fully functional, quiet, and efficient fan that provides clean, cool air.
Estimated time: 1 minute.
Expert Tips for Fan Maintenance
- Regular Dusting is Key: Don’t wait until it’s caked on. A quick wipe-down of the exterior with a damp cloth once a week (while unplugged!) can significantly reduce the need for deep cleaning.
- Seasonal Deep Cleans: Aim for a deep clean at least once per season of heavy use, or before storing it away for an extended period.
- Compressed Air for Quick Cleans: For a very light dusting between deep cleans, a can of compressed air can be used to blow dust out of the grilles without disassembly (always unplug first).
- Check for Wear and Tear: While cleaning, take a moment to inspect the power cord for fraying or damage, and ensure all screws are tight. Replace damaged fans for safety.
- Preventative Measures: Consider placing your fan in areas with less circulating dust, or use an air purifier in the same room to help reduce dust accumulation.
- Watch Out for Allergies: If you suffer from allergies, cleaning your fan more frequently can make a noticeable difference in your home’s air quality.
- Consider Brushless Motors: Some newer fan models feature brushless motors, which tend to collect less internal dust and require less maintenance.
Variations for Different Fan Types
For Tower Fans
Tower fans often don’t have easily removable grilles or blades. Instead:
- Exterior Wipe-Down: Use a damp microfiber cloth to wipe down the entire exterior, including the vents.
- Vacuum Attachment: Use a narrow crevice tool or brush attachment on your vacuum to reach inside the vertical grilles and suck out accumulated dust.
- Compressed Air: Direct bursts of compressed air into the vents to dislodge stubborn internal dust, making sure to do this outdoors or over a trash can.
- Cotton Swabs: For very tight spots on the grilles, damp cotton swabs can be effective.
For Ceiling Fans
While not electric *standing* fans, ceiling fans also gather significant dust.
- Dusting Wand with Extension: Use an extendable dusting wand with a microfiber head to reach and wipe down blades and light fixtures.
- Pillowcase Method: For each blade, carefully slide an old pillowcase over it, trapping the dust inside as you pull it off. This prevents dust from falling all over your room.
- Damp Cloth Wipe: After removing the bulk of the dust, wipe down blades and housing with a damp microfiber cloth (unplugged first, if possible, or ensure light switches are off).
For Bathroom Exhaust Fans
These get particularly grimy with moisture and dust.
- Remove Grille: Most bathroom exhaust grilles clip or screw off easily.
- Soak and Scrub Grille: As with standing fans, soak the grille in warm soapy water and scrub clean.
- Vacuum Fan Housing: Use a vacuum attachment to clean around the fan housing and motor (ensure power is off at the breaker for safety).
- Damp Wipe Interior: Carefully wipe down the interior of the housing with a damp cloth, avoiding direct contact with electrical components.
Storage Instructions for Off-Season
Proper storage ensures your fan stays clean and functional for its next use.
- Ensure it’s Bone Dry: Before storing, always ensure your fan is completely dry to prevent mold or mildew growth, and rust.
- Cover It Up: Place a plastic bag, old pillowcase, or a dedicated fan cover over the entire fan to protect it from dust accumulation during storage.
- Original Packaging: If you still have the original box, that’s an excellent way to store it securely.
- Cool, Dry Place: Store your fan in a cool, dry place away from direct sunlight and extreme temperatures, such as a closet, garage shelf, or under a bed.
- Protect the Cord: Loosely coil the power cord and secure it with a tie or velcro strap to prevent tangling or damage.
Safety Notes
When cleaning any electrical appliance, safety should always be your top priority. Follow these guidelines to prevent accidents and ensure your well-being.
- Always Unplug First: Before you begin any cleaning, inspection, or disassembly, ensure the fan is completely unplugged from the wall socket. This eliminates the risk of electric shock or the fan accidentally turning on.
- Keep Motor Dry: The motor housing contains electrical components. Never submerge it in water or spray liquids directly onto it. Use only a barely damp cloth for cleaning the exterior.
- Avoid Harsh Chemicals: Stick to mild dish soap and water, or a gentle all-purpose cleaner. Harsh chemicals can damage plastic parts, leave residue, or create dangerous fumes. Never mix cleaning products, especially bleach and ammonia-based cleaners, as this can create toxic gases.
- Dry Completely: Ensure all washed parts are absolutely, thoroughly dry before reassembling and plugging the fan back in. Moisture can cause short circuits and electrical hazards.
- Inspect for Damage: While cleaning, check the power cord for any frayed wires, cuts, or exposed electrical components. Inspect the blades and grilles for cracks. If you find significant damage, it’s safer to replace the fan than to risk using it.
- Children and Pets: Keep cleaning supplies and disassembled fan parts out of reach of children and pets. Ensure they are not present during the cleaning process to prevent accidental ingestion of cleaners or tampering with electrical components.
Frequently Asked Questions
How often should I deep clean my electric fan?
It depends on usage and environment. For daily use in a dusty home or with pets, a deep clean every 1-3 months is ideal. For occasional use, once a season or before/after storage is sufficient.
Can I clean the fan without disassembling it?
You can do a surface clean by wiping down the exterior and using a vacuum or compressed air to blow dust through the grilles. However, for a truly effective clean that removes hidden dust and grime, disassembly is highly recommended.
What if my fan blades are metal?
Metal blades can be washed just like plastic ones. Just be extra diligent in drying them thoroughly to prevent rust. A light application of a silicone-based lubricant on the motor shaft *after* cleaning and *before* reassembly can also help prevent rust and ensure smooth operation.
My fan smells dusty even after cleaning. What can I do?
Ensure you’ve cleaned every part thoroughly, including the inside of the grilles and the motor housing exterior. Sometimes, a lingering smell can be due to mold or mildew in hard-to-reach areas. A white vinegar solution in your wash water can help neutralize odors. Also, ensure the motor itself isn’t overheating, which can sometimes produce a burning smell.
Is it safe to use a dishwasher for fan parts?
Generally, no. While some plastic parts *might* survive, the high heat can warp or damage plastic, and the harsh detergents can be too abrasive. Hand washing with mild soap is always the safest and most recommended method.
Can I use bleach to clean really dirty fan parts?
It’s best to avoid bleach. It can discolor plastics, is harsh on skin, and its fumes can be irritating. Mild dish soap and white vinegar are usually powerful enough for most fan grime. If you suspect mold, a vinegar solution is a safer alternative.
What if my fan doesn’t have screws and seems sealed?
Some newer fan designs, especially tower fans or bladeless fans, are not designed for easy user disassembly. For these, rely on vacuuming with attachments, compressed air, and wiping down all accessible exterior surfaces. Always check your fan’s user manual for specific cleaning instructions.
Conclusion
Giving your electric fan a thorough deep clean might seem like a daunting task at first, but as you’ve seen, it’s a straightforward process that yields significant rewards. By investing a little time and effort, you’re not just making your appliance look better; you’re actively improving its performance, extending its lifespan, and most importantly, enhancing the air quality in your home. No more dusty breezes or inefficient cooling!
Remember the simple steps: unplug, disassemble, wash, dry, and reassemble. Prioritize safety by keeping the motor dry and ensuring all parts are completely moisture-free before plugging it back in. With regular maintenance and the tips shared in this guide, your fan will continue to be a source of cool, clean comfort for years to come. So go ahead, grab your cleaning supplies, and enjoy the satisfaction of a sparkling clean fan and fresher air!