Ever opened your kitchen cabinet to find a beloved pot looking like it survived a fiery battle? We’ve all been there! That moment when you realize a pot has been left on the burner a little too long, resulting in a stubborn, charred mess. It can feel like a lost cause, making you want to toss it straight into the trash. But hold on a moment! Before you say goodbye to your trusty cookware, we at Remedy – T.Nhàn have a secret weapon (or rather, a trio of kitchen heroes) that can help you bring that burnt pot back to life.
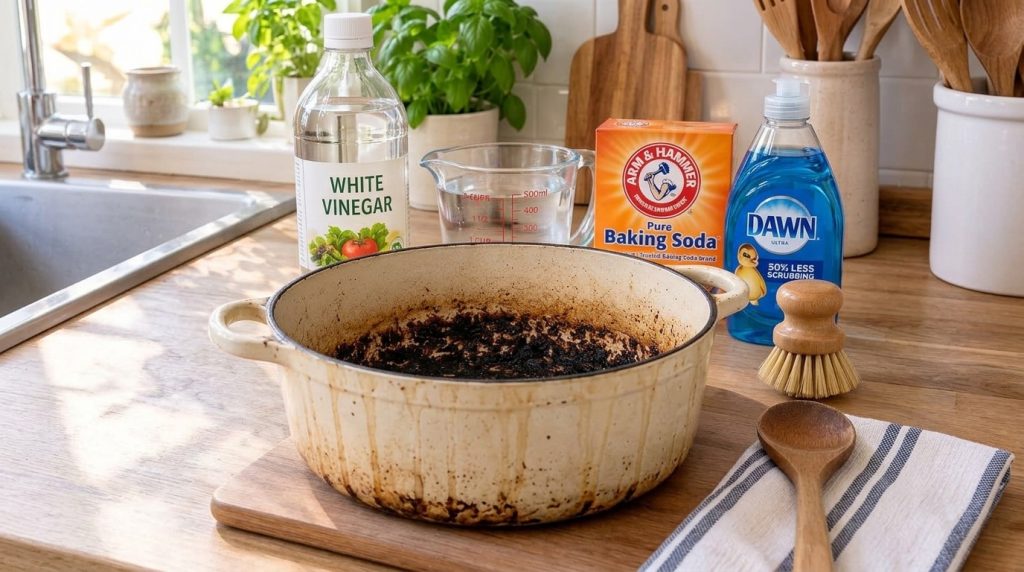
You don’t need harsh chemicals or abrasive tools to tackle this kind of kitchen disaster. Instead, reach for some simple, natural ingredients you probably already have in your pantry: baking soda, white vinegar, and a little dish soap. These humble household staples are incredibly powerful when it comes to breaking down stubborn burnt-on food and grime.
Why Natural Cleaning for Burnt Pots?
Using natural ingredients like baking soda and vinegar offers several benefits beyond just getting your pot clean. They are:
- Gentle on Cookware: Less likely to scratch or damage your pot’s surface compared to metal scrubbers or harsh chemicals.
- Eco-Friendly: Reduce your exposure to strong chemical fumes and contribute to a healthier home environment.
- Cost-Effective: You’re using ingredients you already have, saving you money on specialized cleaning products.
- Safe: No worries about chemical residues when you cook in the pot later.
Your Step-by-Step Burnt Pot Recovery Guide
Ready to embark on this rescue mission? Gather your supplies and let’s get that pot sparkling again!
What You’ll Need:
- The burnt pot
- Baking soda
- White vinegar
- Dish soap
- Water
- A wooden spoon or spatula
- A non-abrasive scrubbing brush or sponge
The Process:
Step 1: Cool Down and Remove Loose Bits
First, ensure your pot is completely cool. Never try to clean a hot pot. Once cool, use a wooden spoon or spatula to gently scrape away any loose, easily removable burnt food particles. Don’t force anything; the goal is just to get rid of the surface layer.
Step 2: The Baking Soda Power Soak
Sprinkle a generous layer of baking soda over the entire burnt area at the bottom of the pot. Aim for about 1/4 to 1/2 inch thick, depending on the severity of the burn.
Step 3: Add Water and Let it Sit
Pour enough hot water into the pot to cover the baking soda and burnt areas. Let this mixture sit for at least 15-30 minutes. For really tough burns, you can even let it soak overnight. Baking soda is a mild abrasive and helps to loosen the burnt-on food.
Step 4: The Vinegar Fizz (The Magic Happens!)
After the initial soak, drain most of the water, leaving just a little to create a paste with the baking soda. Now, pour about 1/2 cup to 1 cup of white vinegar directly over the baking soda. You’ll notice a satisfying fizzing reaction – this is the acetic acid in the vinegar reacting with the baking soda, creating carbon dioxide gas that helps to lift the burnt grime away. Let it fizz for 5-10 minutes.
Step 5: Gentle Scrubbing
Once the fizzing subsides, use your non-abrasive brush or sponge to gently scrub the burnt areas. You should find that much of the burnt food now comes off with relative ease. For stubborn spots, use the wooden spoon or spatula to carefully scrape, being mindful not to scratch the pot’s surface.
You can also create a paste of baking soda and a little water and apply it directly to particularly tough spots, letting it sit for an additional 15-30 minutes before scrubbing again.
Step 6: Dish Soap Wash and Rinse
After you’ve removed as much of the burnt residue as possible, discard the mixture. Wash the pot thoroughly with warm water and your regular dish soap to remove any remaining baking soda, vinegar, and loosened grime. Rinse well until clean.
Tips for Prevention
While this method is fantastic for recovery, preventing burnt pots in the first place is always the best strategy!
- Stay Present: Never leave cooking food unattended, especially when using high heat.
- Use Appropriate Heat: Match the heat setting to your cooking needs. Overheating can quickly lead to burning.
- Stir Regularly: For dishes prone to sticking, stir frequently, especially those with thick sauces or dairy.
- Use Enough Liquid: Ensure there’s always enough liquid when simmering or boiling to prevent ingredients from drying out and sticking.
Rescuing a burnt pot with natural ingredients is a testament to the power of simple, everyday kitchen items. It’s a satisfying and sustainable way to extend the life of your cookware, keeping your kitchen healthier and happier. So next time disaster strikes, remember this guide and get ready to witness a little kitchen magic!