When that craving for something sweet, satisfying, and utterly delicious hits, but you don’t want to turn on the oven, these No-Bake Peanut Butter Bites are your new best friend. Imagine the rich, creamy flavor of your favorite peanut butter combined with wholesome oats and a touch of sweetness, all rolled into perfectly portioned spheres. They’re a true creamy indulgence that requires minimal effort and delivers maximum satisfaction.
These delightful bites are perfect for a quick snack, a lunchbox treat, or a simple dessert. They come together in minutes, set beautifully in the fridge, and are endlessly customizable. Whether you’re looking for a boost of energy, a kid-friendly snack, or a sweet treat without the fuss of baking, these no-bake peanut butter bites are the answer to your cravings.
Why You’ll Love These No-Bake Peanut Butter Bites
- Effortlessly Easy: No oven, no complicated steps – just mix, roll, and chill.
- Simple Ingredients: Made with common pantry staples you likely already have on hand.
- Kid-Friendly: A fantastic recipe for little helpers to get involved in the kitchen.
- Perfect for Meal Prep: Make a batch at the beginning of the week for healthy snacks anytime.
- Customizable: Easily adapt with your favorite mix-ins or coatings for endless variations.
- Satisfying & Delicious: The perfect blend of sweet, salty, and creamy to curb any craving.
Ingredients
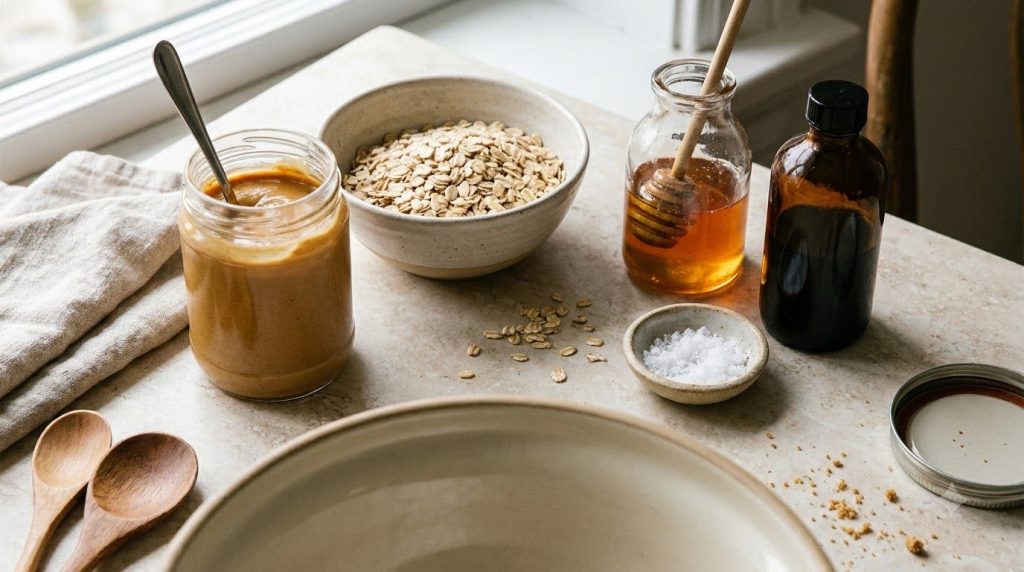
Here’s what you’ll need to make these delicious no-bake peanut butter bites:
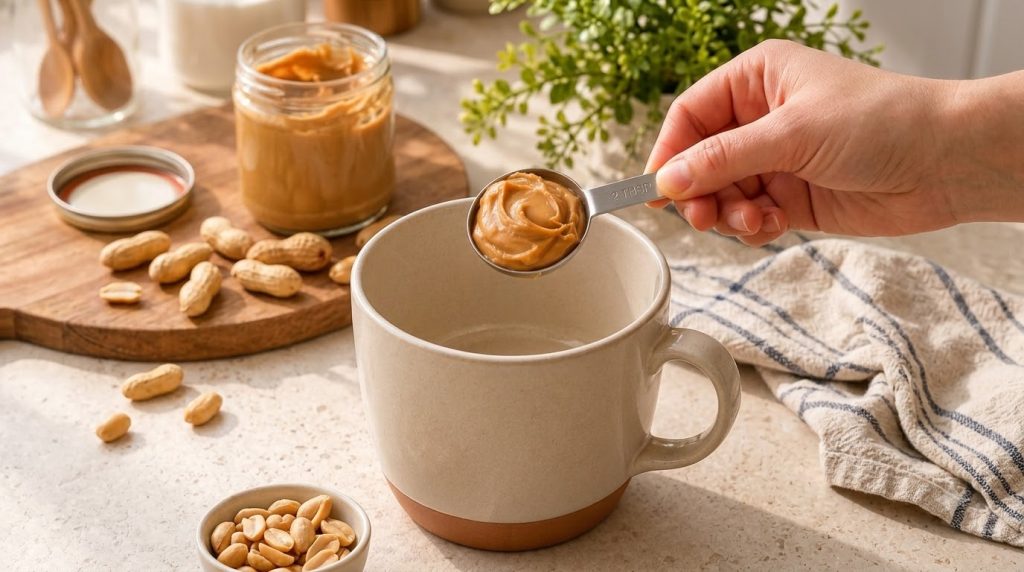
- 1 cup (240 g) creamy peanut butter (natural or regular)
- 1 ½ cups (135 g) rolled oats (old-fashioned)
- ½ cup (120 ml) honey or maple syrup
- 1 teaspoon (5 ml) vanilla extract
- ¼ teaspoon salt
- Optional: ¼ cup (40 g) mini chocolate chips
- Optional for coating: 2-3 tablespoons (15-20 g) powdered sugar, cocoa powder, or shredded coconut
Ingredient Notes
- Peanut Butter: Creamy peanut butter works best for a smooth texture. Natural peanut butter (the kind that separates) can be used, but make sure to stir it very well before measuring to ensure it’s fully incorporated and not too oily or dry.
- Rolled Oats: Old-fashioned rolled oats provide the best texture and structure. Quick oats can work in a pinch but may result in a slightly softer bite. Do not use steel-cut oats.
- Sweetener: Honey and maple syrup both work wonderfully, offering a natural sweetness and acting as a binding agent. Adjust the amount to your desired sweetness level.
- Vanilla Extract: Enhances the overall flavor profile. Don’t skip it!
- Salt: A small amount of salt balances the sweetness and brings out the nutty flavor of the peanut butter.
- Mix-ins: Mini chocolate chips are a classic addition, but feel free to experiment with other stir-ins like finely chopped nuts, chia seeds, or flaxseed meal.
Equipment You’ll Need
- Large mixing bowl
- Measuring cups and spoons
- Rubber spatula or sturdy spoon
- Baking sheet
- Parchment paper or silicone mat
How to Make No-Bake Peanut Butter Bites
Follow these easy steps to create your perfect no-bake peanut butter treats:
- Combine Wet Ingredients: In a large mixing bowl, add the creamy peanut butter, honey (or maple syrup), vanilla extract, and salt. Mix well with a rubber spatula or sturdy spoon until all ingredients are thoroughly combined and smooth.
- Add Dry Ingredients: Gradually add the rolled oats to the wet mixture. Stir continuously until the oats are fully incorporated and the mixture becomes thick and cohesive. If using, fold in the optional mini chocolate chips now.
- Chill the Dough (Optional but Recommended): For easier rolling, cover the bowl and refrigerate the mixture for about 15-20 minutes. This helps firm it up slightly.
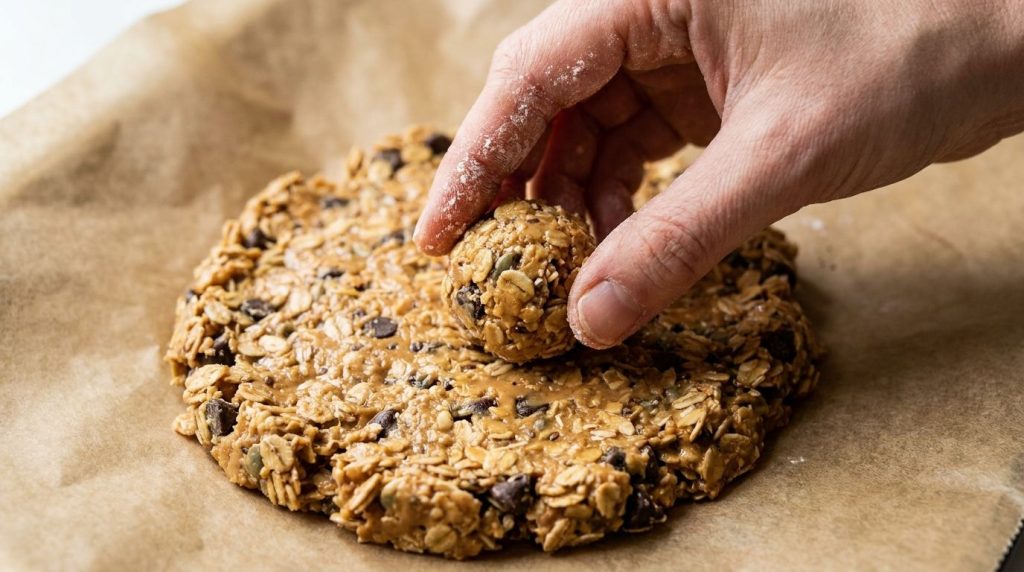
- Roll into Bites: Line a baking sheet with parchment paper or a silicone mat. Take small portions of the mixture (about 1 tablespoon each) and roll them between your palms to form smooth, round balls. If desired, roll the finished balls in powdered sugar, cocoa powder, or shredded coconut for an extra touch.
- Chill to Set: Arrange the rolled peanut butter bites on the prepared baking sheet. Place the sheet in the refrigerator for at least 30 minutes to allow the bites to firm up and set completely.
- Serve and Enjoy: Once firm, your no-bake peanut butter bites are ready to be served!
Pro Tips for the Best Results
- Choose Your Peanut Butter Wisely: If using natural peanut butter, ensure it’s well-stirred to prevent a crumbly or overly oily mixture. Standard creamy peanut butter tends to give the most consistent results.
- Adjust Sweetness: Taste the mixture before adding oats and adjust the honey/maple syrup to your preference. Remember, you can always add more, but you can’t take it out.
- Chill the Mixture: Don’t skip the initial chill if your mixture feels too sticky to roll. A quick 15-20 minutes in the fridge makes a big difference.
- Use Damp Hands: If the mixture is sticking to your hands while rolling, lightly dampen your palms with a little water. This helps prevent sticking and creates smoother bites.
- Uniform Size: Try to make your bites roughly the same size for even chilling and a professional look. A small cookie scoop can help with this.
- Get Creative with Coatings: Rolling in powdered sugar, cocoa powder, or shredded coconut adds another layer of flavor and texture. Crushed nuts or sprinkles are also fun options!
Common Mistakes to Avoid
- Overly Sticky Mixture: This often happens if the peanut butter is too warm, or if too much liquid sweetener was used. Chilling the mixture is the best solution. If still too sticky, add a tiny bit more oats (start with a tablespoon).
- Crumbly Bites: If your mixture is too dry and won’t hold its shape, it might be due to a dry natural peanut butter or not enough sweetener. Add a tiny bit more honey or maple syrup (half a teaspoon at a time) and mix well.
- Not Chilling Enough: Skipping the final chill will result in soft, easily smushed bites. Give them at least 30 minutes to firm up properly for the best texture.
- Using the Wrong Oats: Steel-cut oats are too hard and won’t soften properly in this recipe. Stick to old-fashioned rolled oats.
Variations & Substitutions
- Nut Butter Swaps: Not a peanut butter fan? Almond butter, cashew butter, or even sunflower seed butter (for a nut-free option) can be used. Note that textures may vary slightly, so you might need to adjust the oats or sweetener.
- Add a Protein Boost: Stir in 1-2 tablespoons of your favorite protein powder (vanilla or unflavored work best) along with the oats for an extra protein kick. You might need to add a touch more liquid if the mixture becomes too dry.
- Chocolate Lovers: Drizzle melted chocolate over the chilled bites or dip half of each bite in melted chocolate and let it set for an extra decadent treat.
- Spice It Up: Add a pinch of cinnamon or nutmeg to the mixture for a warm, spiced flavor.
- Extra Texture: Fold in finely chopped toasted nuts (like pecans or walnuts), shredded coconut, or even a tablespoon of chia seeds for added texture and nutrients.
Serving Suggestions
These no-bake peanut butter bites are incredibly versatile!
- Energizing Snack: Grab one or two for a quick energy boost mid-morning or afternoon.
- Post-Workout Treat: A satisfying combination of protein, carbs, and healthy fats makes them great after a workout.
- Easy Dessert: Serve them alongside a cup of coffee or tea for a delightful, simple sweet ending to any meal.
- Lunchbox Addition: Pack them in school or work lunchboxes for a wholesome and appealing snack.
- Party Platter: Arrange them on a platter with other small sweets for a casual gathering.
Storage & Reheating
- Refrigerator Storage: Store the no-bake peanut butter bites in an airtight container in the refrigerator for up to 1 week.
- Freezer Suitability: These bites freeze beautifully! Place them in a single layer on a baking sheet to freeze solid, then transfer them to a freezer-safe airtight container or zip-top bag. They can be stored in the freezer for up to 2-3 months.
- Reheating: No reheating needed! These are meant to be enjoyed chilled or at room temperature. If frozen, simply take them out about 15-20 minutes before you want to eat them to allow them to thaw slightly.
FAQ
Can I make these no-bake peanut butter bites vegan?
Yes! To make them vegan, use maple syrup instead of honey. Ensure your peanut butter doesn’t contain any animal products.
Are these bites gluten-free?
They can be! Make sure to use certified gluten-free rolled oats, as some oats can be cross-contaminated during processing.
Why are my peanut butter bites too crumbly?
A crumbly mixture is usually due to dry peanut butter (especially natural types) or not enough liquid sweetener. Try adding a little more honey or maple syrup, half a teaspoon at a time, until the mixture comes together.
Can I use quick oats instead of rolled oats?
Quick oats can be used, but they absorb liquid differently and will result in a slightly softer, less chewy bite. Rolled oats provide the best texture.
How long do these no-bake peanut butter bites last?
When stored in an airtight container in the refrigerator, they will last for up to 1 week. They can also be frozen for 2-3 months.
Can I add protein powder to this recipe?
Absolutely! Add 1-2 tablespoons of your favorite protein powder (vanilla or unflavored works best) along with the oats. You might need to add an extra half teaspoon to a teaspoon of honey or maple syrup to maintain consistency as protein powder can absorb liquid.
Can I use crunchy peanut butter?
Yes, you can! Crunchy peanut butter will give the bites an extra textural element. The measurements should remain the same.
Recipe Card
Recipe Name: Easy No-Bake Peanut Butter Bites
Short Description: Delicious, creamy, and wholesome peanut butter bites that require no baking, perfect for a quick snack or dessert.
Prep Time: 15 minutes
Cook Time: 0 minutes
Total Time: 45 minutes (including chill time)
Servings: Approximately 18-20 bites
Course: Snack, Dessert
Cuisine: American
Cooking Method: No-Bake, Chilling
Ingredients:
- 1 cup (240 g) creamy peanut butter
- 1 ½ cups (135 g) rolled oats
- ½ cup (120 ml) honey or maple syrup
- 1 teaspoon (5 ml) vanilla extract
- ¼ teaspoon salt
- Optional: ¼ cup (40 g) mini chocolate chips
- Optional for coating: 2-3 tablespoons (15-20 g) powdered sugar, cocoa powder, or shredded coconut
Instructions:
- In a large mixing bowl, combine the peanut butter, honey (or maple syrup), vanilla extract, and salt. Mix thoroughly until smooth.
- Add the rolled oats to the wet mixture and stir until fully incorporated and a thick dough forms. If using, fold in mini chocolate chips.
- (Optional) Cover the bowl and refrigerate for 15-20 minutes to firm up the mixture for easier rolling.
- Line a baking sheet with parchment paper. Take about 1 tablespoon of the mixture, roll it between your palms into a smooth ball. If desired, roll in optional coatings.
- Place the rolled bites on the prepared baking sheet.
- Refrigerate for at least 30 minutes, or until firm, before serving.
Notes:
For best results, use creamy, well-stirred peanut butter. If your mixture is too sticky, chill it longer or lightly dampen your hands. If too dry, add a tiny bit more sweetener.
Storage:
Store in an airtight container in the refrigerator for up to 1 week, or freeze for 2-3 months.
Nutrition:
Nutrition information is an estimate and may vary depending on the ingredients and brands used.