Welcome to The Recipe Corner, where we believe that some of life’s greatest pleasures come from simple, homemade creations. Today, we’re diving into the delightful world of homemade caramel sauce. Forget store-bought versions filled with unpronounceable ingredients; this recipe brings you a rich, buttery, and silky smooth caramel that’s incredibly simple to make right in your own kitchen!
This luscious caramel sauce is a game-changer for anyone who loves to elevate their desserts. Whether you’re topping ice cream, drizzling over apple pie, enhancing a simple cake, or just enjoying it by the spoonful (we won’t tell!), this recipe will become a staple. It’s perfect for home bakers of all skill levels, from beginners to seasoned pros looking for a reliable, delicious caramel recipe.
Beyond its irresistible taste, making your own caramel means you control the ingredients, avoiding unnecessary additives and high-fructose corn syrup often found in commercial brands. You’ll learn the secrets to achieving that perfect amber hue and velvety texture, ensuring a successful batch every time. Get ready to impress your family and friends with this versatile, sweet treat!
In this comprehensive guide, we’ll walk you through each step, share expert tips, and offer variations so you can customize your caramel to perfection. Let’s get cooking!
Recipe Summary
- Prep Time: 5 minutes
- Cook Time: 10-15 minutes
- Total Time: 15-20 minutes
- Servings: Approximately 1 ½ cups
- Difficulty Level: Easy-Medium
- Course: Dessert Topping
- Cuisine: American
- Diet Type: Vegetarian (Contains Dairy)
Why You’ll Love This Recipe
- Incredibly Delicious: Rich, buttery, and perfectly sweet.
- Ready in Minutes: From start to finish, you’ll have caramel in under 20 minutes!
- Beginner-Friendly: Clear, step-by-step instructions make it easy for anyone.
- No Preservatives: Enjoy a natural, wholesome caramel without artificial ingredients.
- Versatile: Perfect for desserts, drinks, or even as a spread.
- Customizable: Easily adapt the flavor and consistency to your liking.
- Budget-Friendly: Made with common, inexpensive pantry staples.
- Impressive Results: Tastes gourmet but is surprisingly simple to achieve.
Ingredients
- 1 cup granulated sugar: The foundation for our caramel.
- ¼ cup water: Helps dissolve the sugar evenly.
- ¼ cup light corn syrup (optional, but recommended): Prevents crystallization and makes the caramel smoother. If omitting, be extra careful with crystallization.
- ½ cup heavy cream: Warmed slightly is best.
- 4 tablespoons (½ stick) unsalted butter: Cut into small pieces.
- ½ teaspoon sea salt: Enhances the flavor and balances the sweetness.
- 1 teaspoon vanilla extract: Added at the end for aroma and depth.
Equipment Needed
- Heavy-bottomed saucepan (at least 2-quart size)
- Whisk
- Heat-safe spatula or wooden spoon
- Measuring cups and spoons
- Heat-proof jar or container for storage
- Pastry brush (optional, for wiping down sugar crystals)
Step-by-Step Instructions
Making homemade caramel sauce might seem intimidating, but with these clear steps, you’ll master it in no time. The key is to pay attention and work quickly!
-
Combine Sugar, Water, and Corn Syrup
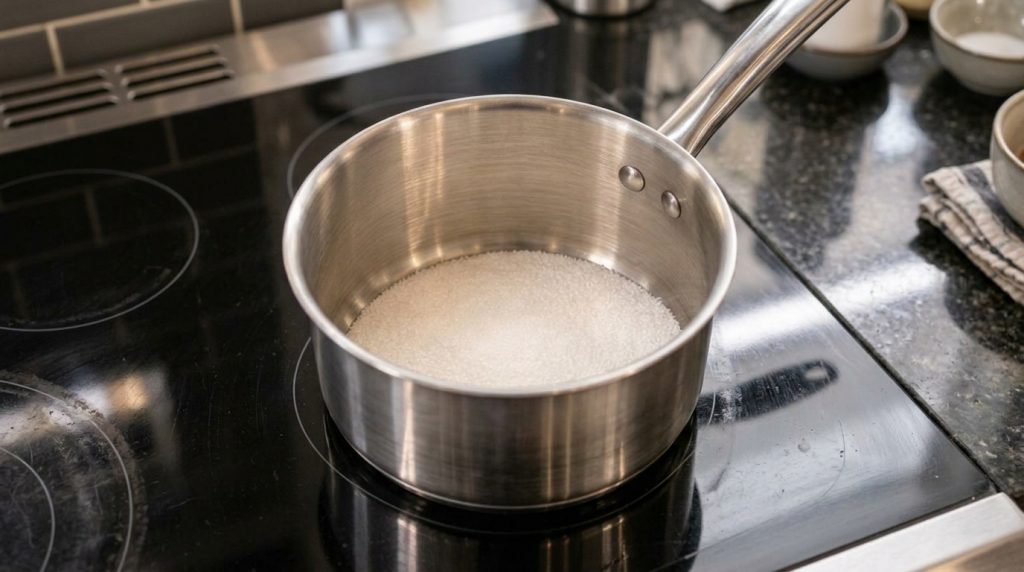
In your heavy-bottomed saucepan, combine the granulated sugar, water, and corn syrup (if using). Stir gently with a whisk or spatula until the sugar is just moistened. Avoid stirring vigorously as this can cause sugar crystals to form on the sides of the pan.
-
Heat to a Boil and Cook Without Stirring
Place the saucepan over medium-high heat. Bring the mixture to a boil. Once boiling, stop stirring. The sugar will begin to dissolve and bubble. If you see sugar crystals forming on the sides of the pan, dip a pastry brush in a little water and gently brush them down into the liquid. This prevents the caramel from becoming grainy. Allow the sugar mixture to cook, undisturbed, until it turns a beautiful amber color. This usually takes about 8-12 minutes. Keep a close eye on it, as it can go from perfect to burnt very quickly!
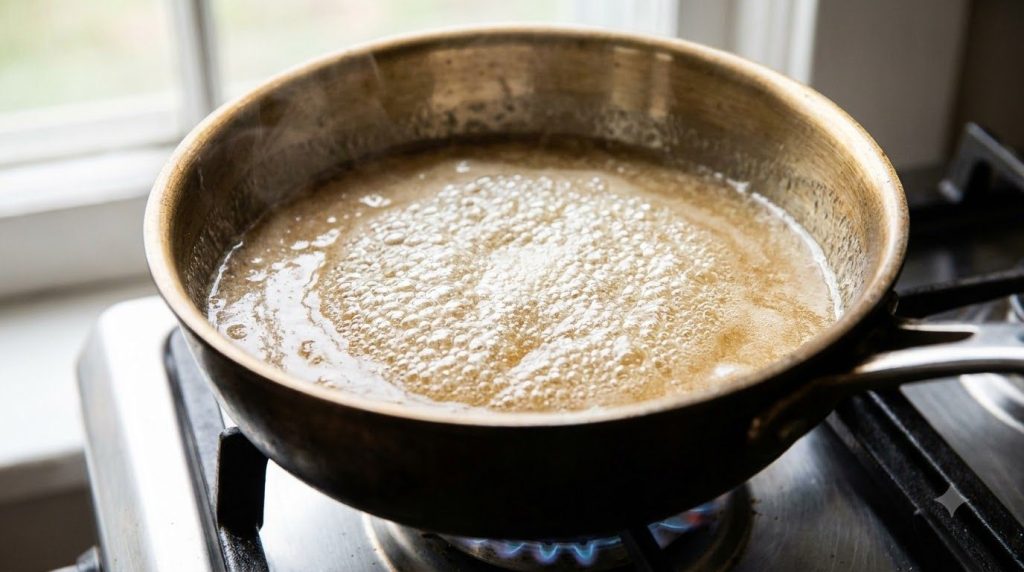
Watch for that beautiful amber color – a sign your caramel is almost ready! -
Remove from Heat and Add Warm Cream
Once the sugar mixture reaches that rich amber color, immediately remove the pan from the heat. This is a crucial step! Carefully and slowly pour the warmed heavy cream into the hot sugar mixture while whisking constantly. Be extremely cautious as the mixture will bubble up violently and release a lot of steam. Continue to whisk until everything is well combined and smooth. The caramel will thicken slightly as you whisk.
-
Stir in Butter, Salt, and Vanilla
Add the cubed unsalted butter and sea salt to the caramel. Continue to whisk until the butter is fully melted and incorporated, creating a glossy, smooth sauce. Stir in the vanilla extract last. Give it a final good whisk to ensure everything is evenly distributed.
-
Cool and Store
Carefully pour the hot caramel sauce into your heat-proof jar or container. Let it cool on the counter for at least 30-60 minutes before refrigerating. As it cools, the caramel will thicken considerably, reaching that perfect pourable consistency. Enjoy!
Nutrition Highlights
This homemade caramel sauce offers a delightful indulgence, and while it’s a sweet treat, making it from scratch allows for a more transparent ingredient list than many store-bought options. It’s rich in flavor, providing a satisfying sweetness derived from basic sugar and cream. Since you control the ingredients, you avoid artificial flavors and preservatives, making it a purer option for your desserts. Enjoy in moderation as a delicious addition to your favorite healthy treats.
Ingredient Benefits
- Granulated Sugar: Provides the primary sweetness and structure for the caramelization process, creating the sauce’s signature flavor and color.
- Water: Helps dissolve the sugar initially, ensuring even cooking and preventing premature crystallization before caramelization begins.
- Light Corn Syrup: Acts as an anti-crystallization agent, ensuring a smooth, non-grainy caramel sauce and contributing to its silky texture.
- Heavy Cream: Adds richness, creaminess, and a luxurious mouthfeel to the caramel, balancing the intense sweetness of the caramelized sugar.
- Unsalted Butter: Contributes a delightful buttery flavor and helps create that smooth, luscious consistency, adding to the overall indulgence.
- Sea Salt: A small but mighty ingredient, sea salt perfectly balances the sweetness of the caramel, enhancing its depth of flavor and preventing it from being cloyingly sweet.
- Vanilla Extract: Provides a warm, aromatic finish, complementing the rich caramel notes and adding a layer of sophisticated flavor.
Expert Tips
- Use a Heavy-Bottomed Pan: This is crucial for even heat distribution, preventing the sugar from burning in spots and ensuring consistent caramelization.
- Don’t Walk Away: Caramel can go from perfectly golden to burnt in a matter of seconds. Stay by the stove and keep a close eye on the color development once it starts to boil.
- Warm Your Cream: Cold cream can cause the hot sugar mixture to seize up significantly. Warming the cream gently before adding it helps prevent this drastic temperature shock, resulting in a smoother caramel.
- Avoid Stirring While Boiling: Once the sugar mixture boils, resist the urge to stir. Stirring can introduce air, which encourages sugar crystals to form, leading to a grainy caramel. Use a wet pastry brush to wash down any crystals on the sides of the pan.
- Safety First: Hot sugar is extremely dangerous. Wear oven mitts and be very careful when adding the cream, as the mixture will bubble up and release steam. Keep a safe distance.
- Adjust Salt to Taste: ½ teaspoon of sea salt provides a nice balance, but feel free to adjust to your preference for a more pronounced salted caramel.
- Know Your Colors: Aim for an amber or copper penny color. Darker caramel will be more bitter, lighter will be less complex.
- Thickening: Don’t worry if your caramel seems too thin right after making it. It thickens significantly as it cools. If it’s too thick once cooled, you can gently reheat it with a tablespoon of water or cream to loosen it up.
Recipe Variations
- Salted Caramel: Simply increase the amount of sea salt to ¾ or 1 teaspoon for an intensified salty kick.
- Dairy-Free/Vegan Version: Substitute heavy cream with full-fat coconut cream (from a can, chilled, spoon off the thick cream) and unsalted butter with a high-quality vegan butter. Note that the flavor and texture might be slightly different.
- Spice It Up: Infuse your cream with spices like cinnamon sticks, star anise, or a pinch of cardamom before adding it to the sugar. Strain the cream before use.
- Coffee Caramel: Dissolve 1-2 teaspoons of instant espresso powder or strong instant coffee into the warm heavy cream before adding it to the sugar mixture.
- Nutty Caramel: Stir in a tablespoon of nut butter (like almond or cashew) at the end with the vanilla for a unique flavor twist.
Storage Instructions
Once your homemade caramel sauce has cooled completely, transfer it to an airtight, heat-proof jar or container. It can be stored in the refrigerator for up to 2-3 weeks. For longer storage, caramel sauce freezes beautifully. Pour it into freezer-safe containers, leaving a little headspace, and freeze for up to 3 months. To use frozen caramel, simply thaw it in the refrigerator overnight and then gently reheat it on the stovetop over low heat or in the microwave in 30-second intervals, stirring until smooth and warm.
Frequently Asked Questions
Can I make this ahead of time?
Absolutely! Homemade caramel sauce is perfect for making ahead. It stores well in the refrigerator for several weeks.
What if my caramel crystallizes?
If your caramel becomes grainy or crystallizes, it often means sugar crystals formed on the sides of the pan and fell back into the batch. While sometimes salvageable by gently reheating with a little water, it’s often best to start over, ensuring you don’t stir while boiling and brush down any side crystals.
Can I use brown sugar instead of granulated sugar?
While you can make a caramel-like sauce with brown sugar, it will have a different flavor and texture, more akin to a butterscotch sauce. For classic caramel, granulated sugar is essential.
What if my caramel is too thin/thick?
Caramel thickens significantly as it cools. If it’s too thick, gently reheat it over low heat with a tablespoon of water or cream until it reaches your desired consistency. If it’s too thin after cooling, it might have been undercooked. You can try reheating it very gently and cooking it a bit longer, watching for color change, but be careful not to burn it.
Can children eat this?
Yes, homemade caramel sauce is generally safe for children to eat as a sweet treat. However, always serve it cooled to prevent burns, and in moderation.
What’s the best way to reheat caramel sauce?
To reheat, place the desired amount in a microwave-safe bowl and heat in 15-30 second intervals, stirring well after each, until warm and pourable. Alternatively, gently reheat it in a small saucepan over low heat on the stovetop, stirring constantly.
Why is corn syrup optional but recommended?
Corn syrup is a common ingredient in candy making because it helps prevent sugar crystals from forming, ensuring a smoother, silkier caramel. You can omit it, but you’ll need to be extra vigilant about not stirring and cleaning the sides of the pan to avoid graininess.
Conclusion
There you have it – a truly simple and utterly delicious recipe for homemade caramel sauce! This versatile sweet treat is so much more satisfying when made from scratch, allowing you to control the quality and customize the flavors. It’s perfect for elevating everyday desserts into something extraordinary, or simply for enjoying a spoonful of pure comfort.
We encourage you to give this recipe a try tonight. You’ll be amazed at how easy it is to achieve professional-tasting results right in your own kitchen. Don’t be afraid to experiment with the variations and make it your own. Happy caramel making!