Is your car’s interior looking a little worse for wear? Over time, car mats bear the brunt of everyday life – muddy shoes, spilled coffees, dust, and debris all accumulate, making your car feel less than fresh. But don’t despair! Giving your car mats a deep clean can dramatically improve the look and feel of your entire vehicle. And the best part? It’s a simple, satisfying DIY project you can tackle with just a few common items and a fantastic foam cleaner.
There’s nothing quite like stepping into a clean car. It instantly feels more inviting, more organized, and simply, better. Our easy foam cleaning hack will lift grime and dirt from your mats, leaving them spotless and revitalized. Let’s get started on bringing that showroom shine back to your ride!
Why Your Car Mats Deserve a Deep Clean
Beyond aesthetics, there are several practical reasons to keep your car mats clean:
- Improved Hygiene: Mats can harbor allergens, bacteria, and mold, contributing to unpleasant odors and potentially affecting air quality inside your car.
- Enhanced Appearance: Clean mats immediately elevate the overall cleanliness and appeal of your car’s interior.
- Preserve Resale Value: A well-maintained interior, including clean mats, can positively impact your car’s resale value.
- Odor Elimination: Trapped dirt and spills are common sources of lingering odors. A deep clean can eliminate these at the source.
The Power of Foam: How It Works Wonders on Fabric
Foam cleaners are particularly effective for fabric surfaces like car mats because they work by encapsulating dirt particles. When sprayed, the foam expands and penetrates the fabric fibers, lifting the grime to the surface. As the foam dries or is agitated, it breaks down and suspends the dirt, making it easier to extract. This method is often less saturating than liquid cleaners, which can be beneficial for drying times and preventing mildew.
What You’ll Need for Spotless Car Mats
Gathering your supplies beforehand makes the cleaning process smoother and more efficient.
- Foam Upholstery/Carpet Cleaner: Look for products specifically designed for automotive interiors or household carpets/upholstery.
- Stiff Bristle Brush: A scrubbing brush (not too harsh) will help agitate the foam and lift dirt.
- Vacuum Cleaner: A powerful wet/dry shop vac or a good household vacuum with an upholstery attachment is ideal for removing loose dirt and extracting the foam.
- Microfiber Towels: For blotting and wiping.
- Bucket of Water (Optional): For rinsing your brush or towels.
- Protective Gloves: To protect your hands from the cleaning agents.
- Good Ventilation: Work in a well-ventilated area, preferably outdoors.
Step-by-Step Guide: Deep Cleaning Your Car Mats
Follow these simple steps to transform your dingy car mats into pristine ones!
-
Remove and Prepare Your Mats
First, take all the car mats out of your vehicle. Give them a good shake or a quick beat against a hard surface to dislodge loose dirt and debris. Then, use your vacuum cleaner to thoroughly vacuum both sides of each mat, removing as much surface dirt as possible. This prevents turning dry dirt into muddy residue.
-
Apply the Foam Cleaner
Following the instructions on your foam cleaner, generously spray an even layer of foam over the entire surface of one car mat. Ensure good coverage, focusing on heavily soiled areas.
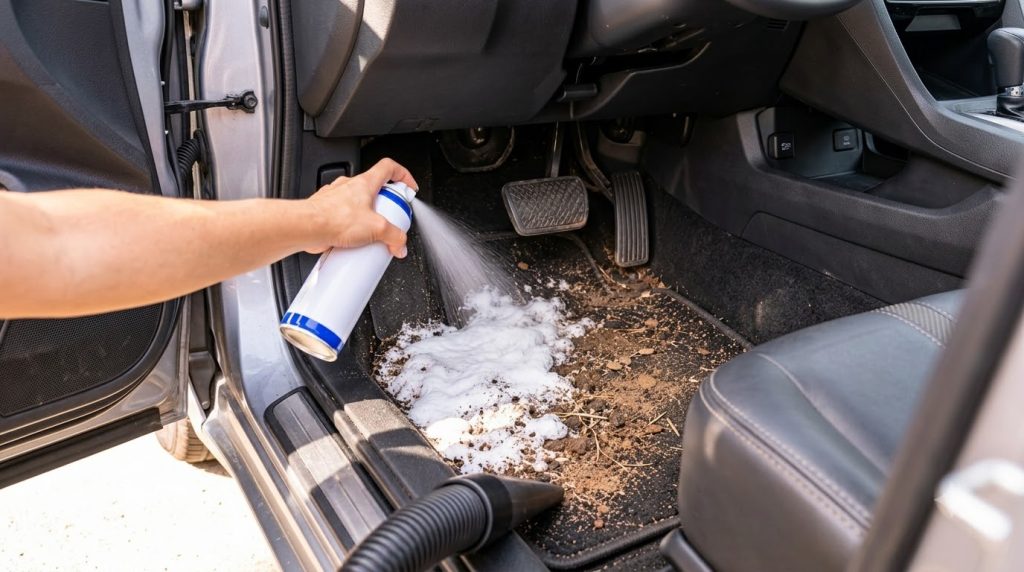
Watch as the foam cleaner begins to work its magic, lifting dirt from your car mats. -
Agitate and Scrub
Using your stiff-bristle brush, gently scrub the foamed areas. Work the foam into the fibers of the mat, focusing on stains and areas with embedded dirt. You’ll often see the foam changing color as it lifts grime. Be thorough but avoid excessive scrubbing that could damage the mat fibers.
-
Allow Dwell Time
Let the foam sit on the mats for the recommended dwell time specified on your product’s instructions. This usually ranges from a few minutes to up to ten minutes, allowing the active ingredients to break down and encapsulate the dirt effectively.
-
Extract the Foam and Dirt
Once the dwell time is up, use your vacuum cleaner with the upholstery attachment to thoroughly vacuum the mats. Go over the entire surface multiple times to extract as much foam and lifted dirt as possible. A wet/dry vacuum is excellent for this step, as it can handle any residual moisture.
-
Rinse and Wipe (If Necessary)
Some cleaners may leave a slight residue. If your mats feel sticky or look streaky after vacuuming, lightly dampen a clean microfiber towel with plain water and wipe down the mats. Follow up with a dry towel to absorb excess moisture.
-
Allow to Air Dry Completely
This is a crucial step! Lay your mats flat in a well-ventilated area, preferably outdoors in the sun (if not too hot and likely to cause fading) or in a garage. Ensure they are completely dry before placing them back in your car. This prevents mildew growth and unpleasant odors.
-
Replace Mats
Once bone dry, return your sparkling clean mats to your car. Enjoy the fresh smell and clean feel of your revitalized vehicle interior!
Pro Tips for Pristine Mats
- Vacuum Regularly: A quick vacuum once a week can prevent major dirt buildup and reduce the need for deep cleaning.
- Protect Your Mats: Consider using all-weather floor liners over your carpeted mats, especially in areas with frequent rain or snow, for easier cleaning.
- Spot Treat Stains: Address spills and stains as soon as they happen to prevent them from setting into the fabric.
- Rotate Mats: If you have multiple sets, rotate them to spread out wear and tear.
Beyond the Mats: Expanding Your Interior Clean
This foam cleaning method isn’t just for mats! Many foam upholstery cleaners can also be used on other fabric surfaces in your car, such as seats (if upholstered in fabric), door panel inserts, and even the headliner. Always perform a spot test in an inconspicuous area first to ensure colorfastness and prevent any damage.
Safety First!
When working with cleaning chemicals, always prioritize safety. Ensure you are in a well-ventilated area or even better, clean your mats outdoors. Wear gloves to protect your hands, and read the instructions on your specific foam cleaner for any additional precautions. Always test the product on a small, hidden area of your mat first to ensure it doesn’t cause discoloration or damage.
With just a little effort and the power of a good foam cleaner, you can have your car’s interior looking and smelling fresh again. A clean car truly does make every journey a more enjoyable experience!
What’s your go-to car cleaning hack? Share your wisdom in the comments below!