Revive Your Mattress: The Ultimate DIY Deep Clean with Household Staples
Is your mattress looking a bit worse for wear? Over time, mattresses accumulate dust, sweat, dead skin cells, and various stains, creating a less-than-ideal sleeping environment. While professional cleaning can be costly, you might be surprised to learn that you can achieve a wonderfully fresh and clean mattress right at home with a few simple, everyday ingredients. Get ready to transform your bed into a truly clean and healthy sanctuary!
Why Your Mattress Needs a Deep Clean
Before diving into the how-to, let’s consider why regular mattress cleaning is essential:
- Hygiene: Mattresses can harbor dust mites, bacteria, and allergens that impact air quality and your health.
- Freshness: A deep clean eliminates odors, leaving your bed smelling fresh and inviting.
- Longevity: Removing dirt and grime can help maintain the integrity of your mattress materials, potentially extending its life.
- Better Sleep: Sleeping on a clean surface can contribute to a more restful and comfortable night’s sleep.
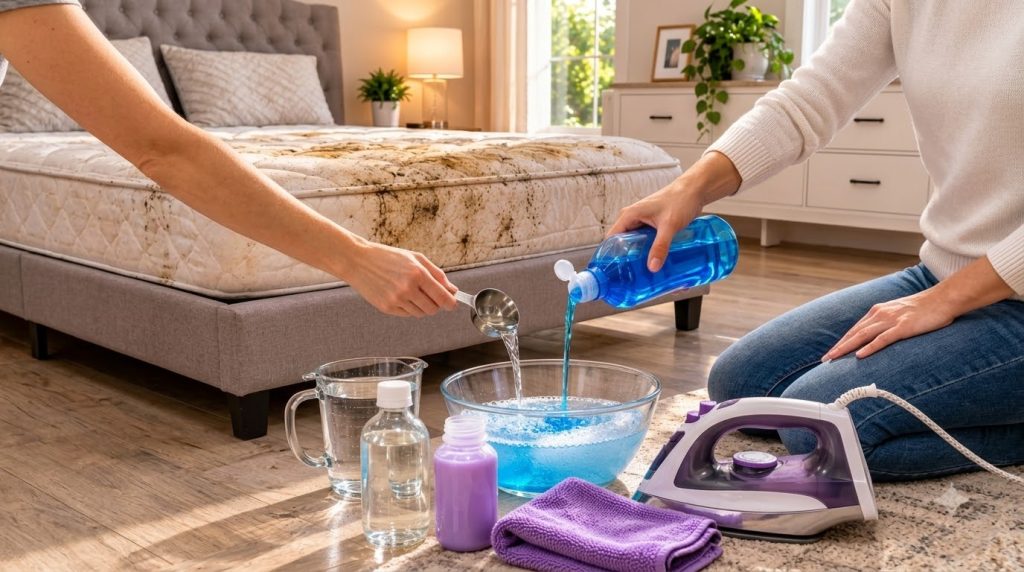
Gather Your Cleaning Arsenal
The DIY Cleaning Solution Ingredients:
- Warm Water: Approximately 2 cups. Warmer water helps activate cleaning agents and dissolve grime.
- Blue Dish Soap: About 1 tablespoon. Look for a concentrated formula known for its grease-cutting and stain-fighting abilities.
- Hydrogen Peroxide (3%): Approximately 1 cup. This common household antiseptic is excellent for breaking down organic stains, sanitizing, and deodorizing.
- Purple Liquid Fabric Softener: Optional, 1-2 tablespoons. While not a primary cleaner, a touch of fabric softener can leave your mattress feeling subtly softer and smelling wonderfully fresh, adding a pleasant aroma to your newly cleaned sleep space.
Essential Tools You’ll Need:
- A clean spray bottle
- Several clean microfiber cloths (a purple one, as seen in the image, works perfectly!)
- A vacuum cleaner with an upholstery attachment
- A sturdy scrub brush (for tough stains)
- A small bowl or bucket for mixing
- Old towels for blotting and protecting surfaces
- An iron (optional, for cautious drying)
Step-by-Step Guide to a Sparkling Clean Mattress
Step 1: Prepare Your Workspace
Start by stripping your bed of all linens. If possible, move your mattress to a well-ventilated area or open windows wide. Use your vacuum cleaner with the upholstery attachment to thoroughly vacuum the entire mattress surface, paying extra attention to seams and crevices where dust and debris tend to collect. This removes loose dirt before you add any moisture.
Step 2: Mix Your Powerful Cleaning Solution
In your small bowl or bucket, combine the warm water, blue dish soap, hydrogen peroxide, and optional purple liquid fabric softener. Stir gently to mix the ingredients without creating too many suds. Once mixed, carefully pour the solution into your spray bottle.
Step 3: Tackle Stains and General Grime
Lightly mist a small section of your mattress with the cleaning solution. Avoid saturating the mattress, as too much moisture can lead to mold and mildew. For general cleaning, gently blot and wipe with a clean microfiber cloth. For noticeable stains, spray the solution directly onto the stain, let it sit for 5-10 minutes, then use your scrub brush to gently work the solution into the stain in a circular motion. Blot firmly with a clean, dry microfiber cloth.
Step 4: Rinse and Blot Thoroughly
After cleaning a section, lightly dampen a separate, clean microfiber cloth with plain warm water. Use this cloth to blot the cleaned area, helping to lift away any remaining cleaning solution and dirt. Repeat this step as needed with fresh cloths until you’ve removed as much moisture and residue as possible. The goal is to leave the mattress as dry as you can.
Step 5: The Drying Process
This is a critical step to prevent mold. Allow your mattress to air dry completely. This can take several hours, or even a full day, depending on humidity and ventilation. You can speed up the process by:
- Opening windows and turning on fans in the room.
- If you have a dehumidifier, run it nearby.
- Using an Iron (with caution): If you need to dry a specific spot faster, place a clean, dry towel over the damp area. Set an iron to its lowest heat setting (no steam) and gently press it over the towel. Move the iron continuously to avoid overheating any single spot. This transfers heat to the moisture through the towel, helping it evaporate. Always use a barrier towel and check the mattress temperature frequently.
Ensure the mattress is bone dry before putting any bedding back on it.
Pro Tips for Mattress Longevity & Freshness
- Mattress Protector: Invest in a good quality, waterproof mattress protector to guard against future spills and stains.
- Regular Vacuuming: Make vacuuming your mattress part of your routine every few months.
- Air It Out: Whenever you change your sheets, let your mattress air out for a few hours without any bedding.
- Rotate & Flip: Follow your mattress manufacturer’s guidelines for rotating or flipping your mattress to ensure even wear.
Safety First!
- Always work in a well-ventilated area when using cleaning solutions.
- Before applying the solution to a large area, test it on an inconspicuous spot of your mattress to ensure no discoloration or damage occurs.
- Never over-saturate your mattress with liquid, as this can lead to internal damage and mold growth.
- Hydrogen peroxide can have a mild bleaching effect, so use sparingly and avoid prolonged contact with colored fabrics you don’t intend to lighten.
Cleaning your mattress doesn’t have to be a daunting task. With these simple ingredients and a little effort, you can enjoy a healthier, fresher sleep environment. Give this home hack a try and feel the difference!
