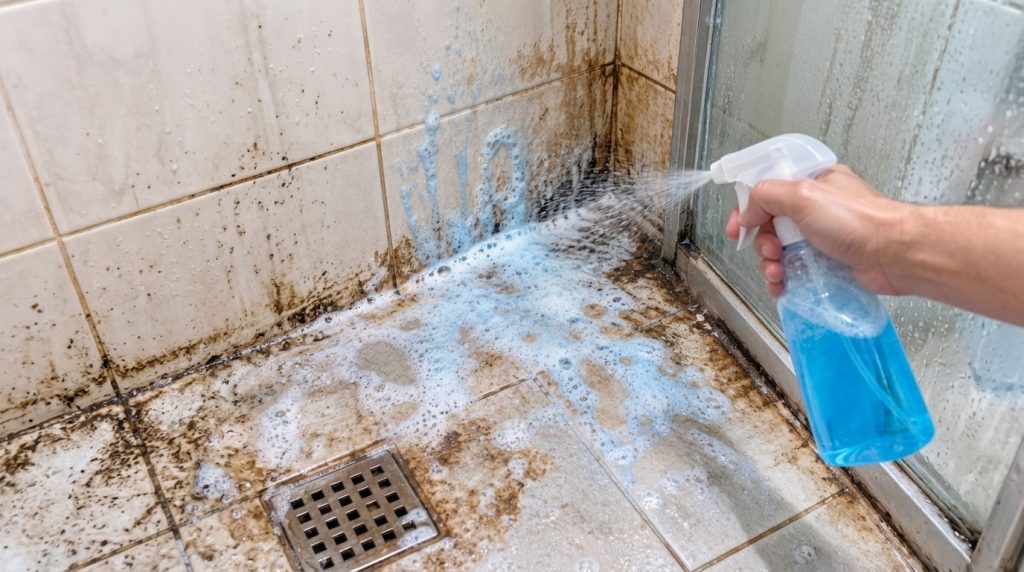
Is your shower looking less than sparkling? Stubborn shower grime, soap scum, and mold can quickly turn your bathroom oasis into an eyesore. It’s a common problem many homeowners face, and often, store-bought cleaners can be harsh, expensive, and not always effective against deep-seated dirt.
But what if you could tackle even the toughest shower buildup with simple ingredients you likely already have in your pantry? Imagine a squeaky-clean shower without the harsh chemicals or constant scrubbing. This guide is for anyone tired of fighting shower grime and ready for a practical, budget-friendly, and highly effective DIY solution.
In this comprehensive guide, you’ll learn how to create a powerful homemade shower cleaner that cuts through soap scum, banishes mold, and leaves your shower sparkling. We’ll walk you through every step, from mixing the ingredients to applying the solution, along with essential safety tips and expert advice. Get ready to transform your shower and reclaim your bathroom’s fresh, clean feel!
Quick Summary
- Preparation Time: 5 minutes
- Application Time: 15-30 minutes (depending on shower size and grime level)
- Difficulty Level: Easy
- Best Uses: Removing soap scum, hard water stains, mold, mildew, and general shower grime.
- Suitable Surfaces: Ceramic tiles, porcelain, fiberglass, glass shower doors, grout (test first).
- Storage Time: Up to 1 month (store in a cool, dark place).
Why You’ll Love This DIY Solution
- Easy to Make: Requires minimal effort and common kitchen ingredients.
- Budget-Friendly: Costs significantly less than commercial shower cleaners.
- Uses Common Household Ingredients: No need for special trips to specialty stores.
- Beginner-Friendly: Simple, clear steps make it accessible for everyone.
- Multipurpose: Effective on various shower surfaces.
- Eco-Friendly: Reduces reliance on harsh chemicals, better for your home and the environment.
- Effective: Tackles tough grime, soap scum, and mold without intense scrubbing.
- Pleasant Scent: Can be customized with essential oils for a fresh aroma.
Ingredients / Materials
- 1 cup white vinegar
- 1 cup warm water
- 1/2 cup baking soda
- 1 tablespoon liquid dish soap (e.g., Dawn, Sal’s Suds – avoid concentrated formulas)
- 10-15 drops tea tree essential oil (optional, for mold-fighting properties)
- 10-15 drops lemon essential oil (optional, for scent and degreasing)
Equipment Needed
- Large mixing bowl
- Measuring cups and spoons
- Funnel
- Spray bottle (16-24 oz capacity)
- Stiff-bristled scrub brush or old toothbrush (for grout)
- Microfiber cloths or sponges
- Rubber gloves
- Ventilation fan or open window
Step-by-Step Instructions
Follow these easy steps to mix and apply your homemade shower cleaner:
-
Gather Your Ingredients and Equipment (2 minutes)
Lay out all your measuring cups, bowls, ingredients, and the empty spray bottle. Ensure you have good ventilation in your bathroom before you begin.
-
Combine Dry Ingredients (1 minute)
In your large mixing bowl, add 1/2 cup of baking soda. Baking soda acts as a mild abrasive and odor absorber, helping to scour away grime.
-
Add Liquid Dish Soap (1 minute)
Pour 1 tablespoon of liquid dish soap into the bowl with the baking soda. The dish soap is crucial for breaking down grease, oils, and soap scum.
-
Mix Warm Water and Vinegar (1 minute)
In a separate container, gently combine 1 cup of warm water and 1 cup of white vinegar. Important: Add the vinegar slowly to the water to prevent excessive fizzing. Vinegar is a natural disinfectant and powerful acid that dissolves hard water stains and mineral deposits.
-
Combine All Ingredients (1 minute)
Slowly pour the vinegar and water mixture into the bowl with the baking soda and dish soap. It will fizz quite a bit, which is normal and helps to activate the cleaning power. Stir gently until the baking soda is mostly dissolved and you have a slightly thick, pasty liquid.
-
Add Essential Oils (Optional, 30 seconds)
If desired, add 10-15 drops of tea tree essential oil (known for its antifungal properties) and 10-15 drops of lemon essential oil (for a fresh scent and extra degreasing). Stir again to combine.
-
Transfer to Spray Bottle (1 minute)
Using a funnel, carefully transfer the mixture into your spray bottle. This can be a bit thick, so you might need to stir it in the bottle or shake it well before each use. Make sure the spray nozzle is securely attached.
-
Prepare Your Shower (2 minutes)
Before spraying, rinse your shower walls and floor with warm water. This helps to loosen some of the surface dirt and primes the area for cleaning. Put on your rubber gloves.
-
Apply the Cleaner (5-10 minutes)
Liberally spray the entire shower area – tiles, grout, glass doors, and fixtures – with your homemade solution. Focus on areas with heavy soap scum, mold, or hard water stains. The solution will have a slight foaming action.
-
Let It Sit (15-30 minutes)
Allow the cleaner to sit on the surfaces for at least 15-30 minutes. For very stubborn grime or mold, you can let it sit for up to an hour. This dwell time is essential for the ingredients to work their magic and break down the buildup.
-
Scrub and Rinse (5-15 minutes)
After the dwell time, use your scrub brush or sponge to thoroughly scrub all the treated surfaces. Pay extra attention to grout lines with an old toothbrush. You’ll notice the grime lifting away much easier. Once scrubbed, rinse all surfaces thoroughly with warm water, ensuring no residue is left behind.
-
Wipe Dry and Polish (5 minutes)
For a streak-free shine, especially on glass doors and fixtures, wipe down all surfaces with a clean, dry microfiber cloth. Stand back and admire your sparkling, fresh shower!
Best Uses
This versatile DIY cleaner is perfect for various areas in your bathroom:
- Shower Tiles and Grout: Excellent for removing soap scum, mildew, and general discoloration.
- Glass Shower Doors: Say goodbye to water spots and film for crystal-clear glass.
- Bathtubs: Works wonders on stubborn rings and grime in porcelain or fiberglass tubs.
- Shower Heads and Faucets: Helps dissolve hard water buildup, restoring shine.
- Plastic/Fiberglass Shower Enclosures: Effective on these surfaces, but always test in an inconspicuous area first.
Surface Limitations: While generally safe, avoid using this solution on natural stone surfaces like marble or granite, as the vinegar’s acidity can etch and damage them over time. Always test on a small, hidden area first, especially on older or delicate finishes.
Safety Notes
Your safety is paramount when cleaning. Please keep these important notes in mind:
- Wear Gloves: Always wear rubber gloves to protect your hands from prolonged contact with the cleaning solution, even natural ingredients can cause irritation.
- Ensure Good Ventilation: Open windows or turn on the bathroom fan to ensure adequate air circulation. While natural, vinegar can have a strong scent.
- Test in an Inconspicuous Area: Before applying to your entire shower, especially on new or sensitive surfaces, test the solution on a small, hidden spot to ensure no discoloration or damage occurs.
- Keep Away from Children and Pets: Store all cleaning solutions, homemade or commercial, out of reach of children and pets.
- Do Not Mix with Other Cleaners: Never mix this DIY solution with commercial cleaners, especially those containing bleach or ammonia. Mixing cleaning agents can create dangerous fumes.
Expert Tips
- Pre-Rinse for Best Results: A quick rinse with warm water before applying the cleaner helps to loosen surface dirt and ensures better adhesion of the solution.
- Target Grout Lines: For heavily stained grout, apply the solution, let it sit, and then use an old toothbrush or a grout brush for targeted scrubbing.
- Add a Boost for Tough Stains: For extra stubborn mold spots, create a paste with baking soda and a tiny bit of hydrogen peroxide. Apply directly to the spot, let it sit, then rinse.
- Daily Maintenance: Keep a diluted spray bottle of white vinegar (1:1 with water) in your shower to spritz after each use. This helps prevent soap scum and water spots from building up.
- Don’t Forget the Shower Curtain: If you have a fabric shower curtain, wash it regularly. For plastic liners, a quick scrub with this solution can help remove mildew.
- Check Your Exhaust Fan: Ensure your bathroom exhaust fan is working correctly and use it during and after showers to reduce humidity, which is a major cause of mold and mildew.
- Proper Storage is Key: Store your homemade cleaner in a cool, dark place. Label the bottle clearly so everyone knows what’s inside.
- Consider a Shower Squeegee: A simple squeegee used on glass doors after each shower can dramatically reduce water spots and soap scum accumulation, extending the time between deep cleans.
- Listen to Your Nose: If a strong vinegar smell bothers you, increase the amount of lemon essential oil or use a citrus-infused vinegar (made by soaking citrus peels in vinegar for a few weeks).
- Address Leaks Promptly: Persistent mold or mildew might indicate a leak behind tiles or around fixtures. Address any plumbing issues to prevent recurring problems.
Storage Instructions
Your homemade shower cleaner can be stored effectively for up to 1 month. For optimal shelf life:
- Best Storage Container: Use a clean, opaque plastic spray bottle. Opaque bottles help prevent light degradation of essential oils (if used) and keep the solution stable.
- Storage Location: Store the bottle in a cool, dark place, away from direct sunlight and heat. Under the sink or in a linen closet are good options.
- Signs the Solution Should Be Discarded: If you notice any significant changes in color, separation that doesn’t resolve with shaking, or an unpleasant odor beyond the initial vinegar scent, it’s best to discard the solution and mix a fresh batch. Over time, the ingredients may lose some of their potency, especially the essential oils.
Frequently Asked Questions
Here are some common questions about using this DIY shower cleaner:
-
Can I store this solution?
Yes, you can store this solution in a sealed spray bottle for up to one month. Shake well before each use.
-
How long does it last?
The cleaning potency is best within the first month. After that, it may start to lose some effectiveness, particularly if essential oils are included.
-
Can I use it on marble or natural stone?
No, the acidic nature of vinegar can etch and damage natural stone like marble or granite. It’s best to avoid using this solution on such surfaces.
-
Can I replace an ingredient?
While you can omit essential oils, we don’t recommend replacing the core ingredients (vinegar, baking soda, dish soap) as they work synergistically for effective cleaning. Substituting other ingredients might reduce its efficacy.
-
Is it safe around pets?
The ingredients are generally safe, but it’s always best to keep pets out of the bathroom during cleaning and ensure all surfaces are thoroughly rinsed before allowing them back in. Store the solution out of their reach.
-
Will it remove hard water stains?
Yes, the vinegar in the solution is highly effective at dissolving hard water stains and mineral deposits.
-
Does it smell strongly of vinegar?
Initially, yes, but the smell dissipates quickly, especially with good ventilation. Adding lemon essential oil can also help mask the scent.
-
Can I use it on shower curtains?
Yes, for plastic shower curtain liners, spray the solution, let it sit, scrub, and rinse. For fabric curtains, it’s generally better to machine wash them.
-
What if the solution clogs my spray bottle?
The baking soda can sometimes settle. Ensure you shake the bottle very well before use. If it clogs, clear the nozzle with warm water or try a spray bottle with a wider nozzle or a thicker solution. Make sure the baking soda is fully dissolved.
-
How often should I use this cleaner?
For a deep clean, use it monthly or as needed. For maintenance, a quick spray and wipe with a diluted vinegar solution (or this solution) once a week can keep grime at bay.
Conclusion
Say goodbye to stubborn shower grime and hello to a sparkling clean bathroom! This DIY shower cleaner offers a powerful, yet gentle, alternative to harsh chemical products. By combining the natural cleaning prowess of baking soda, vinegar, and dish soap, you can effectively tackle soap scum, mold, and hard water stains, leaving your shower fresh and inviting.
Remember to follow the steps carefully, prioritize safety with proper ventilation and gloves, and perform a patch test on delicate surfaces. With just a few common ingredients and a little effort, you’ll be amazed at the transformation. Give this homemade solution a try, and enjoy the satisfaction of a beautifully clean shower!
-