There’s nothing quite like the taste of freshly made homemade peanut butter. Forget store-bought jars with added sugars and oils; making your own peanut butter is surprisingly simple, incredibly satisfying, and allows you to control exactly what goes into it. It’s a quick project that transforms humble roasted peanuts into a luscious, creamy spread perfect for sandwiches, smoothies, or just enjoying by the spoonful.
This recipe focuses on pure, unadulterated peanut goodness, yielding a spread that’s rich in flavor and wonderfully smooth. Whether you’re aiming for a healthier alternative or simply love the fresh taste, you’ll be amazed at how easy it is to achieve gourmet-quality peanut butter right in your own kitchen.
Why You’ll Love This Homemade Peanut Butter Recipe
- Simple Ingredients: You only need one main ingredient (peanuts!), with optional additions for flavor.
- Easy Preparation: With just a food processor or high-speed blender, this recipe comes together in minutes.
- Healthier Alternative: Control sugar and oil content, avoiding unnecessary additives often found in commercial brands.
- Customizable: Easily adjust sweetness, saltiness, and texture to your personal preference.
- Fresh Taste: Enjoy the vibrant, nutty flavor that only fresh, homemade peanut butter can offer.
- Cost-Effective: Often more economical than purchasing specialty or organic peanut butter.
Ingredients
- 2 cups (240 g) roasted peanuts, unsalted
- ½ teaspoon (2.5 g) sea salt (optional, to taste)
- 1-2 tablespoons (15-30 ml) honey, maple syrup, or granulated sugar (optional, for sweetness)
- 1-2 tablespoons (15-30 ml) neutral oil like peanut oil or vegetable oil (optional, for extra smoothness, if needed)
Ingredient Notes
- Roasted Peanuts: Using already roasted peanuts is key for the best flavor and texture. Unsalted gives you control over the final seasoning. If you only have raw peanuts, you can roast them yourself on a baking sheet at 350°F (175°C) for 10-15 minutes, stirring occasionally, until fragrant and lightly golden. Allow them to cool completely before using.
- Salt: A pinch of salt enhances the nutty flavor. Adjust to your liking.
- Sweeteners: Honey and maple syrup provide natural sweetness and a slight caramel note. Granulated sugar can also be used. Add sparingly and taste as you go.
- Oil: While peanuts release their own natural oils, a touch of extra neutral oil can help achieve an extra-smooth, pourable consistency, especially if your peanuts are very dry or your equipment isn’t super powerful.
Equipment You’ll Need
- High-speed blender or Food Processor
- Spatula
- Airtight jar or container for storage
How to Make Homemade Peanut Butter
Making homemade peanut butter is mostly a waiting game as your machine works its magic. Be patient, and you’ll be rewarded with a silky-smooth spread!
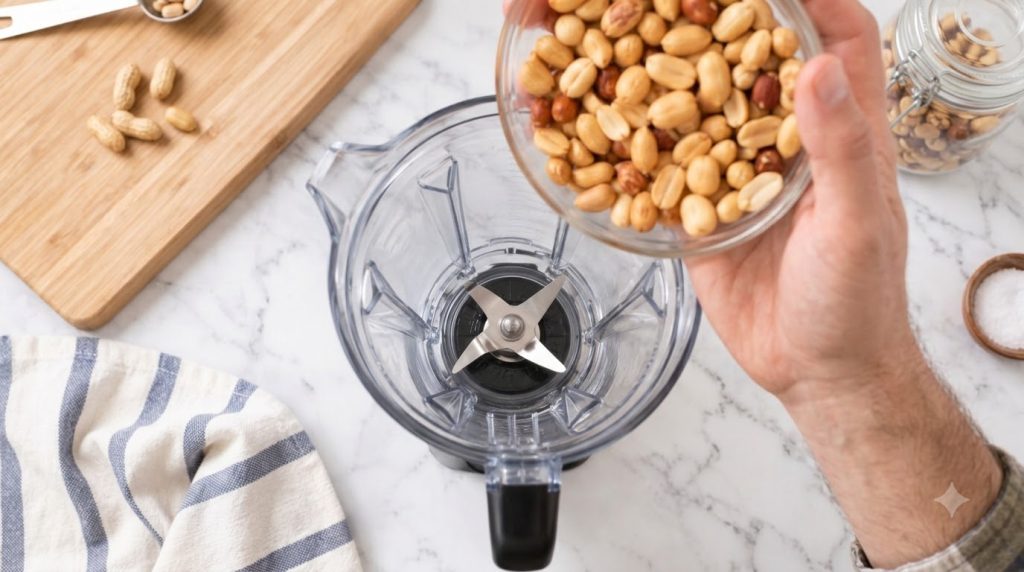
- Add Peanuts: Place the roasted peanuts into your high-speed blender or food processor. Ensure the machine is securely assembled.
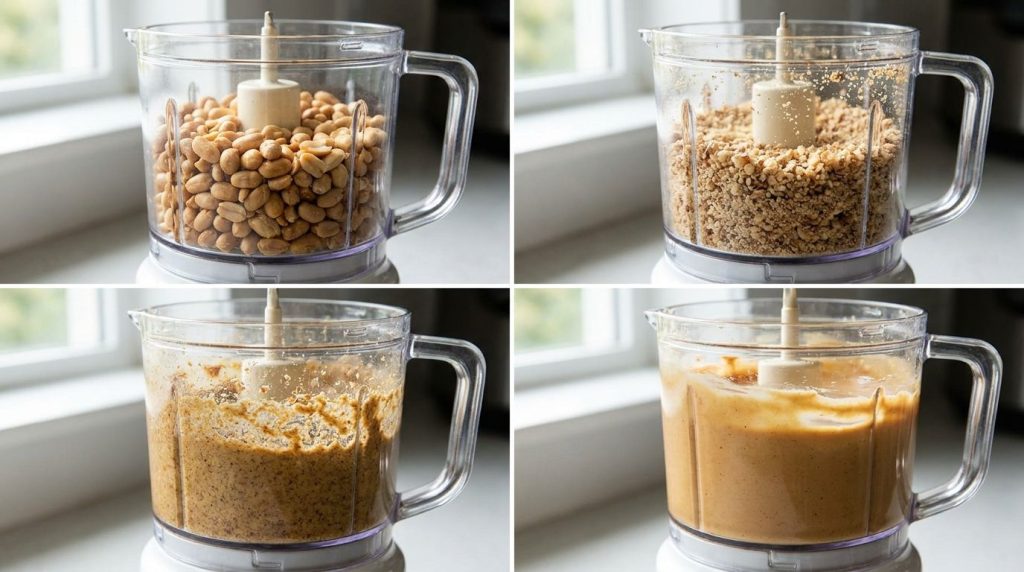
- Start Processing: Begin blending on a low setting, then gradually increase to high. The peanuts will go through several stages: first, they’ll become coarse crumbs, then a fine meal.
- Scrape Down Sides (Stage 1): After about 1-2 minutes, the peanuts will look like a fine, dry meal. Stop the machine and scrape down the sides of the bowl with a spatula to ensure all the peanuts are incorporated.
- Form a Ball: Continue processing. The mixture will then start to clump together and form a thick ball or paste. This can take another 2-4 minutes. Scrape down the sides again.
- Release Oils: Keep blending. The friction and pressure will cause the peanuts to release their natural oils. The mixture will transform from a thick paste into a more liquid, glossy, and creamy consistency. This is the stage where the magic really happens and can take anywhere from 5-10 minutes (or longer, depending on your machine).
- Achieve Creaminess: Continue blending until the peanut butter reaches your desired smoothness. For extra creamy peanut butter, process for a few more minutes until it’s very fluid and glossy. If it seems too thick or your machine is struggling, add optional oil one tablespoon at a time until the desired consistency is achieved.
- Season and Taste: Once creamy, stop the machine. Add the optional salt and sweetener, if using. Pulse a few times to combine. Taste and adjust seasonings as needed, adding more salt or sweetener a little at a time until perfect.
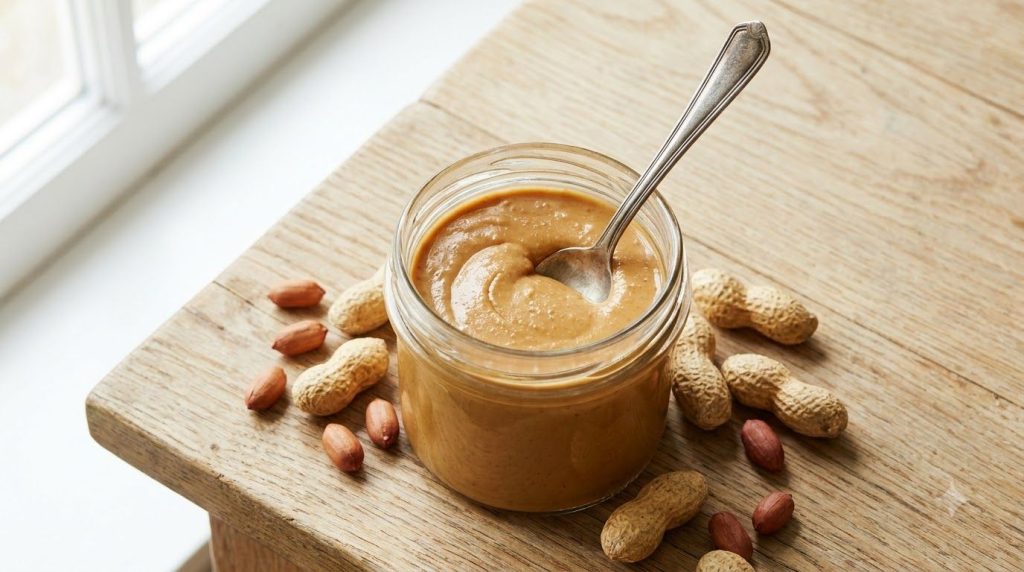
- Transfer and Store: Carefully transfer the freshly made peanut butter to a clean, airtight jar or container.
Pro Tips for the Best Results
- Use Roasted Peanuts: This is crucial for deep flavor. If you only have raw, roast them in the oven and cool completely before processing.
- Invest in a Good Machine: A high-speed blender or a powerful food processor (at least 750 watts) will make the process much smoother and quicker.
- Be Patient: The transformation from nuts to butter takes time, especially the final stage where the oils are released. Don’t rush it or add liquid prematurely.
- Scrape Down Regularly: Stop and scrape down the sides of your blender/food processor every few minutes to ensure all peanuts are uniformly processed.
- Don’t Overheat: If your machine gets very hot, give it a break for a few minutes to prevent damage.
- Start with Unsalted: This gives you full control over the salt content, allowing you to perfectly season to your taste.
- Warm Nuts for Speed: Slightly warm peanuts (not hot) can sometimes release their oils more quickly, speeding up the process.
Common Mistakes to Avoid
- Giving Up Too Soon: Many people stop blending when the peanuts are still in the paste or crumbly stage, thinking it’s not working. Keep going! The oils will release.
- Adding Liquid Too Early: Resist the urge to add water, milk, or too much oil at the beginning. This can seize the mixture and prevent it from becoming smooth.
- Using Raw Peanuts: While possible, raw peanuts yield a less flavorful and sometimes bitter butter. Roasting is essential for that classic peanut butter taste.
- Overfilling the Blender/Processor: Don’t fill your machine to the brim. Give the peanuts room to circulate and process efficiently.
Variations & Substitutions
- Crunchy Peanut Butter: Before the final stage of blending, remove about ¼ cup of the coarsely chopped peanuts. Stir them back in after the creamy butter is made.
- Sweetened Peanut Butter: Experiment with different sweeteners like brown sugar, agave nectar, or a pinch of stevia.
- Spiced Peanut Butter: Add a pinch of cinnamon, nutmeg, or even a tiny amount of cayenne pepper for a unique kick.
- Chocolate Peanut Butter: Blend in 1-2 tablespoons of unsweetened cocoa powder and an extra tablespoon of sweetener with the peanuts.
- Nut Butter Blends: You can experiment with mixing other roasted nuts like cashews or almonds with your peanuts for a custom nut butter blend.
- Other Nuts: This same method works beautifully for making almond butter or cashew butter – simply substitute the peanuts for your nut of choice.
Serving Suggestions
Homemade peanut butter is incredibly versatile and can elevate many dishes:
- Spread it on toast, bagels, or rice cakes.
- Use it in classic PB&J sandwiches.
- Swirl it into your morning oatmeal or yogurt.
- Add a spoonful to smoothies for extra protein and creaminess.
- Dip apple slices, banana, or celery sticks into it for a healthy snack.
- Use it as a base for savory sauces, like a Thai-inspired peanut sauce for noodles or salads.
- Bake with it! Incorporate into cookies, brownies, or energy bites.
Storage & Reheating
Store your homemade peanut butter in a clean, airtight jar or container.
- Refrigerator: Stored in the refrigerator, homemade peanut butter will last for up to 3-4 weeks. The natural oils may separate, so give it a good stir before each use.
- Pantry: If you prefer a softer, more spreadable consistency, it can be stored at cool room temperature for about 1-2 weeks. However, refrigeration is generally recommended to prolong freshness due to the absence of commercial preservatives.
- Freezer: For longer storage, you can freeze homemade peanut butter for up to 3 months. Thaw in the refrigerator overnight before using.
No reheating is necessary for peanut butter; it’s best enjoyed at room temperature or slightly chilled from the fridge.
FAQ
- Why is my peanut butter not getting creamy?
- The most common reason is not blending long enough. Peanuts go from crumbs to a dry paste, then a thick ball, and finally release their oils to become creamy. This process takes patience; keep blending!
- How long does homemade peanut butter last?
- Homemade peanut butter lasts about 1-2 weeks at room temperature and 3-4 weeks in the refrigerator when stored in an airtight container.
- Can I use raw peanuts?
- It’s best to use roasted peanuts for a richer flavor and smoother texture. Raw peanuts tend to yield a less flavorful and sometimes slightly bitter or chalky butter.
- Do I need to add oil?
- Typically, no. Peanuts contain enough natural oils to become creamy on their own. However, if your machine struggles or you desire an extra-smooth, pourable consistency, a tablespoon or two of neutral oil can help.
- Can I make this in a regular blender?
- A high-speed blender or a powerful food processor works best. Regular blenders might struggle to process the nuts into a smooth consistency and can overheat. If using one, you might need to stop frequently to scrape and let the motor cool.
- Is homemade peanut butter healthier?
- Homemade peanut butter can be healthier because you control all the ingredients, avoiding added sugars, unhealthy oils, and preservatives often found in commercial brands. It’s simply peanuts, and whatever natural seasonings you choose.
- Why does my peanut butter separate?
- Oil separation is natural for homemade peanut butter because it doesn’t contain emulsifiers. Simply stir it well before each use to recombine the oils.
Easy Homemade Peanut Butter
Make creamy, delicious homemade peanut butter with just one simple ingredient and a blender. Healthier, fresher, and fully customizable!
- Prep Time: 5 minutes
- Cook Time: 10-15 minutes
- Total Time: 15-20 minutes
- Servings: Approximately 1 ½ cups
- Course: Snack, Spread
- Cuisine: American
- Cooking Method: Blending
Ingredients:
- 2 cups (240 g) roasted peanuts, unsalted
- ½ teaspoon (2.5 g) sea salt (optional, to taste)
- 1-2 tablespoons (15-30 ml) honey, maple syrup, or granulated sugar (optional, for sweetness)
- 1-2 tablespoons (15-30 ml) neutral oil like peanut oil or vegetable oil (optional, for extra smoothness, if needed)
Instructions:
- Add Peanuts: Place the roasted peanuts into your high-speed blender or food processor. Ensure the machine is securely assembled.
- Start Processing: Begin blending on a low setting, then gradually increase to high. The peanuts will go through several stages: first, they’ll become coarse crumbs, then a fine meal.
- Scrape Down Sides (Stage 1): After about 1-2 minutes, the peanuts will look like a fine, dry meal. Stop the machine and scrape down the sides of the bowl with a spatula to ensure all the peanuts are incorporated.
- Form a Ball: Continue processing. The mixture will then start to clump together and form a thick ball or paste. This can take another 2-4 minutes. Scrape down the sides again.
- Release Oils: Keep blending. The friction and pressure will cause the peanuts to release their natural oils. The mixture will transform from a thick paste into a more liquid, glossy, and creamy consistency. This is the stage where the magic really happens and can take anywhere from 5-10 minutes (or longer, depending on your machine).
- Achieve Creaminess: Continue blending until the peanut butter reaches your desired smoothness. For extra creamy peanut butter, process for a few more minutes until it’s very fluid and glossy. If it seems too thick or your machine is struggling, add optional oil one tablespoon at a time until the desired consistency is achieved.
- Season and Taste: Once creamy, stop the machine. Add the optional salt and sweetener, if using. Pulse a few times to combine. Taste and adjust seasonings as needed, adding more salt or sweetener a little at a time until perfect.
- Transfer and Store: Carefully transfer the freshly made peanut butter to a clean, airtight jar or container.
Notes:
Using a powerful blender or food processor is key for the best results. Be patient with the blending process as the peanuts transform into a smooth, creamy butter. Stop and scrape down the sides frequently to ensure even processing.
Storage:
Store in an airtight container in the refrigerator for up to 3-4 weeks, or at cool room temperature for 1-2 weeks. Oils may separate; simply stir before using. Can be frozen for up to 3 months.
Nutrition:
Nutrition information is an estimate and may vary depending on the ingredients and brands used.