Most people cherish their Christmas cactus for its vibrant, festive blooms, but few realize just how simple it is to multiply that beauty and create an endless supply of flower-filled plants. Imagine transforming one beloved plant into a cascade of colorful holiday cheer for every room, or as thoughtful gifts for friends and family. The secret isn’t complicated; it’s a straightforward process called propagation that, with a few simple steps, allows you to grow new plants from existing ones.
What is Christmas Cactus Propagation?
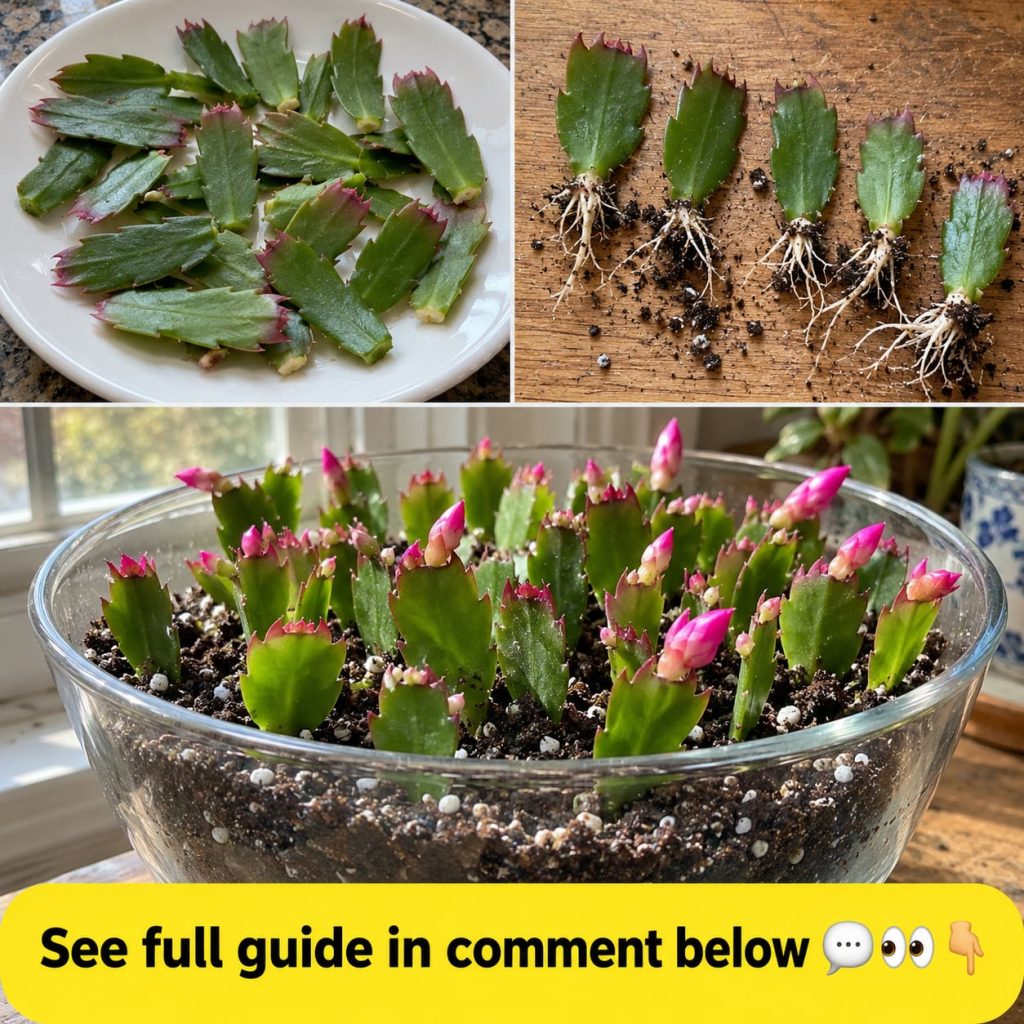
Christmas cactus (Schlumbergera) propagation is the process of creating new plants from cuttings of a mature, healthy mother plant. Unlike many plants that require seeds, Christmas cacti readily root from stem segments, making it one of the most rewarding and accessible propagation projects for any home gardener. This method ensures your new plants will be exact genetic copies of the parent, carrying forward its desirable traits like bloom color and growth habit. It’s an effective way to rejuvenate an older plant, share your love for gardening, or simply expand your collection.
Ingredients for Success
You don’t need a lot of fancy equipment to propagate Christmas cactus. The key is a healthy mother plant and a few basic supplies:
- Healthy Christmas Cactus Mother Plant: Choose a mature plant with firm, green segments, free from pests or disease.
- Sharp, Sterilized Cutting Tool: Small pruners, scissors, or a clean razor blade work best. Sterilize with rubbing alcohol to prevent disease transfer.
- Rooting Medium: A well-draining potting mix designed for cacti and succulents, or a mix of peat moss and perlite/sand.
- Small Pots: 3-4 inch pots with drainage holes are ideal for starting cuttings.
- Water: For watering your newly planted cuttings.
- Rooting Hormone (Optional): While not strictly necessary for Christmas cactus, it can speed up the rooting process.
Approximate Measurements for Cuttings
For best results, aim for cuttings that are 2-4 stem segments long. Each segment is typically about 1-2 inches. Shorter cuttings (1 segment) can work but may take longer to establish, while overly long cuttings might struggle to root and could be more prone to rot.
Quick Tip: When selecting segments, look for those that are plump and firm, not shriveled or discolored. Healthy segments have the best chance of rooting successfully.
Formula for Abundant Cuttings
- Identify Healthy Stems: Locate strong, firm stems on your mother plant.
- Take Cuttings: Using your sterilized tool, carefully twist or cut off segments. Aim for 2-4 connected segments.
- Allow to Callous: This is a crucial step most people skip. Place the cuttings in a dry, airy spot away from direct sunlight for 2-5 days. This allows the cut end to form a protective callus, preventing rot once planted.
- Prepare Rooting Medium: Fill your small pots with the chosen well-draining potting mix. Lightly moisten the soil.
- Plant Cuttings: Insert the calloused end of each cutting about 1 inch deep into the moist soil. If using rooting hormone, dip the calloused end into the powder before planting.
- Provide Indirect Light: Place the pots in a location with bright, indirect light. Avoid direct sun, which can scorch tender new cuttings.
- Maintain Humidity: While not strictly necessary, covering the pots loosely with a plastic bag or placing them in a humidity dome can encourage rooting. Just ensure good air circulation to prevent mold.
Step-by-Step Method: From Cut to Root
Let’s walk through the process in detail to ensure your success.
Step 1: Gather Your Tools and Choose Your Mother Plant
Before you begin, ensure your scissors or pruners are clean and sharp. A dull or dirty tool can damage the plant tissue and introduce pathogens. Select a vigorous, healthy stem from your Christmas cactus. Avoid stems that look weak, diseased, or are actively blooming, as this can stress the mother plant.
Step 2: Taking the Cuttings
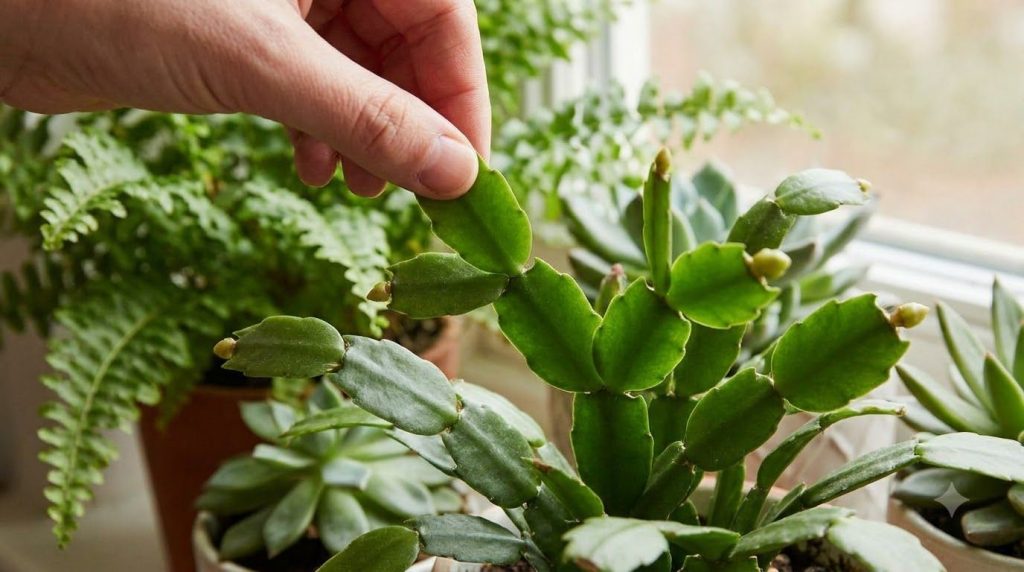
Gently grasp a stem at a joint where two segments meet. With a twisting motion, carefully break off 2-4 segments, or use your sterilized cutting tool to make a clean cut. Try to leave a small nub on the mother plant. This method minimizes damage to the parent plant.
Step 3: The Critical Callousing Phase
Lay your cuttings on a paper towel or a clean, dry surface in a spot with good air circulation, away from direct sunlight. This period, lasting from 2 to 5 days, allows the cut end to dry out and form a protective seal, much like a scab. This ‘callus’ is vital for preventing fungal infections and rot once the cutting is introduced to moisture.
Step 4: Preparing the Potting Medium
Fill your small pots with a light, airy, and well-draining mix. A specialized cactus or succulent mix is ideal. If you’re mixing your own, combine equal parts peat moss and perlite or coarse sand. This ensures roots get enough oxygen and don’t sit in soggy soil. Lightly moisten the mix before planting, so it’s damp but not waterlogged.
Step 5: Planting Your Cuttings
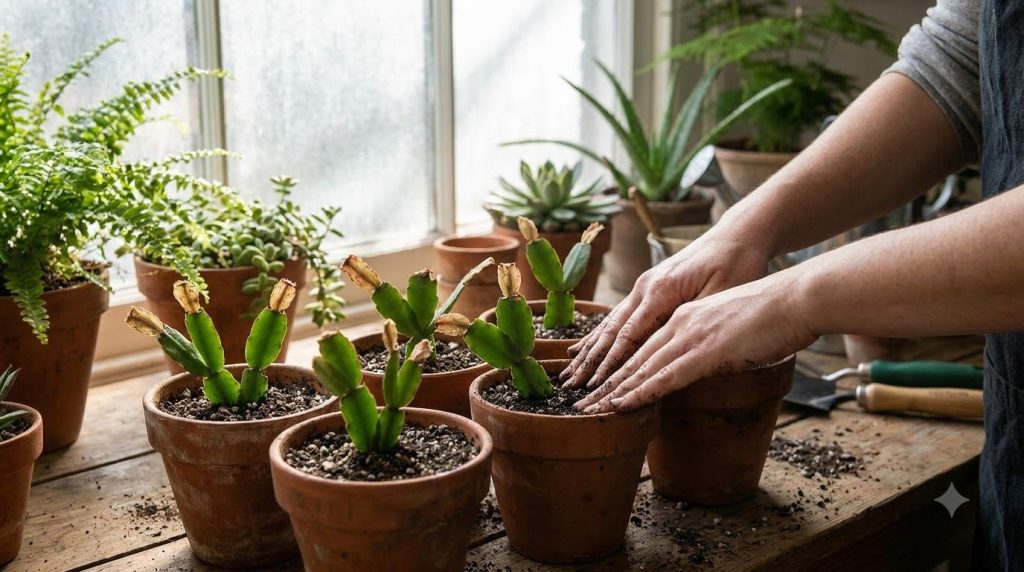
Make a small hole in the center of the moistened potting mix. If using rooting hormone, dip the calloused end of each cutting into the powder, tapping off any excess. Insert the calloused end about an inch deep into the soil. You can plant multiple cuttings in one pot, spacing them out to avoid competition. Gently firm the soil around each cutting to provide support.
How to Use and Care for Your New Plants
Once planted, your new Christmas cactus cuttings will need a period of gentle care to establish roots. Place them in a warm location with bright, indirect light. Avoid any drafts or extreme temperature fluctuations. Water sparingly, only when the top inch of soil feels dry. Overwatering is the most common killer of new cuttings.
How Often to Use (Ongoing Care)
New roots typically form within 2-6 weeks. You can gently tug on a cutting to test for resistance, indicating root development. Once established, treat your new plants like mature Christmas cacti: provide bright, indirect light, water when the top soil is dry, and feed lightly during the growing season. You can propagate new plants from these ‘offspring’ as they mature, creating a continuous cycle of beautiful blooms.
How to Choose Ingredients for Success
Choosing the right elements is key. For the mother plant, look for one that is robust and healthy, with no signs of stress, yellowing, or pests. The potting mix should be specifically formulated for cacti or succulents, or a homemade blend that prioritizes excellent drainage. Avoid heavy garden soil or standard potting mixes that retain too much moisture.
Storage for Cuttings and Plants
Calloused cuttings can be stored for a few days in a dry, cool spot before planting. Once rooted, new Christmas cactus plants prefer consistent conditions. Avoid storing them in areas with drastic temperature swings or where they might be exposed to frost.
Fresh vs. Dried Rooting Methods
Some growers attempt water propagation, but soil propagation is generally recommended for Christmas cacti due to the risk of rot in water.
| Feature | Water Propagation (Less Recommended) | Soil Propagation (Recommended) |
|---|---|---|
| Visibility of Roots | Roots are visible, satisfying for some. | Roots are not visible until transplanting. |
| Risk of Rot | Higher risk of stem rot if water is not changed frequently or if stem is left too long. | Lower risk of stem rot, especially with proper callousing. |
| Transition Shock | Requires careful transition to soil, which can be stressful for the plant. | No transition shock, as roots develop directly in soil. |
| Overall Success Rate | Can be lower for beginners due to rot risk and transition. | Generally higher and more reliable for consistent results. |
Practical Tips for Thriving Cuttings
- Humidity: While they don’t need extremely high humidity, a slightly more humid environment can help. You can achieve this by misting around the cuttings (not directly on them) or placing them on a pebble tray.
- Light: Bright, indirect light is crucial. Too little light slows growth, too much can burn them.
- Patience is Key: Don’t get discouraged if roots don’t appear overnight. Some cuttings take longer than others.
- Avoid Overwatering: This is the most critical tip. The soil should dry out slightly between waterings.
Common Mistakes to Avoid
- Planting Uncalloused Cuttings: This is a recipe for rot. Always allow the cut ends to dry for a few days.
- Overwatering: Soggy soil is the enemy. It suffocates roots and promotes fungal diseases.
- Using the Wrong Soil: Heavy, moisture-retaining soil will lead to problems. Always use a well-draining mix.
- Direct Sunlight: New cuttings are sensitive and can be easily scorched by harsh, direct sun.
- Too Short or Too Long Cuttings: Stick to the 2-4 segment rule for optimal success.
Cautions: Who Should Avoid It?
Christmas cacti are generally non-toxic to humans and pets, making them a safe plant for most homes. However, those with extreme plant allergies might experience mild skin irritation from plant sap, though this is rare. Always use clean tools and practice good hygiene when handling plants.
Did You Know? The Christmas cactus is actually a jungle cactus, native to the humid coastal mountains of southeastern Brazil. This explains its preference for higher humidity and indirect light compared to desert cacti.
Quick Summary for Fast Readers
To propagate Christmas cactus, take 2-4 segment cuttings from a healthy plant. Callous the cuttings for 2-5 days in a dry spot. Plant them 1 inch deep in moist, well-draining cactus/succulent soil. Place in bright, indirect light and water sparingly when the soil is dry. Avoid overwatering and direct sun. With patience, you’ll have new rooted plants in a few weeks.
You may also like: See the full guide on Houseplant Care for beginners.
Frequently Asked Questions (FAQ)
- Can I use fresh or dried cuttings? Always use fresh cuttings but allow them to callous (dry) for 2-5 days before planting to prevent rot.
- How long does it take for Christmas cactus cuttings to root? Rooting typically takes between 2 to 6 weeks, sometimes longer depending on conditions.
- How often should I water new cuttings? Water sparingly, allowing the top inch of soil to dry out completely between waterings.
- What part of the Christmas cactus is best for propagation? Stem segments, ideally 2-4 segments long, are best. Avoid using flower buds or leaves.
- Can I propagate Christmas cactus in water? While possible, it’s generally not recommended as cuttings are more prone to rot in water. Soil propagation after callousing yields better results.
- When is the best time to propagate a Christmas cactus? The best time is after the plant has finished blooming, typically in late winter or early spring, during its active growing phase.
- My cutting isn’t rooting. What’s wrong? Common issues include overwatering, planting uncalloused cuttings, or insufficient light. Review the common mistakes section for troubleshooting.
Related remedy: Learn how to revive a failing houseplant.
Conclusion
Propagating your Christmas cactus is a rewarding journey that connects you more deeply with your plants. It’s an accessible way to expand your collection, share living gifts, and ensure the legacy of your favorite plant continues. By following these easy steps and avoiding common pitfalls, you’ll soon be enjoying a home brimming with beautiful, flower-filled Christmas cacti. Happy propagating!